for loops
in the
Swift Language.
Study the
Swift Language,
read Apple’s
Swift Tour,
and start dipping into the
Language
Guide.
(Many of the links in
the
Swift Language
point into the
Language
Guide.)
Create bookmarks in your browser for
NS
(NextStep),
UI
(User Interface),
and
CG
(Core Geometry;
look under
CGGeometry
for the simple data type
CGFloat
and the structure data types
CGPoint,
CGSize,
and
CGRect.
Play with Swift in a playground.
For example, type in
//Find the midpoint between point a and point b.
let a: CGPoint = CGPointMake(10.0, 20.0);
let b: CGPoint = CGPointMake(30.0, 40.0);

let midpoint: CGPoint = CGPointMake((a.x + b.x) / 2.0, (a.y + b.y) / 2.0);
print("The midpoint is \(midpoint).");
Read ahead to Class and Hello.
Admire our class photo. Put Xcode on your Mac if you don’t already have it. Create a free personal GitHub account. Look at the accounts of the other students in the class.
Your instructor would be happy to invite you to join the team for this class, thus saving you $99, if you give him (mark.meretzky@nyu.edu) your name, email address, the name of your GitHub account, and the 40-hex-character identifier of your iPhone, iPad, or iPod Touch. This identifier is called the “Device ID” or “UDID”. Instructions for finding it are in Register your device. Apple will send you an invitation to join and will send you an Apple ID. After you have joined the team, go here to see who else has joined the team (click on People), and go here to see your device and App ID (on the left, click on Devices and App IDs). This offer is good from 8:30 p.m. EST on Tuesday, October 21 until 6:00 p.m. EST on Thursday, October 23, 2014.
AppDelegate.swift,
ViewController.swift,
and
View.swift,
visit
my GitHub account
and see if you can find those three files.
Hint: go to the repository named
Hello.
Further hint:
open the folder named
Hello.
If you’re brave, you can try creating the Class and Hello projects in Xcode. Just follow the “create the project” directions. I believe these instructions for uploading an Xcode project to your GitHub site are now correct. If you’re really brave, you can try to upload the Hello project to your GitHub site after you create the project in Xcode. Good luck!
Admire our new class photo; it has ten students.
On Thursday night, October 23, I asked Apple to email invitations to the six students who sent me their 40-character identifiers. Accept the invitation to join the group of people who will not have to pay the $99 fee to copy their apps from their Macintosh to their iPhone. As of October 25, four out of six have accepted.
- a method named
prev, with no parameters. It should be exactly like the existing method namednextwith no parameters, except that it moves the object 1 day back in time instead of 1 day forward, - a method named
prev, with oneIntparameter. It should be exactly like the existing method namednextwith oneIntparameter, except that it moves the object n days back in time instead of n days forward.
prev.
Second,
a project named
Oct30,
loosely based on
Hello
and its exercises.
(Maybe an app that flashes
“Emergency Destruct”
in a font that gets bigger and bigger?
Or a Times Square-style ticker with a crawling message?)
The
Oct30
project should have at least one
icon.
(My 120 × 120 pixel
yellow square
is totally adequate,
but remember how proud
your instructor
was of the handsome
icon
he created for
this project.)
Check out
these icons!
The
Oct30
project should have a launch image that has the same background color
as your app.
Get rid of the launch image’s title and copyright notice.
Read ahead to Internationalization, Download and Japan. We’ll have a brief talk about downloading on November 4th.
Nov4
that draws text and graphics in the
drawRect(_:)
method of its
view.
How about a rocket made of one triangle and one rectangle
that moves up the screen and says “Boom!”
when it reaches a certain altitude?
You could also play with
line
join
and
line
cap;
see
Parameters
That Affect Stroking.
Internationalize
the app for English and at least one other language
(Spanish is fine).
You might be interested in seeing Japan in the
Objective-C
language;
at least look at the pictures.
Anything you can do in Objective-C,
you can also do in Swift.
Watch the YouTube video about icons. See the icon templates and many other tutorials here.
As usual, please read ahead.
Please email me that link to the tutorial
about how you made that great-looking
icon.
Also, somebody please email me a link to where I can hear the recordings
of the lectures.
No class November 6
(instructor
teaching iOS and Android in
San Francisco).
Homework due Tuesday, November 18th:
first run
Touch
and do at least its exercise #1 (which I added on November 11th at 10:00pm).
Then write (and upload to GitHub) an app named
Nov11
written in Swift that will do something interesting with the stuff
we did in class today.
How about an app that displays the face of your favorite politician,
and creates a subview displaying a splattered cream pie
at each point where you touch the screen?
Or a map of New Jersey that displays a little red brick at each point
where you touch, indicating a case of Ebola?
Nov11
in time for the November 18th class.
Make it do something interesting involving touch-sensitivity and/or animation.
On November 13th, I registered four devices under the names
Sharafasli,
elena-dare,
AviPogrow,
and
aperfectempire80.
I created certificates for the two people who requested certificates
(Sharafasli
and
AviPogrow).
Good luck with the
downloading
instructions.
Avi Pogrow says this online course has a very good entry level iOS Swift curriculum. He built an app in Swift based on their lessons, “FunFacts”, which is in his GitHub account.
Here are two answers
to a question I couldn’t answer in class on November 13th:
how to make the app’s biggest (or only) UIView
occupy the entire window except for the status bar.
Short answer: put the following statement in the
applicationDidBecomeActive
method of the application delegate:
		//Defaults to black, which would make the black text in the status bar
		//invisible.
		window!.backgroundColor = UIColor.orangeColor();
Put the following statement into the
init
method of your big View
(your only UIView, or the superview of all your UIViews):
		//to verify that your View covers the whole window except the status bar
		backgroundColor = UIColor.yellowColor();
Put the following statements at the start of the
drawRect
method of your big View
(your only UIView, or the superview of all your UIViews):
		let screen: UIScreen = UIScreen.mainScreen();
		frame = screen.applicationFrame;
		"Hello, world!".drawAtPoint(bounds.origin, withAttributes: nil);
Long answer:
it might slow the app down if we change the value of
the
frame
property every time we call
drawRect,
as we did in the short answer.
(Remember,
drawRect
might be called up to 60 times per second.)
A workaround is to have your View (which occupies the entire window)
create a subview of class View1 (which occupies the entire window
except for the status bar).
	//This is the init method of class View in View.swift.

	required init(coder aDecoder: NSCoder) {
		super.init(coder: aDecoder);
		backgroundColor = UIColor.orangeColor();
		let screen: UIScreen = UIScreen.mainScreen();
		let view1: View1 = View1(frame: screen.applicationFrame);
		addSubview(view1);
	}
	//Add these methods to your class View1 in View1.swift.

	override init(frame: CGRect) {
		super.init(frame: frame);
		backgroundColor = UIColor.yellowColor();
	}

	//never called, but needed anyway to get View1.swift to compile
	required init(coder aDecoder: NSCoder) {
		super.init(coder: aDecoder);
	}

	//etc.
	override func touchesBegan(touches: NSSet, withEvent event: UIEvent) {
Simpler version of code in method
snowing
in class
View
that used to be at
https://github.com/caraballoj/WinterWonderLand/blob/master/WinterWonderLand/View.swift.
		let h: CGFloat = bounds.size.height;	//short name

		//An array of thirteen tuples, like the one in Manhattan.

		let tuples: [(x: CGFloat, y: CGFloat)] = [
			(-50, snowYAxis),
			(-bounds.size.width + 2 * bounds.origin.x, snowYAxis),
			(-150, snowYYAxis + h * 67 / 22),
			(-100, snowYAxis + h / 4),
			(-200, snowYYAxis + h / 6),
			(-0.5, snowYAxis + h / 4),
			(-250, snowYAxis + h / 9),
			(-330, snowYYAxis / 6),
			(-210, snowYYAxis / 2),	//slower
			(-130, snowYAxis / 8),	//same as above, but slower
			(-330, snowYAxis + h / 4),
			(-250, snowYYAxis + h / 2.8),
			(-370, snowYYAxis + h / 2.3)
		];

		for tuple in tuples {
			let p: CGPoint = CGPointMake(
				bounds.origin.x + bounds.size.width + tuple.x,
				tuple.y % h);

			snowflake.drawAtPoint(p, withAttributes: snowAttributes);
		}
Write a Swift app named
Nov18
and upload it to GitHub by 6:00pm on Tuesday, November 25th.
It should display a series of two or more screen-filling views, like
Flip.
How about a photo album with a cover page,
or a series of pages displaying the current prices of different stocks,
or a series of pages with different animations?
Please add background music (or speech, or sound)
to your
Nov18
app (due November 25th).
See
Gone
for background music.
If you have bugs you can’t figure out, upload the project to GitHub where we can all see it and send me email describing the symptom(s). Admire the output of my first Python program: a continuously updated chronological list of all the projects the class has uploaded to GitHub, with the most recent at the top. Warning: you can click on this link only a limited number of times per 24 hours.
Answer to a question about Zhanna’s
Madagascar
app that I couldn’t answer in class on November 11.
To make the green ground touch-sensitive and the blue water touch-insensitive,
draw the coastline by building up a
CGMutablePathRef
as we did in the last triangle example in
Japan.
Add the following property to the class
View
of Madagascar.
let coastline: CGMutablePathRef = CGPathCreateMutable();In the
drawRect
method of
class
View,
		//Create three transformation objects.
		//We saw our first transformation object in exercise 8 of Animate.

		let translate1: CGAffineTransform = CGAffineTransformMakeTranslation(bounds.size.width / 2, bounds.size.height / 2);
		let scale1: CGAffineTransform = CGAffineTransformMakeScale(scale * CGFloat(cos(radians)), -scale);
		let translate2: CGAffineTransform = CGAffineTransformMakeTranslation(-longitude, -latitude);

		//Concatenate the three transformation objects
		//into one big transformation object.

		let t1: CGAffineTransform = CGAffineTransformConcat(translate2, scale1);
		var bigTransform: CGAffineTransform = CGAffineTransformConcat(t1, translate1);

		//Build up the coastline, applying the bigTransform at each step.

		CGPathMoveToPoint(coastline, &bigTransform, a[0].longitude, a[0].latitude);
		for var i = 1; i < a.count; ++i {
			CGPathAddLineToPoint(coastline, &bigTransform, a[i].longitude, a[i].latitude);
		}
		CGPathCloseSubpath(coastline);

		//Paint the land mass on the screen (very simple).

		let c: CGContextRef = UIGraphicsGetCurrentContext();
		CGContextBeginPath(c);
		CGContextAddPath(c, coastline);
		CGContextSetRGBFillColor(c, 0, 1, 0, 1);	//green, opaque
		CGContextFillPath(c);
The
touchesBegan
method of class
View
contains the punchline:
		let point: CGPoint = touch.locationInView(self);

		if CGPathContainsPoint(coastline, nil, point, true) {
			let f: CGRect = CGRectMake(point.x - 30, point.y - 30, 60, 60);
			addSubview(LittleView(frame: f));
		}
Nov25,
and upload it to GitHub in time for the December 2nd class.
The app should recognize one or more gestures using a
gesture
recognizer,
and should have one or more
buttons
that call methods.
Here is a link to the audio/visual file of the November 25th lecture. The name of the meeting is "iOS 11/25/2014" and its meeting number is 734 621 634. Can somebody please tell me how to play the file?
Link to cancer project. No class November 27th (Thanksgiving).
Here is an answer to a question I couldn’t answer in class on
November 25th.
In
this project,
the
init
method of
View
gives the dimensions 90 × 40 to each of the two little subviews.
And these dimensions just happen to work correctly:
they are just barely big enough for the two subviews to display
“Hello, ” and “World!”.
How could we eliminate the guesswork and let the app compute
the actual dimensions needed for the two texts?
-
Add the following two properties to class
LittleView. They go right after the{at the top of theLittleView.swiftfile.let s: String = "Hello, "; let attributes: [NSObject: AnyObject] = [NSFontAttributeName: UIFont.systemFontOfSize(32)];
You can then remove the local variabless,font, andattributesfrom thedrawRect(_:)method of classLittleView. In fact, you can also remove the variablessize,screen,appplicationFrame, andffromdrawRect(_:), since they are never used. -
Remove the
initmethod whose parameter is aCGRectfrom classLittleView. Replace it with the followinginitmethod that accepts no parameters at all.//Give the newborn LittleView a size, //but don't try to give it a position yet. override init() { let size: CGSize = s.sizeWithAttributes(attributes); let frame: CGRect = CGRectMake( 0, 0, size.width, size.height); super.init(frame: frame) // Initialization code backgroundColor = UIColor.redColor(); //just so we can see it } - Make the same changes to class
LittleView2: two new properties, no-parameterinit. Let its background color be orange. -
In the
initmethod ofView, create the two subviews by calling the no-paraminits you just wrote://Create the two subviews and give them their correct sizes, //but don't try to give them positions yet. littleView = LittleView(); littleView2 = LittleView2();
You can then remove the local variablesfandf2from theinitmethod ofView, since they are no longer used. - Add the following method to class
View. We sawlayoutSubviewsin Rotate.override func layoutSubviews() { let screen: UIScreen = UIScreen.mainScreen(); let applicationFrame: CGRect = screen.applicationFrame; //Put upper left corner of LittleView at upper left corner of applicationFrame. littleView.frame.origin = applicationFrame.origin; //Put upper right corner of LittleView2 at upper right corner of applicationFrame. littleView2.frame.origin = CGPointMake( applicationFrame.origin.x + applicationFrame.width - littleView2.bounds.width, applicationFrame.origin.y); }
-
In the
touchesBeganmethod of classView, banish all mention of the number 40. Changepoint.x - 40
topoint.x - littleView.bounds.size.width / 2
and changepoint.x + 40
topoint.x + littleView2.bounds.size.width / 2
UITextView
to display a screenfull of text.
- Let the superclass of class
TextViewbeUITextView.class TextView: UITextView {
- Change the no-parameter
initmethod of classTextViewto the following.override init() { super.init(frame: CGRectZero, textContainer: nil); //If this view is touched, do not pop up a keyboard. editable = false; //If this view is touched, do not let this view react to the touch. //This view's superview object (i.e., the View in View.swift) //will be the one that reacts to the touch. userInteractionEnabled = false; text = "\n" + "\n" + "\t Somewhere beyond the sea \n" + //etc. "\n" + "\t Frank Sinatra - Somewhere beyond the sea"; } -
Remove the
drawRect(_:)method from classTextView.
Video.zip
file,
and updated the “Create the project” instructions in
Video.
Please let me know if it doesn’t play the silent movie.
Run
Button
on an real iPhone or iPad and listen to the sound;
then uncomment its
vibration
line and run it again.
Do the exercises in
Button
and
Notify,
but don’t hand them in.
Read “The big picture”
in
Notify.
The coolest man who ever lived was
Derek Flint.
For example,
he was the first person to have a
ringtone.
(Number Six in
The Prisoner
was cool too,
and so is
Mr. Bond.)
Write a Swift app named
Dec2
that simulates a device for Mr. Flint
(or any one of his friends—or enemies)
to carry in his pocket,
with
background music
or
a brief sound effect.
Video
would definitely be a plus,
not to mention vibration.
And you certainly want lots of
buttons,
and maybe a
swinging or peeling door.
It’s okay if some of the buttons do nothing at all—just
make it look good.
They should have impressive labels: Kilotons/Megatons
or Moscow/Peking/London/Washington
or Autodestruct.
Upload the app to your GitHub account by 6:00pm on December 9, 2014.
“This has 82 different functions…
83 if you want to light a cigar.”
Here is the
View.swift
file in the
Three Cat Project
I edited in class on December 2nd.
I made the smallest possible modification to the existing code
that would allow all three cats to appear.
import UIKit
import GLKit;

class View: UIView {

	var previousScale: CGFloat = 0;
	var index: Int = 0;

	override init(frame: CGRect) {
		super.init(frame: frame);
		backgroundColor = UIColor.blackColor();

	/*
		let names: [String] = [
		"1",
		"2",
		"3"
	];

		let image: UIImage? = UIImage(named: "/(names[index])");
	*/

		// Image

		let image: UIImage? = UIImage(named: "1");

		if image == nil {
			A HREF =
"https://developer.apple.com/documentation/swift/1541053-print">print("could not create image");
			return;
		}
		var imageView: UIImageView = UIImageView(image: image);
		imageView.center = center;
		addSubview(imageView);

		// Pinch

		let recognizer: UIPinchGestureRecognizer =
			UIPinchGestureRecognizer(target: self, action: "pinch:");
		previousScale = recognizer.scale;
		addGestureRecognizer(recognizer);

		// Rotate

		let recognizer2: UIRotationGestureRecognizer =
			UIRotationGestureRecognizer(target: self, action: "rotate:");
		addGestureRecognizer(recognizer2);

		//Tap


		let recognizer3: UITapGestureRecognizer =
			UITapGestureRecognizer(target: self, action: "swichPhoto:");
		recognizer3.numberOfTapsRequired = 2;
		addGestureRecognizer(recognizer3);


	}


	required init(coder aDecoder: NSCoder) {
		super.init(coder: aDecoder)
	}


	func pinch(recognizer: UIPinchGestureRecognizer) -> Void {

		let currentScale: CGFloat = recognizer.scale;

		if abs(currentScale - previousScale) <= 0.1 {

			let imageView: UIImageView = subviews[subviews.count - 1] as UIImageView;

			let factor: CGFloat = currentScale / previousScale;

			let newSize: CGSize = CGSizeMake(
				factor * imageView.frame.size.width,
				factor * imageView.frame.size.height);

			imageView.frame = CGRectMake(
				(frame.size.width - newSize.width) / 2,
				(frame.size.height - newSize.height) / 2,
				newSize.width,
				newSize.height);

		}

			previousScale = currentScale;

	}


	func rotate(recognizer2: UIRotationGestureRecognizer) {

		let radians: Float = Float(recognizer2.rotation);
		let degrees: Float = GLKMathRadiansToDegrees(radians);
		print("recognizer.rotation = \(degrees)");
		let imageView: UIImageView = subviews[subviews.count - 1] as UIImageView;

		imageView.transform = CGAffineTransformMakeRotation(recognizer2.rotation);

	}


	func swichPhoto(recognizer3: UITapGestureRecognizer) -> Void {

		if index < 2  {
		index = index + 1;
		} else {
		index = 0;
		}

		let imageView: UIImageView = subviews[subviews.count - 1] as UIImageView;
		imageView.center = center;
		imageView.image = UIImage(named: "\(index + 1)");
		imageView.frame.size = imageView.image!.size;

	}


	override func layoutSubviews() {

		let imageView: UIImageView = subviews[subviews.count - 1] as UIImageView;
		imageView.center = center;
	}

}

To hear the recorded lectures, see the Webex instructions at the top of this page. In the future, I’ll try to speak in a deeper, more resonant voice, and not say “um” so often. Should we ask Pace for a higher-fidelity microphone that handles the sound “s” better?
Write a Swift app named Dec9
and upload it to GitHub by 6:00pm on Tuesday, December 16.
It should do something interesting, probably involving
sliders,
subviews,
and
audio recording and playback.
Here is the
View.swift
file I modified in class on December 9 in this
Dec2
project:
//
//  View.swift
//  Dec2
//
//  Created by Jacqueline Caraballo on 12/9/14.
//  Copyright (c) 2014 JacquelineCaraballo. All rights reserved.
//

import UIKit

class View: UIView {
	//Called from the loadView method of the ViewController.
	let fontSize: CGFloat = UIFont.buttonFontSize();

	required init(coder aDecoder: NSCoder) {
		// Initialization code
		super.init(frame: CGRectZero);
		backgroundColor = UIColor.whiteColor();

		let application: UIApplication = UIApplication.sharedApplication();
		let appDelegate: AppDelegate = application.delegate! as AppDelegate;
		let window: UIWindow = appDelegate.window!;
		let viewController: ViewController = window.rootViewController! as ViewController;

		/***LABEL***/
		let screen: UIScreen = UIScreen.mainScreen();
		let applicationFrame: CGRect = screen.applicationFrame;

		let text: String = "CIA Clandestine Resources";
		let font: UIFont = UIFont.systemFontOfSize(25);
		let fontColor: UIColor = UIColor.blackColor();
		let attributes: [NSObject: AnyObject] = [NSFontAttributeName: font, NSForegroundColorAttributeName: fontColor];
		let size: CGSize = text.sizeWithAttributes(attributes);

		let f: CGRect = CGRectMake(
			applicationFrame.origin.x ,
			applicationFrame.origin.y,
			size.width,
			size.height);

		let label: UILabel = UILabel(frame: f);
		label.backgroundColor = UIColor.redColor();

		label.font = font;
		label.text = text;
		addSubview(label);

		/***VIDEO***/
		//Put the button in the center of this View and keep it there.
		let videoButton: UIButton = UIButton.buttonWithType(UIButtonType.System) as UIButton;
		videoButton.bounds.size = CGSizeMake(250, 40);

		videoButton.center = center;

		videoButton.autoresizingMask =
		UIViewAutoresizing.FlexibleLeftMargin
		| UIViewAutoresizing.FlexibleRightMargin
		| UIViewAutoresizing.FlexibleTopMargin
		| UIViewAutoresizing.FlexibleBottomMargin;

		videoButton.backgroundColor = UIColor.grayColor();
		videoButton.layer.borderWidth = 0.5;	//0.5 pairs of pixels = 1 pixel
		videoButton.layer.borderColor = UIColor.blackColor().CGColor;
		videoButton.setTitleColor(UIColor.blackColor(), forState: UIControlState.Normal);
		videoButton.setTitle("Emergency Alert System", forState: UIControlState.Normal);

		videoButton.addTarget(viewController,
			action: "touchUpInsideVideo:",
			forControlEvents: UIControlEvents.TouchUpInside);

		addSubview(videoButton);

		/***AUDIO BUTTON 1***/
		let audioButton1: UIButton = UIButton.buttonWithType(UIButtonType.System) as UIButton;
		audioButton1.bounds.size = CGSizeMake(250,40);

		//Put the button at the center of the bottom edge of this View
		audioButton1.center = CGPointMake(
			bounds.origin.x + bounds.size.width / 2,
			bounds.origin.y + bounds.size.height - audioButton1.frame.size.height / 2
		);

		//keep the button at the center of this view
		//even if the size of this View changes
		audioButton1.autoresizingMask =
			UIViewAutoresizing.FlexibleLeftMargin
			|	UIViewAutoresizing.FlexibleRightMargin
			| 	UIViewAutoresizing.FlexibleTopMargin
//			| 	UIViewAutoresizing.FlexibleBottomMargin;

		audioButton1.backgroundColor = UIColor.grayColor();
		audioButton1.layer.borderWidth = 0.5; // 0.5 pairs of pixels = 1 pixel
		audioButton1.layer.borderColor = UIColor.blackColor().CGColor;
		audioButton1.setTitleColor(UIColor.blackColor(), forState: UIControlState.Normal);
		audioButton1.setTitle("Connect to Agent Smith", forState: UIControlState.Normal);

		audioButton1.titleLabel!.font = UIFont.systemFontOfSize(fontSize);

		audioButton1.addTarget(viewController,
			action: "touchUpInside:",
			forControlEvents: UIControlEvents.TouchUpInside);

		addSubview(audioButton1);

		/***AUDIO BUTTON 2***/
		let audioButton2: UIButton = UIButton.buttonWithType(UIButtonType.System) as UIButton;
		audioButton2.bounds.size = CGSizeMake(250,40);

		//Put the button at the center of the top edge of this View
		audioButton2.center = CGPointMake(
			bounds.origin.x + bounds.size.width / 2,
			bounds.origin.y + audioButton2.frame.size.height / 2
		);
		//keep the button at the center of this view
		//even if the size of this View changes
		audioButton2.autoresizingMask =
			UIViewAutoresizing.FlexibleLeftMargin
			|	UIViewAutoresizing.FlexibleRightMargin
//			| 	UIViewAutoresizing.FlexibleTopMargin
			| 	UIViewAutoresizing.FlexibleBottomMargin;

		audioButton2.backgroundColor = UIColor.grayColor();
		audioButton2.layer.borderWidth = 0.5; // 0.5 pairs of pixels = 1 pixel
		audioButton2.layer.borderColor = UIColor.blackColor().CGColor;
		audioButton2.setTitleColor(UIColor.blackColor(), forState: UIControlState.Normal);
		audioButton2.setTitle("City Hall Live Audio", forState: UIControlState.Normal);

		audioButton2.titleLabel!.font = UIFont.systemFontOfSize(fontSize);

		audioButton2.addTarget(viewController,
			action: "touchUpInside:",
			forControlEvents: UIControlEvents.TouchUpInside);

		addSubview(audioButton2);
	}

//	//Never called.
//	required init(coder aDecoder: NSCoder) {
//		super.init(coder: aDecoder);
//	}
//
	/*
	// Only override drawRect: if you perform custom drawing.
	// An empty implementation adversely affects performance during animation.
	override func drawRect(rect: CGRect) {
	// Drawing code
	}
	*/

}
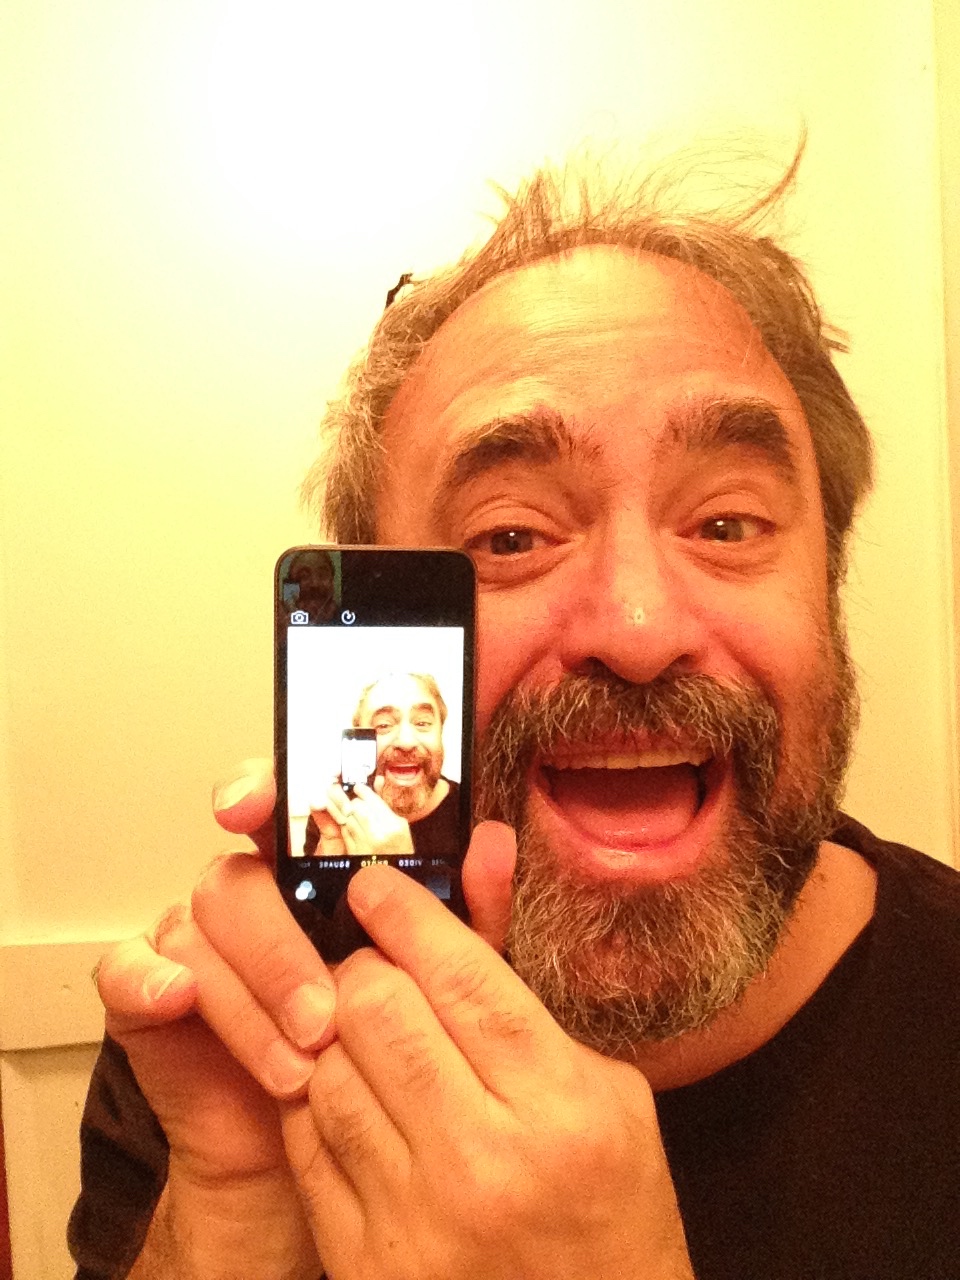
And here is your instructor with his new iPod Touch.
Thank you!
autoresizingMask)
and 2
(constraints)
of
Subviews,
and exercise 2 (the
dictionary
exercise) of
Segmented,
but don’t hand them in.
(You could also do the dictionary in exercise 3 of
Switch.)
Please email me the rgb answer to exercise 5 of
Segmented.
It would be very educational to study the
constraints
in the
init
and
addViewControllerConstraint
methods of class
View
in
Date Picker.
In the
weather project
copied from
Pasan Premaratne’s
weather app,
lines 39–42 of
ViewController.swift
and lines 21–22 of
File.swift
use Objective-C dictionaries.
See exercise 13 of
Hello
for a rewrite using
Swift
dictionaries.
In
File.swift
replace the
weatherIconFromString
method in lines 46–74
with the following
Swift
dictionary
and method.
	//This Swift dictionary is a property of struct Current.

	let icons: [String: String] = [
		"clear-day":           "clear-day",
		"clear-night":         "clear-night",
		"rain":                "rain",
		"snow":                "snow",
		"sleet":               "sleet",
		"wind":                "wind",
		"fog":                 "fog",
		"cloudy":              "cloudy",
		"partly-cloudy-day":   "partly-cloudy",
		"partly-cloudy-night": "cloudy-night"
	];

	func weatherIconFromString(stringIcon: String) -> UIImage {
		var imageName: String? = icons[stringIcon];
		if imageName == nil {
			imageName = "default";
		}
		return UIImage(named: imageName!)!;
	}
CADisplayLink
animation in the application delegate in
Pong
and
Pearl.
Do the exercises, but don’t hand them in.
For a good time, I really think you ought to do the accelerometer exercise in
Pearl.
Write a Swift app named
Dec16
and upload it to GitHub by 6:00p.m. on Tuesday, January 6, 2015.
It should do something interesting,
probably with
date pickers,
text fields,
and/or
animation with
CADisplayLink—and
why not the
accelerometer?
It should definitely have a
tab bar controller
or a
navigation controller.
Before you even think about trying to make an app that has both a tab bar controller and a navigation controller, you should practice each one separately. When you’re ready to try both, you can put navigation controllers into the array of view controllers under a tab bar controller. (The Clock app on my iPod Touch has an array of four navigation controllers under a tab bar controller. Each navigation controller has an array of one view controller under it. I know the navigation controllers are there, because because otherwise the navigation bars would not be visible.) Don’t put a tab bar controller in the array of view controllers under a navigation controller.
Version 6.1.1 (6A2008a) of Xcode was released on December 2, 2014. I’m putting it on my Mac at home. No class December 23 to January 1 (Christmas and New Year’s).
This project
CoreG.PlusControls.zip
is copied from p. 549 of
Beginning iPhone Development with Swift:
Exploring the iOS SDK
by David Mark, Jack Nutting, Kim Topley, Fredrik Olsson, Jeff LaMarche.
Its Swift files are
AppDelegate.swift,
ViewController.swift,
QuartzFun.swift.
Here is a simpler version of the method
changeColor
in
ViewController.swift:
	//This method of the view controller is called
	//when the user presses a button in a segmented control.

	@IBAction func changeColor(sender: UISegmentedControl) {
		let colors: [UIColor] = [      //an array of color objects
			UIColor.redColor(),    //button 0 (leftmost) in segmented control
			UIColor.blueColor(),   //button 1 in segmented control
			UIColor.yellowColor(), //button 2 in segmented control
			UIColor.greenColor()   //button 3 in segmented control
		];

		let funView = view as QuartzFunView;
		let i: Int = sender.selectedSegmentIndex;
		funView.useRandomColor = i == colors.count;
		if i < colors.count {
			funView.currentColor = colors[i];
		}
	}
textLabel
and
imageView
properties of class
UITableViewCell
are non-optional in Xcode 6.1 (and in Apple’s online documentation),
but are optional in Xcode 6.1.1.
You will therefore have to remove the exclamation points
to get these properties to compile.
Run the apps and do the exercises, but don’t hand them in.
Write a Swift app named
Jan13
and upload it to your GitHub account by 6:00pm on January 13.
Make it do something interesting, propably with a
UITableViewController, etc.
UITabBarController
or a
UINavigationController
but not both,
before you even think about writing an app that has both.
And make tables whose cells are of Apple’s built-in styles
UITableViewCellStyle.Default,
UITableViewCellStyle.Subtitle,
UITableViewCellStyle.Value1,
etc.
(States exercise 3)
before you even think about designing your own custom style of cell.
WeddingApp-master.zip.
Write and upload a Swift app named
Jan13,
probably with several
UITableViews.
UIWebView,
so one of the reasons you should run
Tree
is because it creates web views.
Both of the bugs I looked at in the classroom on January 15th were caused by methods that we thought were being executed but which actually weren’t. If you think your code is not doing what it is supposed to do, insert a statement such as
print("Arrived at point A.");at the start of the code to make sure it is actually being executed.
Tips for reading Apple’s iOS Documentation. How to read iOS or Mac OS Programming Documentation.
Orient.zip,
TableMedia-Master.zip,
and
TebTest-master-2.zip.
Write and upload a Swift app named
Jan20
that does something interesting, probably with one or more
UIWebViews.
The following
if
statement is always false in any language,
because it could be true only if 2 equals 3.
if x == 2 && x == 3 {
UIWebViews
examples and do the exercises in
HTML,
Generate,
and
JavaScript,
but don’t hand them in.
If we wanted to follow up the Google Maps example in
JavaScript,
we could do the GPS example in
Map.
We definitely have to do the comparatively minor subclasses of class
UIView:
UIPickerView
and the views displayed by a
UIAlertController.
If I have time, I’ll try to find out how an app can create a
photo album,
or at least store an image into an album other than the Camera Roll.
UIView
that we do on February 3 will include classes
UIActivityIndicatorView,
UIProgressView,
UIPickerView,
and the class of the view displayed by a
UIAlertController.
Maybe we’ll also have time for the GPS in
Map.