Click anywhere on a view to go to the next one.
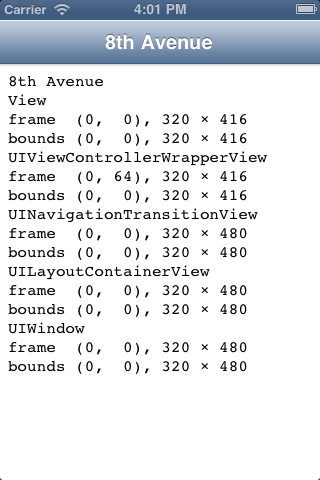
The status and navigation bars,
not to mention the back button and the leading between the lines of text,
looked better in iOS 6.
What were they thinking of?
The
tab
bar controller
we saw
here
let us visit the view controllers in any order.
A
navigation controller
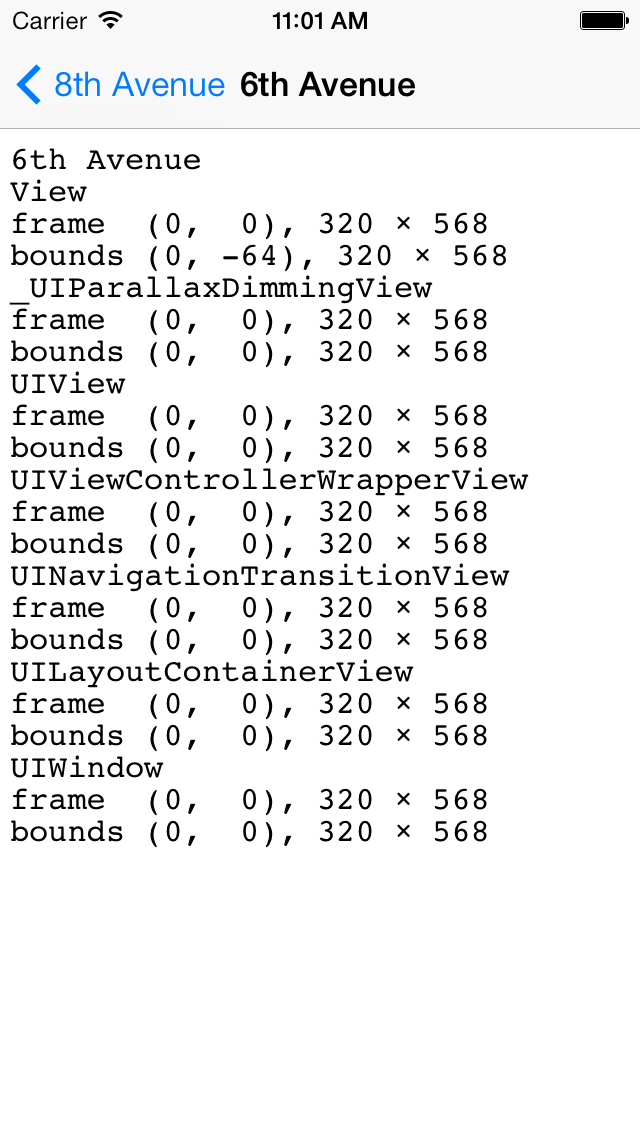
lets us visit the view controllers in only one specific order:
Eighth Avenue,
Sixth Avenue,
Union Square, etc.,
and back again.
You can’t jump directly from Eighth Avenue to Union Square
without visiting Sixth Avenue along the way.
See
Bars
and
Navigation
Bars.
The classic example of a
navigation controller
is in the
Settings
app that comes with the iPhone.
The navigation controller provides the
right-to-left animation as we drill deeper into the menus,
and left-to-right animation as we come back out.
It does not provide the menus themselves—they will come later,
when we have class
UITableView.
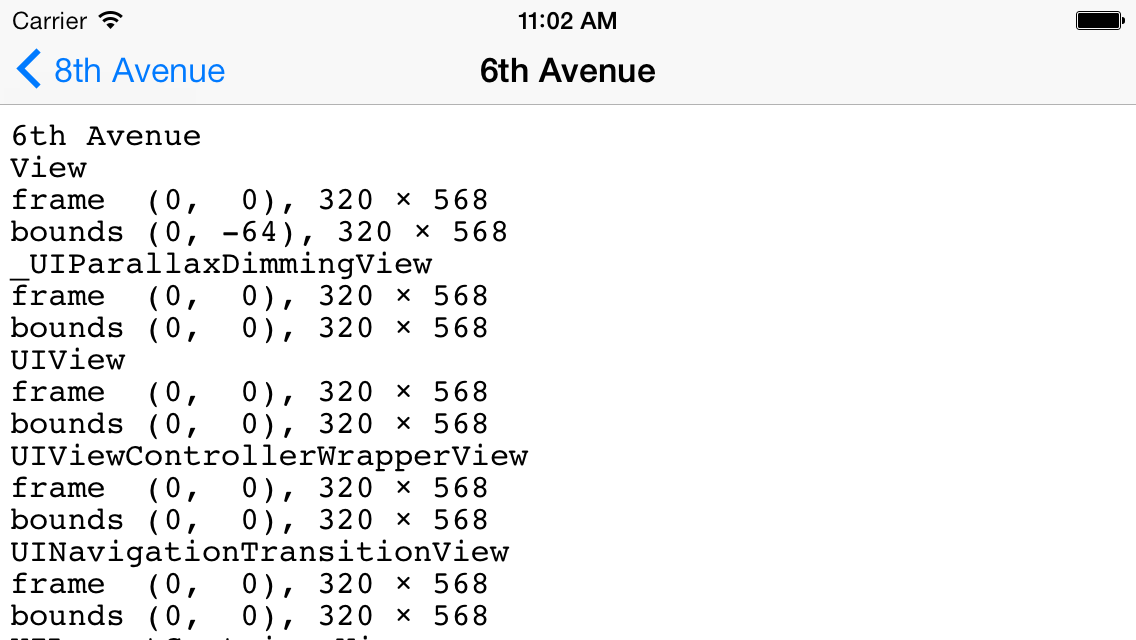
If the navigation bar has no room for the title and the back button,
hold the iPhone in landscape orientation.
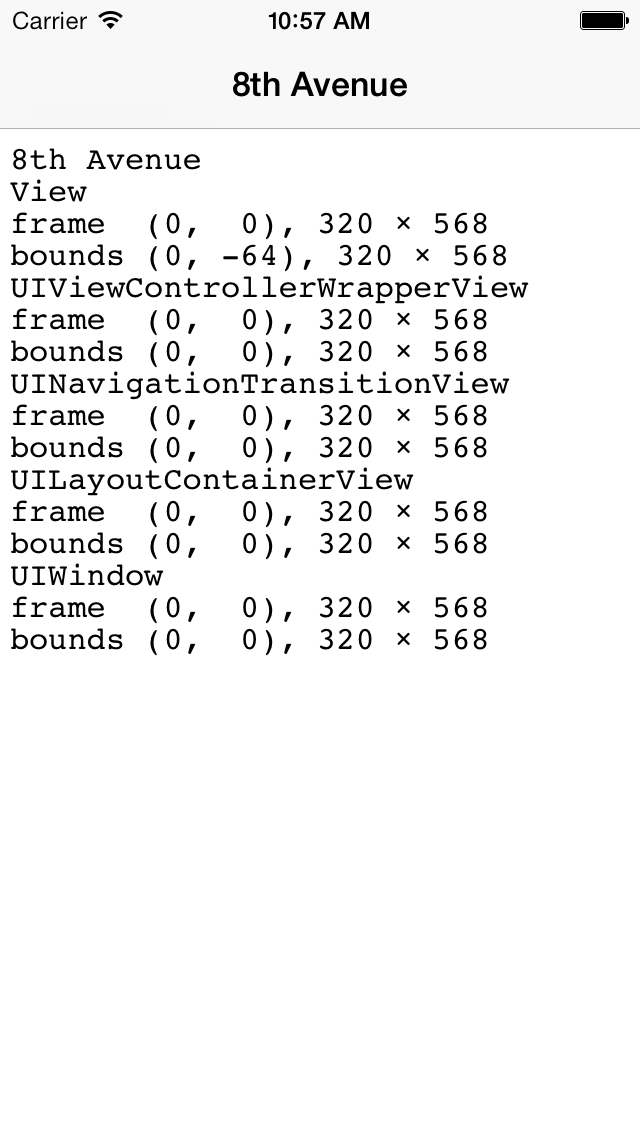
Even if we have only one view controller and one view,
we might still want to put a navigation controller atop the view controller
just to see the view controller’s navigation bar.
Every view controller has a navigation bar,
but the navigation bar is visible only if there is a navigation controller
above the view controller.
The navigation bar can have attractive titles and buttons.
The
NavigateAppDelegate
creates the
UINavigationController
and puts it in the
window.
The
UINavigationController
contains one or more
ViewControllers,
one for each station on the L Train,
Manhattan’s only east/west subway line.
Each
ViewController
contains one
View.
The
application:didFinishLaunchingWithOptions:
method of class
NavigateAppDelgate
creates only the first
ViewController,
not all of them,
because it might be expensive to create objects of this class.
We create the
ViewControllers
only as needed.
main.m- Class
NavigateAppDelegate
- Class
ViewController
- Class
View
A kludge I resisted
It would be possible for a lowly
view
to talk directly to the
application
delegate.
For example, the
touchesEnded:withEvent:
method of class
View
could be changed to the following.
- (void) touchesEnded: (NSSet *) touches withEvent: (UIEvent *) event {
	UIApplication *application = [UIApplication sharedApplication];
	NavigateAppDelegate *applicationDelegate = application.delegate;
	[applicationDelegate nextStation];
}
To mention class
NavigateAppDelegate
in the file
View.m,
we would have to say
#import "NavigateAppDelegate.h"
at the top of
View.m.
But please resist this temptation.
Instead of talking to objects all over the application,
a
view
should restrict itself to talking to its
view
controller.
The
view
controller
can then talk to the
model
on behalf of the
view.
In our case, the model consists of the array of stations in the
application
delegate
and the number of currently pushed stations.
Things to try
- To see the animation more clearly,
give each view a different background color.
In the
initWithFrame:
method of class
View,
change the background color to the following.
The expression
(CGFloat)rand() / RAND_MAX
is a fraction in the range 0.0 to 1.0 inclusive.
We have to cast (convert) at least one of the operands of the division to
CGFloat
because all-integer division would result in an integer quotient,
not a fraction.
		self.backgroundColor =
			[UIColor colorWithRed: (CGFloat)rand() / RAND_MAX
			green: (CGFloat)rand() / RAND_MAX
			blue: 1.0
			alpha: 1.0
		];
To get different random colors each time you run the app,
insert the following code at the start of the
application:didFinishLaunchingWithOptions:
method of class
NavigateAppDelegate.
	//Seed the random number generator with a different seed
	//each time the app is run.
	srand(time(NULL));
- In the
nextStation
method of class
NavigateAppDelegate,
what happens if you change the
animated:
to
NO?
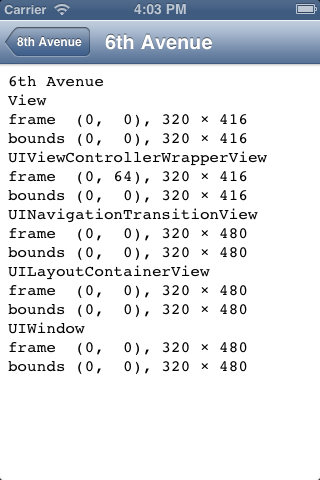
- The
status bar
is the top 20 pixels of the iPhone screen.
It displays the current time,
battery
level,
etc.
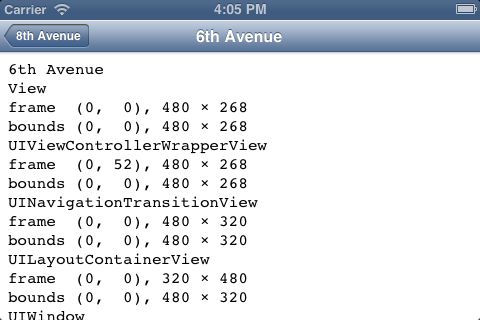
Under the status bar,
the navigation controller displays a
navigation bar,
44 pairs of pixels high in portrait orientation,
32 pairs in landscape.
It displays the
title
of the controller that is currently displayed by the navigation controller.
To add a prompt to the top of the navigation bar
(occcupying an additional 30 pixels),
insert the following statement into the
initWithTitle:
method of class
ViewController
after setting the
title.
		self.navigationItem.prompt =
			[NSString stringWithFormat: @"Welcome to %@.", self.title];
I acknowledge that this prompt is inane.
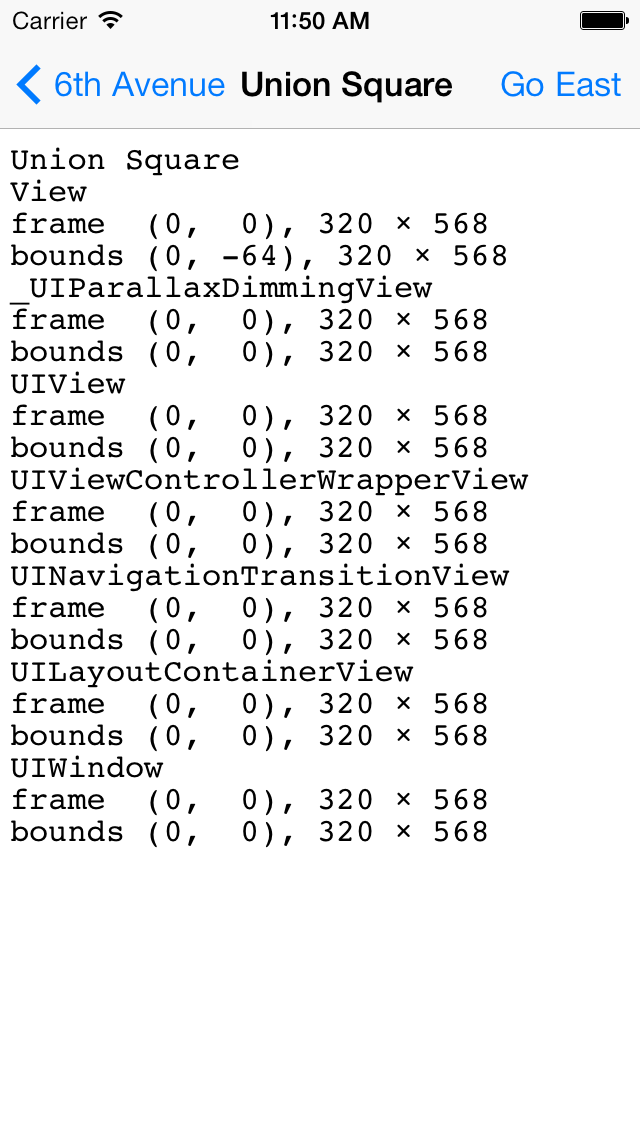
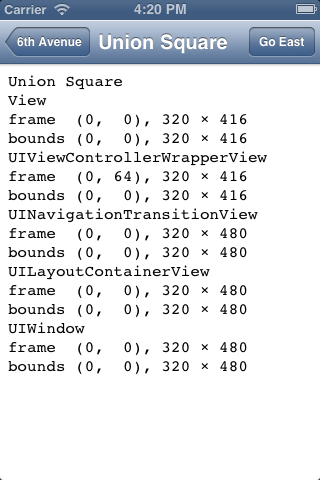
- The navigation bar already has a button in the upper left corner
(except when we’re at 8th Avenue).
Let’s add a button in the upper right corner.
Insert the following statement into the
initWithTitle:
method of class
ViewController
after setting the
title
and
prompt.
		self.navigationItem.rightBarButtonItem = [[UIBarButtonItem alloc] initWithTitle: @"Go East"
			style: UIBarButtonItemStylePlain
			target: self
			action: @selector(nextStation)
		];
You can now remove
touchesEnded:withEvent:
from class
View.
How could you prevent the last station (First Avenue) from having the
“Go East” button?
- Set the
toolbarhidden
property of the
UINavigationController
to
NO.
((UINavigationController *)self.window.rootViewController).toolbarHidden = NO;
The
tool
bar
that appears at the bottom of the screen will be empty.
We will use a tool bar
here.
- Instead of puttings the arrays of data into the application delegate,
should we have put them into a separate object called the model?
Then we would have all three components:
model/view/controller.
- We currently destroy a
ViewController
each time we retreat one station to the west,
and re-create it each time we advance one station to the east.
We can verify this by adding the following method to class
ViewController.
- (void) dealloc {
	NSLog(@"ViewController %@ is being destroyed", self.title);
}
It would save time if we could create the
ViewController
the first time we visit it,
and keep it stored in an array in case we visit it again in the future.
Give the application delegate the following instance variable.
	//all the stations we have already visited at any time
	NSMutableArray *visited;
Initialize the instance variable in
application:didFinishLaunchingWithOptions:.
visited = [NSMutableArray arrayWithObject: firstController];
Change the
nextStation
method of the application delegate to the following.
- (void) nextStation {

	UINavigationController *navigationController =
		(UINavigationController *)self.window.rootViewController;

	NSUInteger i = navigationController.viewControllers.count;
	if (i == titles.count) {
		//We are currently visiting the last station, and can go no farther.
		return;
	}

	if (visited.count <= i) {
		//This station is being visited for the first time.
		NSString *title = [titles objectAtIndex: i];
		ViewController *viewController = [[ViewController alloc] initWithTitle: title];
		[visited addObject: viewController];
	}

	[navigationController pushViewController: [visited objectAtIndex: i] animated: YES];
}