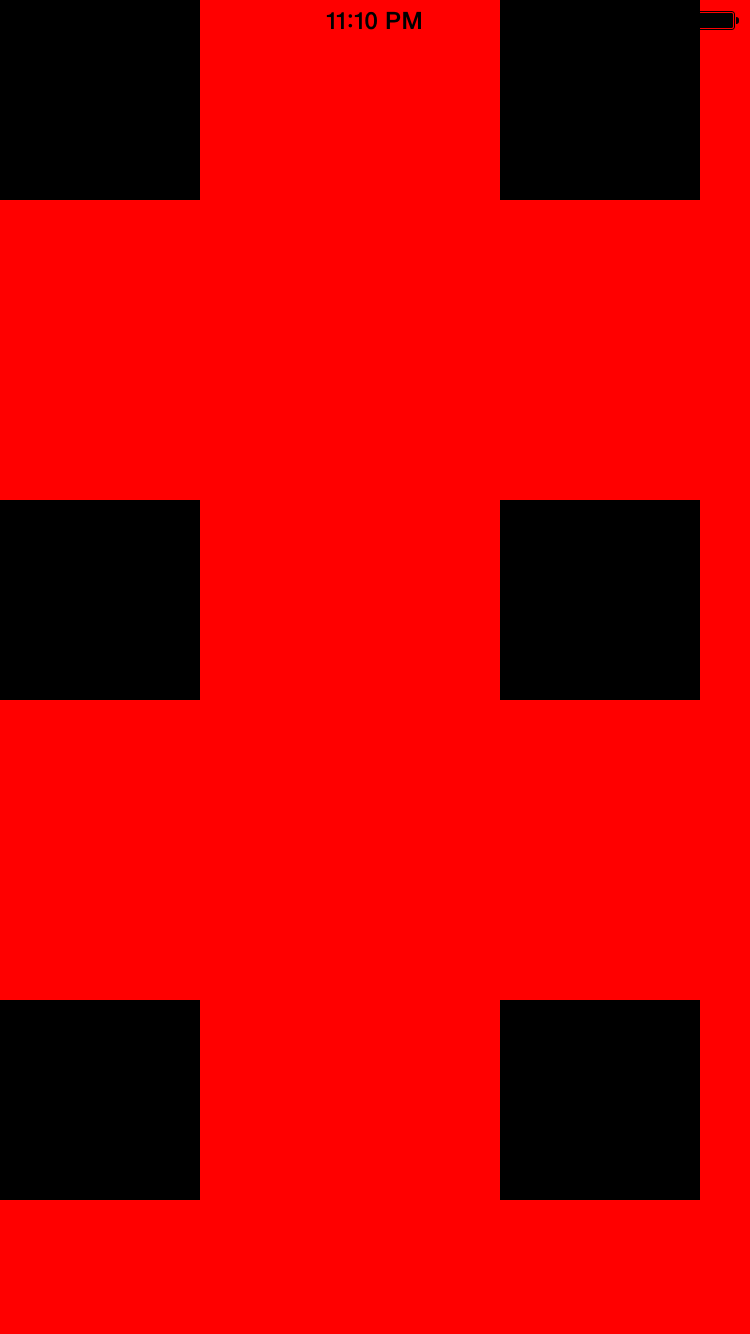
The nine black subviews in the red screenshot were sized and positioned in the
init(frame:)
method of class
InitView.
(That’s why it’s called an
InitView.)
At this time, the dimensions of the
InitView
are 600 × 600 pairs of pixels.
The
InitView
is later resized to 375 × 667 (on iPhone 6 in portrait orientation),
but the subviews do not move.
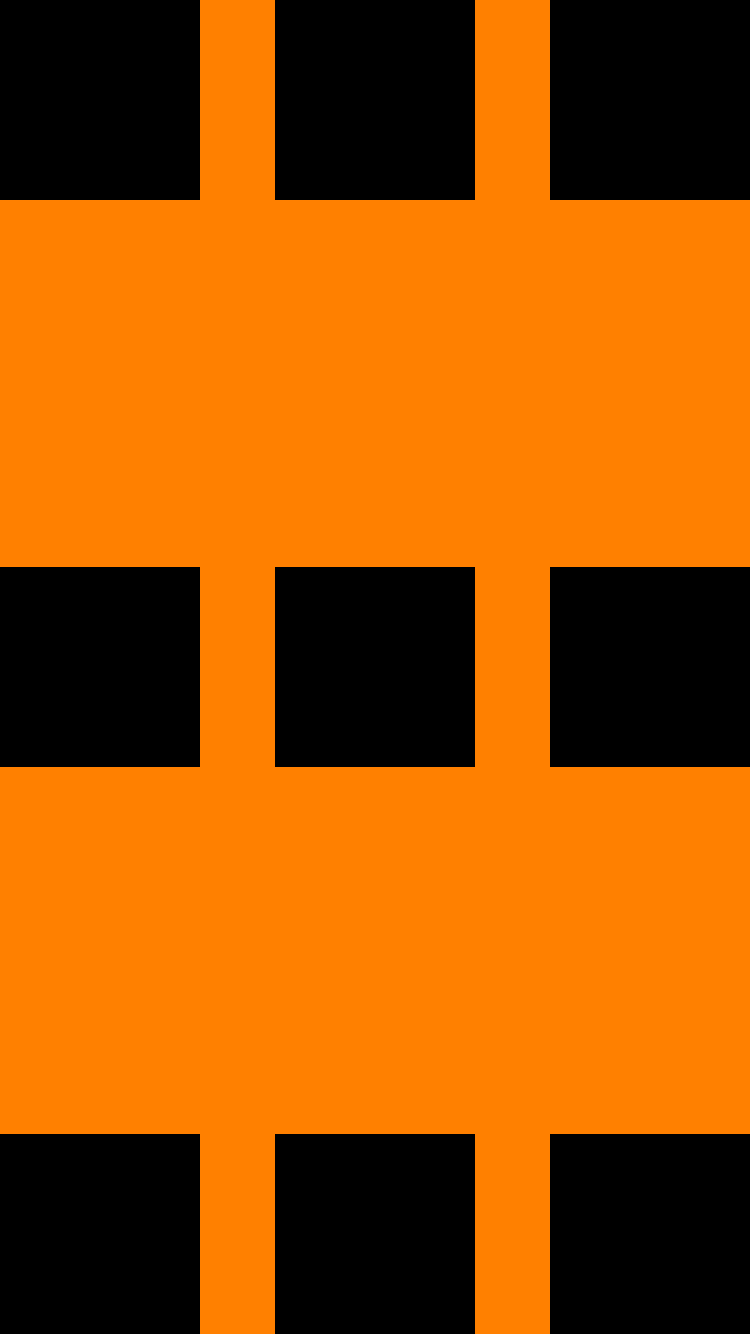
The nine black subviews in the orange screenshot
were sized and positioned in the
layoutSubviews
method of class
LayoutSubviewsView.
(That’s why it’s called an
LayoutSubviewsView.)
At this time, the dimensions of the
LayoutSubviewsView
are 375 × 667 pairs of pixels.
The subviews are positioned correctly,
and are repositioned correctly whenever the device orientation changes.
The “topmost” view (i.e., the superview of all the other views)
is usually resized automatically when the orientation of the device
changes.
For example, the big yellow view in exercise 8 of
Hello
continued to fill the screen when the orientation changed.
In the present app, however,
the
InitView,
LayoutSubviewsView,
AutoresizingMaskView,
and the
LayoutConstraintView
are not the topmost view.
(The
View
is the topmost view.)
These four views therefore need the
autoresizingMask = UIViewAutoresizing.FlexibleWidth | UIViewAutoresizing.FlexibleHeight;in their
init(frame:)
methods.
AppDelegate:
unchanged.
ViewController:
unchanged.
View.
Like the class
View of
Flip.
InitView.
Subviews are created, sized, and positioned in the
init(frame:)
method of the
InitView.
Red background.
LayoutSubviewsView.
Subviews are created in the
init(frame:)
method of the
LayoutSubviewsView,
but they are sized and positioned in the
layoutSubviews
method of the
LayoutSubviewsView.
Orange background.
AutoresizingMaskView.
Subviews are created, sized, and positioned in the
init(frame:)
method of the
AutoresizingMaskView.
Yellow background.
LayoutConstraintView.
Subviews are created, sized, and positioned in the
init(frame:)
method of the
LayoutConstraintView.
A subview must be
added
to its superview
before
the subview’s size and position can be
constrained.
Green background.
Square.
Each subview is a
Square.
Classes
View,
InitView,
LayoutSubviewsView,
AutoresizingMaskView,
LayoutConstraintViewSquare
are subclasses of class
UIView.
In the Xcode Project Navigator,
select
Main.storyboard
and tell the view controller to create a view of class
View.
init(frame:)
method of class
AutoresizingMaskView.
Run the app and look at the yellow
AutoresizingMaskView
in portrait and landscape.
		/*
		Keep the subview centered in this AutoresizingMaskView.  Keep
		its width 200 pairs of pixels less than the width of the
		AutoresizingMaskView.  Keep its height 200 pairs of pixels less
		than the height of the AutoresizingMaskView.
		*/
		frame = CGRectMake(
			bounds.origin.x + 100,
			bounds.origin.y + 100,
			bounds.size.width - 200,
			bounds.size.height - 200);

		let subview: UIView = UIView(frame: frame);
		subview.backgroundColor = UIColor.clearColor();
		subview.layer.borderWidth = 0.5;	//0.5 pairs of pixels = 1 pixel
		subview.layer.borderColor = UIColor.redColor().CGColor;
		subview.autoresizingMask =
			  UIViewAutoresizing.FlexibleWidth
			| UIViewAutoresizing.FlexibleHeight;
		addSubview(subview);
Now change the above code to the following and run the app again.
		/*
		Keep the subview centered in this AutoresizingMaskView.
		Keep its width half the width of the AutoresizingMaskView.
		Keep its height half the height of the AutoresizingMaskView.
		*/
		frame = CGRectMake(
			bounds.origin.x + bounds.size.width / 4,
			bounds.origin.y + bounds.size.height / 4,
			bounds.size.width / 2,
			bounds.size.height / 2);

		let subview: UIView = UIView(frame: frame);
		subview.backgroundColor = UIColor.clearColor();
		subview.layer.borderWidth = 0.5;	//0.5 pairs of pixels = 1 pixel
		subview.layer.borderColor = UIColor.redColor().CGColor;
		subview.autoresizingMask =
			  UIViewAutoresizing.FlexibleLeftMargin
			| UIViewAutoresizing.FlexibleRightMargin
			| UIViewAutoresizing.FlexibleTopMargin
			| UIViewAutoresizing.FlexibleBottomMargin
			| UIViewAutoresizing.FlexibleWidth
			| UIViewAutoresizing.FlexibleHeight;
		addSubview(subview);
LayoutConstraintView,
search for the comment
“mid center”.
Like each of the other subviews,
it has four
constraints.
Change the second constraint to the following.
		//Keep the y coordinate of the center of this square
		//equal to 1/3 of the height of this View.

		addConstraint(NSLayoutConstraint(
			item: square,
			attribute: NSLayoutAttribute.CenterY,
			relatedBy: NSLayoutRelation.Equal,
			toItem: self,
			attribute: NSLayoutAttribute.Bottom,
			multiplier: 1.0 / 3.0,
			constant: 0));
Run the app and go to the green view. Is the square correctly positioned in portrait and landscape?
To find the bottom center subview in the green
LayoutConstraintView,
search for the comment
“bottom center”.
It has four
constraints.
Change the second constraint to the following.
		//This is a kludgy and unreliable way to get the center square.
		let centerSquare: Square = subviews[subviews.count - 4] as Square;

		//Keep the top edge of this square 8 pairs of pixels below
		//the bottom edge of the center square.

		addConstraint(NSLayoutConstraint(
			item: square,
			attribute: NSLayoutAttribute.Top,
			relatedBy: NSLayoutRelation.Equal,
			toItem: centerSquare,
			attribute: NSLayoutAttribute.Bottom,
			multiplier: 1,
			constant: 8));