A View Controller presented
Modally
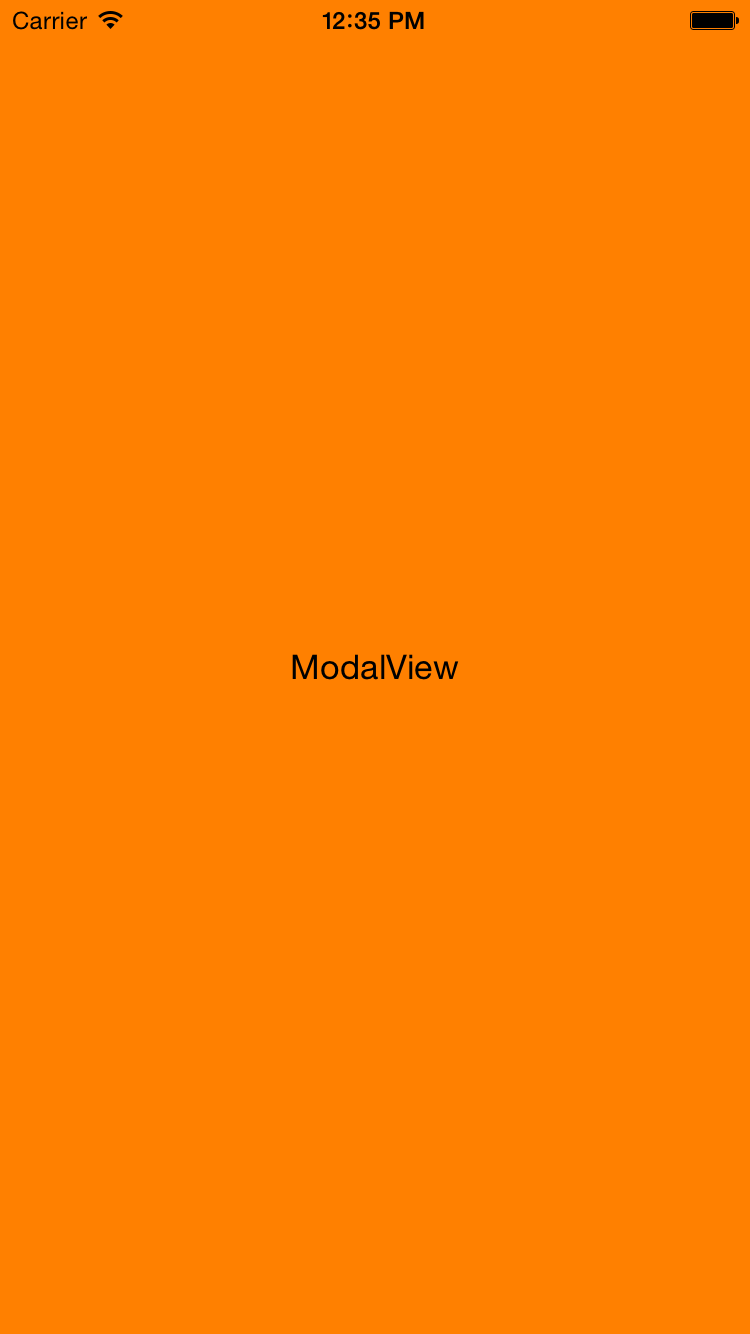
The view of a
modally presented
view controller slides up from the bottom of the screen.
For example,
launch the Calendar app and press
+
to add a new event.
Or launch the Clock app and press
+
to add a new city.
Or launch Contacts and press
+
to add a new contact.
When you press Done or Cancel,
the new view will eventually slide back down
and you will find yourself back where you were before.
Our
navigation controller
presented a series of view controllers in a certain order
(Eighth Avenue, Sixth Avenue, Union Square),
but does not require you to return to the place from which you started.
A view controller and a subsequent modally presented view controller
are a series of view controllers presented in a certain order,
with the intent that you will return to the place from which you started.
Usually the series will consist of only two view controllers:
the initial one,
and one that you visit modally (temporarily).
See
Modal
Contexts
in the
iOS
Human Interface Guidelines.
- Class
AppDelegate:
unchanged.
- Class
MainViewController.
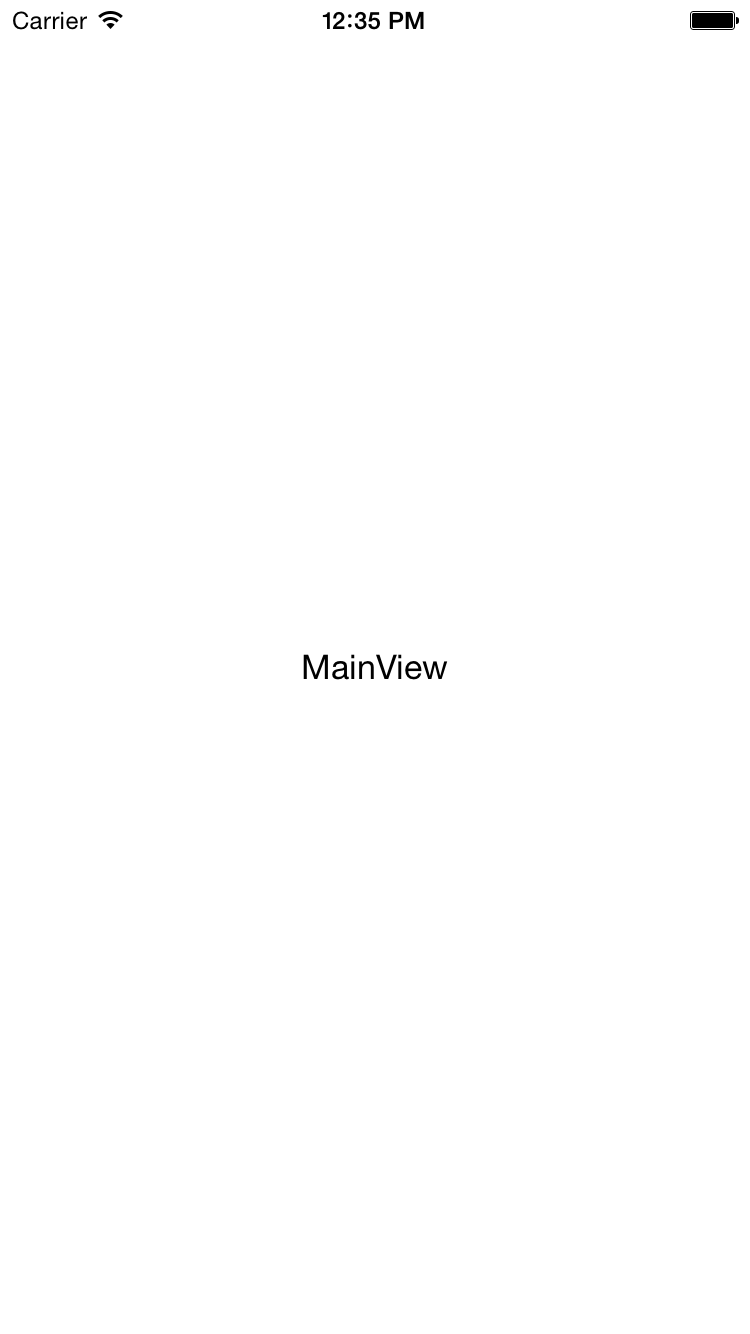
The
MainViewController
creates and displays the
MainView.
It voluntarily allows itself and its
MainView
to be covered by the
ModalViewController
and its
ModalView,
but only temporarily.
- Class
MainView.
When the
MainView
is touched, it calls the
slideUpModal
method of its
MainViewController.
- Class
ModalViewController.
The
ModalViewController
and its
ModalView
temporarily cover the
MainViewController
and its
MainView,
but they readily disappear when told to go away.
- Class
ModalView.
When the
ModalView
is touched, it calls the
slideDownModal
method of its
ModalViewController.
Create the project
We have to create four new classes:
MainViewController
and its
MainView;
ModalViewController
and its
ModalView.
We can get rid of the existing class
ViewController.
Select the
Modal
folder in the Xcode Project Navigator.
File → New → File…
Choose a template for your new file:
iOS Source/Cocoa Touch Class
Next
Choose options for your new file:
Class: MainViewController
Subclass of: UIViewController
Next
Create
Create three more classes:
-
class
MainView
(a subclass of class
UILabel)
-
class
ModalViewController
(a subclass of class
UIViewController)
-
class
ModalView
(a subclass of class
UILabel).
In the Xcode Project Navigator,
draw the four new files
MainViewController.swift,
MainView.swift,
ModalViewController.swift,
and
ModalView.swift
up to the point immediately below
ViewController.swift.
Select the
Main.storyboard
file in the Xcode Project Navigator.
In the left pane of the center panel,
open the View Controller Scene as far as the View in the following list,
and select the View.
▼View Controller Scene
   ▼View Controller
      Top Layout Guide
      Bottom Layout Guide
      View
In the right panel of Xcode, click on the Identity Inspector icon.
It’s a rectangle with a smaller rectangle in its upper left corner.
Custom Class
Class: MainViewController
Module: Modal
Control click on
ViewController.swift
in the Xcode Project Navigator and select
Delete.
Do you want to move the file “ViewController.swift”
to the Trash,
or only remove the reference to it?
Move to Trash.
Bottom-to-top animation
Modal
view controllers
are not a subclass of
UIViewController.
In fact, modal view controllers are not a class at all.
A modal view controller is just a plain old view controller
(e.g., a
UITabBarController
or
UINavigationController)
that is displayed
modally,
i.e., temporarily.
When the modal view controller disappears,
the previous view controller reappears and you’re back where you were.
A modal controller is always animated upwards when it
covers the previous controller,
and downwards when it disappears.
A modal controller can have another modal controller on top of it.
In fact, there can be a stack of them.
Every
UIViewController
has a
presentedViewController
property that points to the modal view controller
that is temporarily on top of it.
(The property is
nil
if there is no modal view controller currently on top of it.)
Conversely, every modal view controller has a
presentingViewController
property that points to the view controller waiting patiently under it.
(The property is
nil
if there is no other controller.)
What to use it for
A navigation controller is leading the user through the following series
of questions.
Each quesion is presented by its own view controller and view.
Each view has
“Next”
button.
- What is your name?
- What is your age?
- Are you taking any medications?
(If the answer is yes,
a modally presented view controller and its view will pop up and say
“describe
them”.
After the user has described the meds,
the modally presented view controller and view will disappear.)
- What is your email address?
- What is your phone number?
Things to try
-
In the
init
method of the
ModalViewController,
try a different
UIModalTransitionStyle.
UIModalTransitionStyle.FlipHorizontal
UIModalTransitionStyle.CrossDissolve
UIModalTransitionStyle.PartialCurl
Then go back to the default
UIModalTransitionStyle.CoverVertical.
-
In the
init
method of the
ModalViewController,
try a different
UIModalPresentationStyle.
On an iPhone they all look the same
because the modal view covers the original view completely.
The presentation styles are intended for iPad.
But here’s an experiment you can try on an iPhone.
In the
init
method of the
ModalView,
set
alpha = 0.2;
You will now see the black
window
behind the
ModalView,
because
UIModalPresentationStyle.FullScreen
temporarily removes the previous view from the window.
Then change the
UIModalPresentationStyle
to
UIModalPresentationStyle.OverFullScreen,
which does not remove the previous view from the window.
When you’re done, go back to the original
alpha
and
UIModalPresentationStyle.FullScreen.
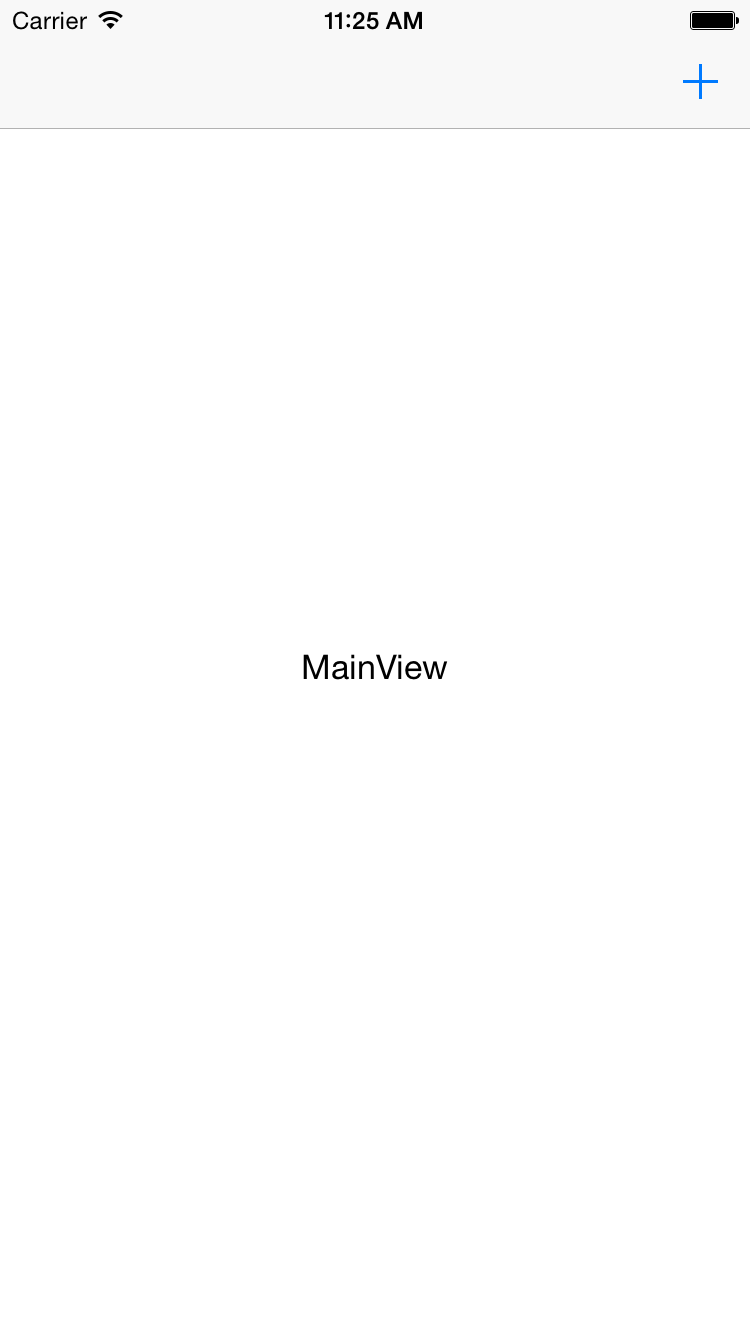
-
A view often has a navigation bar with a plus button
if it can be tempoarily covered wth a modally presented view.
Let’s provide the
MainView
with these decorations.
To make the
MainViewController’s
navigation bar visisble,
we will have to put a
UINavigationController
above the
MainViewController.
- Select the
Main.storyboad
file in the Xcode Project Navigator.
In the center panel of Xcode, under Navigation Controller Scene,
select the Navigaion Controller.
In the right panel of Xcode,
select the Identity Inspector icon.
Custom Class
Class: UINavigationController
Module: (leave it blank)
-
Add the following code to the start of the
application(_:didFinishLaunchingWithOptions:)
method of the
AppDelete.
		if window == nil {
			print("window is nil");
		} else if window!.rootViewController == nil {
			print("window!.rootViewController is nil");
		} else {
			let navigationController: UINavigationController = window!.rootViewController! as UINavigationController;
			navigationController.pushViewController(MainViewController(), animated: false);
		}
-
Add the following methods to class
MainViewController.
	override init() {
		super.init(nibName: nil, bundle: nil);

		navigationItem.rightBarButtonItem = UIBarButtonItem(
			barButtonSystemItem: UIBarButtonSystemItem.Add, //its icon is a plus sign
			target: self,
			action: "slideUpModal");
	}

	//not called
	required init(coder aDecoder: NSCoder) {
		super.init(coder: aDecoder);
	}
- Now that the
ModalView
is slid up with a
+
button,
you can remove the
touchesBegan(_:withEvent:)
method of class
MainView.
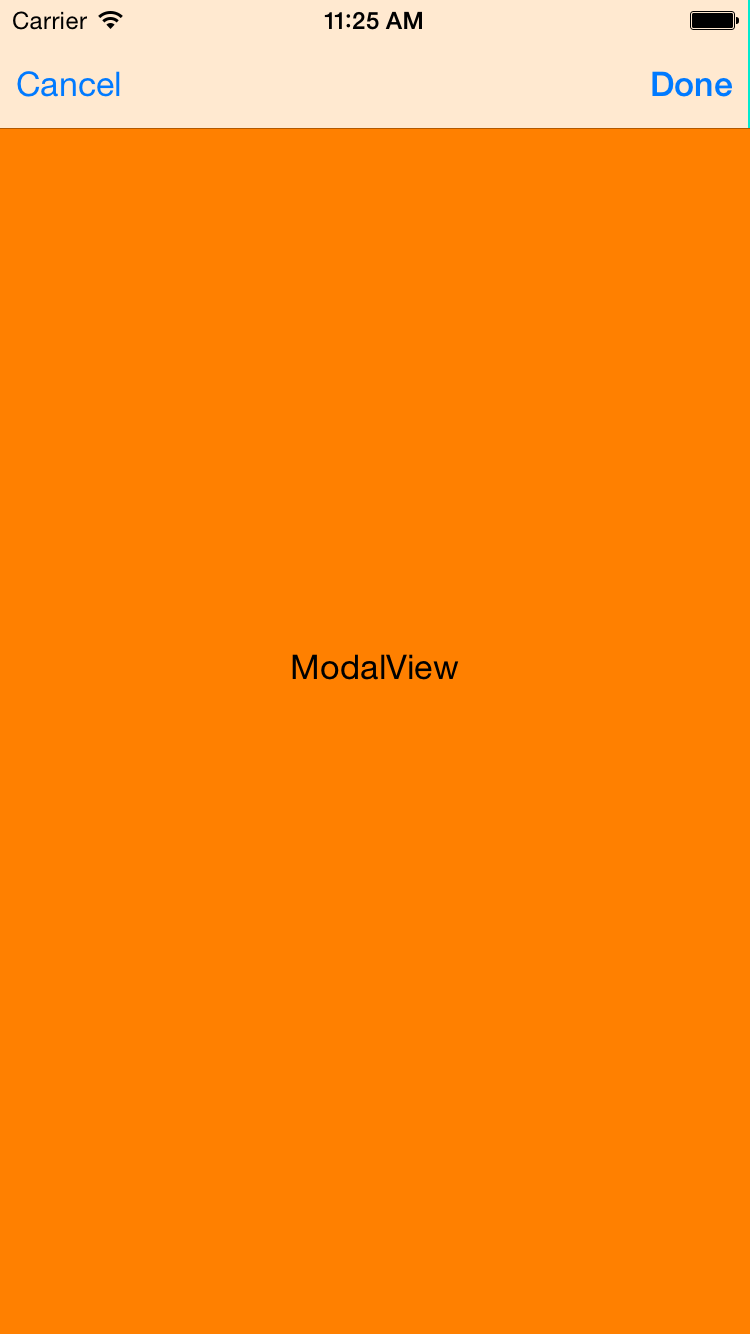
-
A modally displayed view is expected to have a navigation bar
containing buttons for
“Done”
and (optionally)
“Cancel”.
Our
ModalView
is underneath a
ModalViewController.
To display its navigation bar,
the
ModalViewController
will have to be underneath a
UINavigationController.
The
UINavigationController
will appear modally atop the
MainViewController.
Make the following three changes.
- Give the
ModalViewController
a Done button that will appear if the
ModalViewController
is ever controlled by a
UINavigationController.
Append the following statement to the
init
method of the
ModalViewController.
		navigationItem.rightBarButtonItem = UIBarButtonItem(
			barButtonSystemItem: UIBarButtonSystemItem.Done,
			target: self,
			action: "slideDownModal");
and maybe also
		navigationItem.leftBarButtonItem = UIBarButtonItem(
			barButtonSystemItem: UIBarButtonSystemItem.Cancel,
			target: self,
			action: "slideDownModal");
- In the
slideUpModal
of class
MainViewController,
change
		let modalViewController: ModalViewController = ModalViewController();
		presentViewController(modalViewController, animated: true, completion: nil);
to
		let modalViewController: ModalViewController = ModalViewController();

		let navigationController: UINavigationController =
			UINavigationController(rootViewController: modalViewController);

		presentViewController(navigationController, animated: true, completion: nil);
or to
		presentViewController(
			UINavigationController(rootViewController: ModalViewController()),
			animated: true,
			completion: nil);
- Now that the
ModalView
is dismissed with a Done
button,
you can remove the
touchesBegan(_:withEvent:)
method of class
ModalView.