While you have the
previous project
open in Android Studio,
edit the
MainActivity.java
file.
This is the most self-contained way to print debugging output,
since only one file has to be edited.
Insert the following statements into the
onCreate
method of the
MainActivity
immediately after the call to
setContentView.
		Toast toast = Toast.makeText(this, "MainActivity onCreate", Toast.LENGTH_LONG);
		toast.show();
We said
this
because the first parameter of
Toast.makeText
must be an
Activity
object.
(Actually, it must be a
Context
object, which is a superclass of
Activity.)
"MainActivity onCreate"
is the message to be displayed.
LENGTH_LONG
is a public static final field of class
Toast.
makeText
is a static method of class
Toast;
show
is a non-static method.
Try
Toast.LENGTH_SHORT
(2 seconds
vs.
3½).
Combine the above two statements into one statement by letting the
variable that refers to the
Toast
be an anonymous temporary variable:
Toast.makeText(this, "MainActivity onCreate", Toast.LENGTH_LONG).show();
To avoid complains about the word
Toast,
you will need the following
import
at the top of the
MainActivity.java
file.
We configured Android Studio to write the
import
automatically
when we
installed
it.
import android.widget.Toast; //Write this with the other imports at the top of MainActivity.java.
Toast bibliography:
android.widget.Toast
platforms_frameworks_base/core/java/android/widget/Toast.java
source code on GitHub
A
dialog
is like a piece of
toast,
but it’s bigger and lasts longer.
The dialog stays on the screen until you press its OK button.
Insert the following statements into the
onCreate
method of the
MainActivity
immediately after the call to
setContentView.
We must import
android.app.AlertDialog.
		//The builder will build the dialog.
		AlertDialog.Builder builder = new AlertDialog.Builder(this);

		//Tell the builder about the dialog you want it to create.
		builder.setTitle("The Title");
		builder.setMessage("The message");
		//null because we want the positive button to do nothing
		//except dismisss the dialog.
		builder.setPositiveButton("OK", null);

		//Now that we've finished describing the dialog,
		//tell the builder to create it.
		AlertDialog alertDialog = builder.create();
		alertDialog.show();
The last two statements could be replaced by the following.
builder.show();
Instead of hardcoding the title
"The Title"
into the Java code,
it should have been a
string
resource
in
strings.xml.
Ditto for the other strings.
<string name="dialog_title">The Title</string>
The above
name
attribute adds a static field named
dialog_title
to the Java class
R.string
in the
R.java
file.
We can now use the integer variable
R.string.dialog_title
in our Java code.
public final class R {
	public static final class string {
		public static final int dialog_title=some number;
	}
}
builder.setTitle(R.string.dialog_title);
Dialog bibliography:
android.app.AlertDialog
platforms_frameworks_base/core/java/android/app/AlertDialog.java
source code on GitHub
Our
res/layout/activity_main.xml
already contains the following
TextView
object.
We created the
string
resource
greeting
in the exercises in
Hello.
Let’s give it an
ID
number.
The plus sign creates a new ID number.
Without the plus,
we would merely be referring to an existing ID number.
	<TextView
		android:id="@+id/textView"
		android:layout_width="wrap_content"
		android:layout_height="wrap_content"
		android:text="@string/greeting"/>
The above
android:id
attribute adds a static field named
textView
to the Java class
R.id
in the
R.java
file.
public final class R {
	public static final class id {
		public static final int textView=0x7f05003d;
	}
}
We can now use the integer variable
R.id.textView
in our Java code.
Insert the following statements
after the call to
setContentView
in the
onCreateView
method in
MainActivity.java.
findViewById
returns an object of class
View,
which is the superclass of all the view classes.
This plain vanilla return value must be converted to the data type
TextView
before we can call
setText.
The
(TextView)
in parentheses is a conversion operator called a
cast.
In this case it’s a
downcast,
a conversion from a superclass to a subclass.
The Java
instanceof
operator returns
true
if the downcast will succeed,
i.e., if the
view
actually is a
TextView.
In addition to
setText,
there’s also
append.
		View view = findViewById(R.id.textView);

		if (view == null) {
			Toast.makeText(this, "could not find R.id.textView", Toast.LENGTH_LONG).show();
		} else if (!(view instanceof TextView)) {
			Toast.makeText(this, "view belongs to class " + view.getClass(), Toast.LENGTH_LONG).show();
		} else {
			TextView textView = (TextView)view;
			textView.setText("Debuging output in a TextView.");
		}
Most people omit the error checking:
		TextView textView = (TextView)findViewById(R.id.textView);
		textView.setText("Debuging output in a TextView.");
We could even do it all in one statement,
with an extra pair of parentheses to execute the cast before the dot whose
right operand is
setText.
((TextView)findViewById(R.id.textView)).setText("Debuging output in a TextView.");
The
.java
file will also need the following imports.
import android.widget.TextView;
import android.widget.Toast;
TextView bibliography:
android.widget.TextView
platforms_frameworks_base/core/java/android/widget/TextView.java
source code on GitHub
Call the static method
Log.d
in the
onCreate
method of the
MainActivity.
See
Write
and View Logs with LogCat.
The six levels of priority (in increasing order) are
Verbose, Debug, Info, Warning, Error, Assert:
Very Dark Icebergs With Eskimos?
Log.d("myTag", "my message");
Import
android.util.Log,
not the homonymous
org.apache.commons.logging.Log.
import android.util.Log;
Click on the
LogCat
tab at the bottom of Android Studio.
(If you don’t see the tab, click on 6: Android Monitor.)
For the log level, select the
“Debug”
level of verbosity from the drop-down menu.
Next to it,
where the magnifying glass is,
write
myTag.
The
8825’s are the Process ID and Thread ID.
07-27 08:46:16.392 8825-8825/edu.nyu.sps.hello D/myTag: my message
Better yet,
create a new filter by pulling the rightmost menu
(“Show only selected application”)
down to
Edit Filter Configuration.
That way, you won’t have to see any lines other than the ones
that have
myTag.
Create New Logcat Filter
Specify one or several filtering parameters:
Filter Name: MyFilter
Log Tag: myTag
(Check regex if you know about regular expressions.)
Log Level: Debug
OK
To clear the log,
click on the blue garbage can with the gray top.
If you don’t see the can, click on the
>>.
Call
Log.d
as above.
Type the following command in the Terminal window of a Mac
or the Command Prompt window of a PC.
It will output every line with the tag
myTag
printed by
Log.d
or by the higher methods
Log.i
(info),
Log.w
(warning),
or
Log.e
(error).
Lines with other tags are silenced with an uppercase S.
The
'single
quotes'
are necessary on platforms where the
*
is a shell wildcard.
The
-s
option stands for “serial
number”.
adb devices
List of devices attached
192.168.56.101:5555
emulator-5554
ca1784a34445a8d0308

adb devices -l
List of devices attached
192.168.56.101:5555    device product:vbox86p model:Samsung_Galaxy_S5___4_4_4___API_19___1080x1920 device:vbox86p
emulator-5554          device product:sdk_google_phone_x86_64 model:Android_SDK_built_for_x86_64 device:generic_x86_64
ca1784a34445a8d0308    device usb:14100000 product:polaris_inet model:A727 device:polaris-inet

adb -s emulator-5554 logcat -v brief myTag:D '*:S'
--------- beginning of main
--------- beginning of system
D/myTag   ( 8825): my message
Or you can direct the standard output into a file:
adb -s emulator-5554 logcat myTag:D '*:S' > outfile.txt
Then launch the app.
After the output has been produced,
you can kill
adb
with a control-C.
The standard way of producing output in Java is with the method(s)
System.out.println
		//Create a variable named i and put 10 into it.
		int i = 10;

		System.out.println("standard output: i = " + i);
		System.err.println("standard error output: i = " + i);
The documentation
Viewing
stdout and stderr
says that
System.out.printlnstdout
with priority I.
The tags are actually
System.out
with priority I
and
System.err
with priority W.
You can see the output in the LogCat window
or with
adb logcat.
adb -s emulator-5554 logcat System.out:I '*:S'
--------- beginning of main
--------- beginning of system
07-27 07:05:21.103  1884  2266 I System.out: gmsNlpServiceThread This NLP should run continuously. intent is Intent { act=com.google.android.location.internal.GMS_NLP pkg=com.google.android.gms }
07-27 09:14:23.005  8825  8825 I System.out: standard output: i = 10
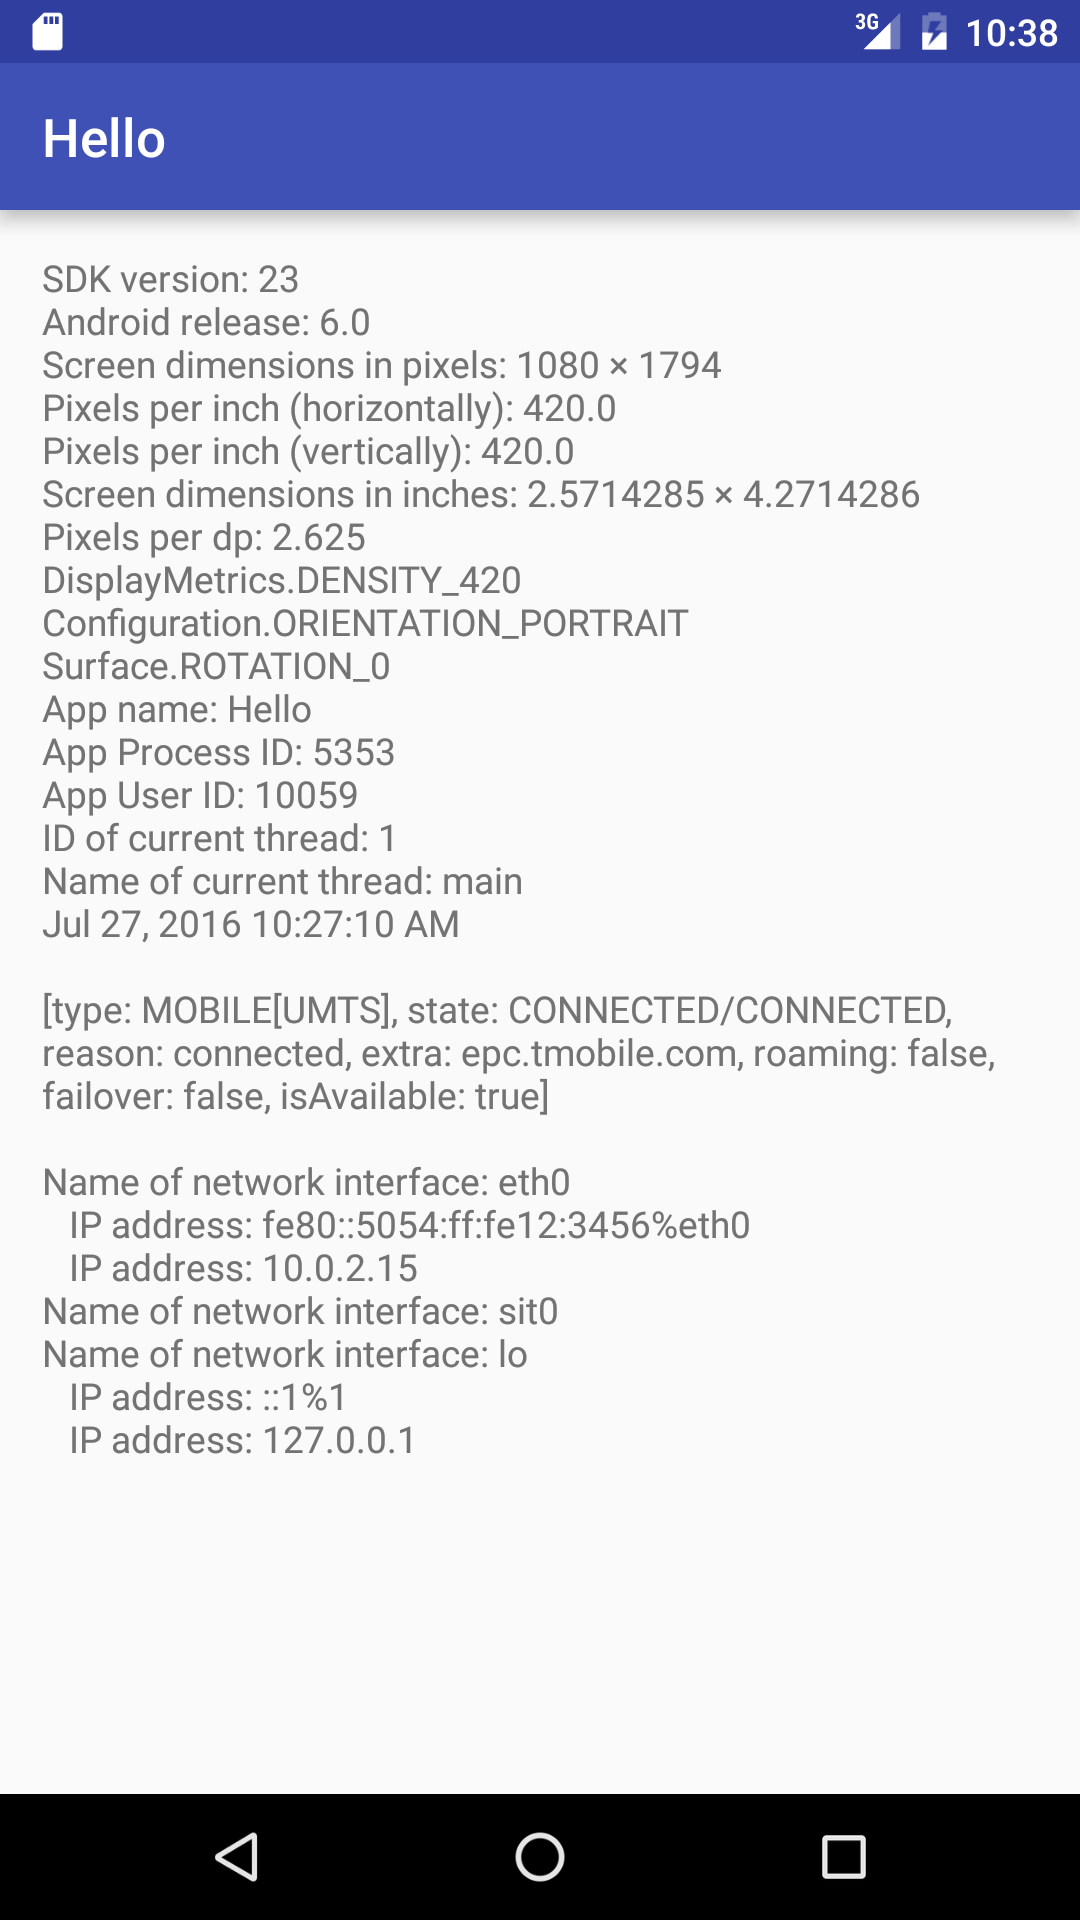
The app in this
.zip
file is pictured in the following screenshots.
It’s exactly the same as the
Hello
app,
except for the following additions.
MainActivity.java.
I added extra statements to
onCreate.
Import
java.util.Date
and
java.text.DateFormat.
R.javaactivity_main.xml.
I added the properties
android:idandroid:scrollbars="vertical"
to the
TextView.
The
TextView
also needed a call to
setMovementMethod.
strings.xmlAndroidManifest.xml.
I added the
ACCESS_NETWORK_STATE
and
INTERNET
permission needed to see if device is connected to Internet
and to list the network interfaces.
build.gradle
(Module: app)
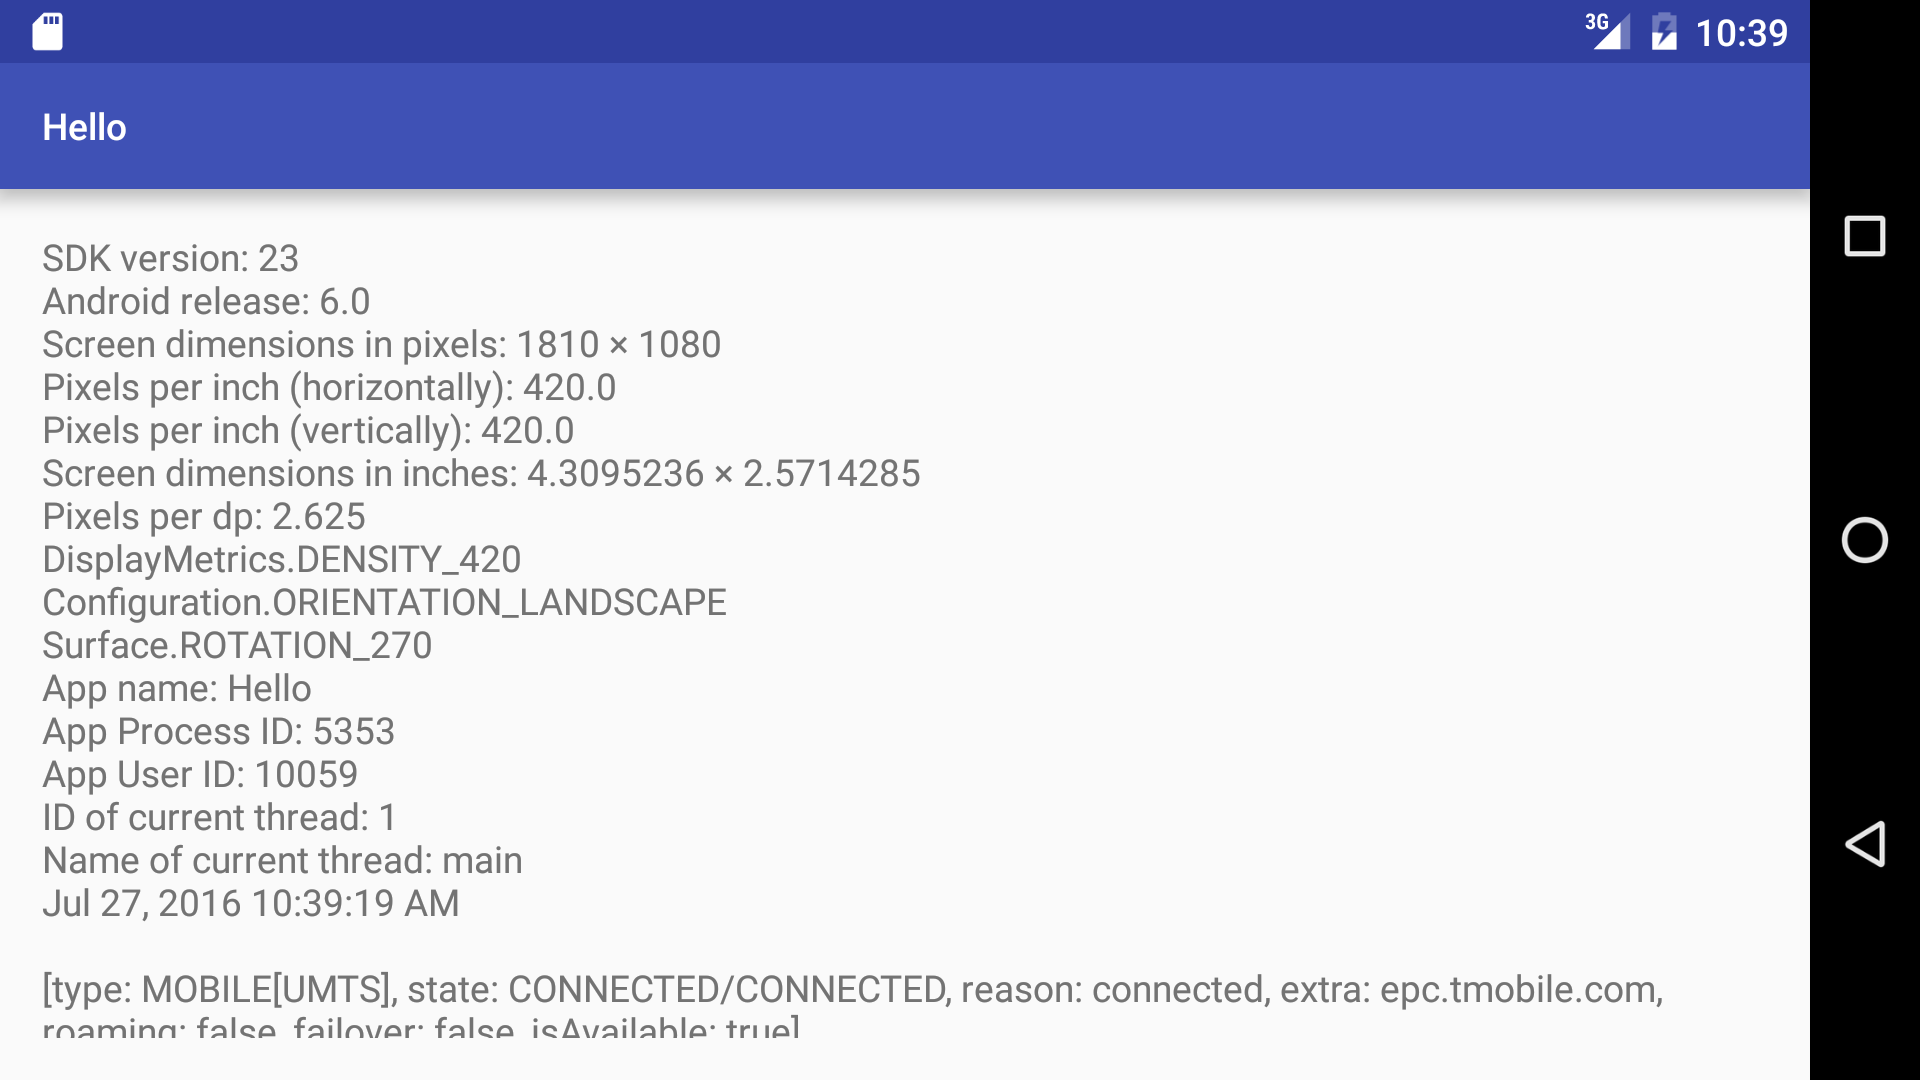
The two screenshots were taken
on the Nexus 5X API 23 emulator.
The change of orientation must have triggered another call to the
onCreate
method of the
MainActivity,
because the text changed
(ORIENTATION_LANDSCAPE).
But
onCreate
is called only when an
Activity
object is created.
Therefore a second
Activity
object must have been created.
In fact, what actually happens is far more drastic.
A change of orientation destroys the original
Activity
object.
Then it creates a new
Activity
object and calls its
onCreate
method.
We can verify this by writing
Toast
messages in the
onCreate
method of the
Activity.
The primary purpose of an
Activity
object is to create the user interface.
If the orientation changes,
we will probably have to destroy and re-create the interafce,
so Android destroys and re-creates the
Activity.
Is this too extreme for you?
We can prevent a change of orientation from destroying and re-creating the
Activity
object
by adding the following attribute to the
<activity>
element in the
AndroidManifest.xml
file.
android:configChanges="orientation|screenSize|keyboardHidden"See Handling the Configuration Change Yourself. Also see Orientation and Configuration.
On my Amazon Fire HD 6:
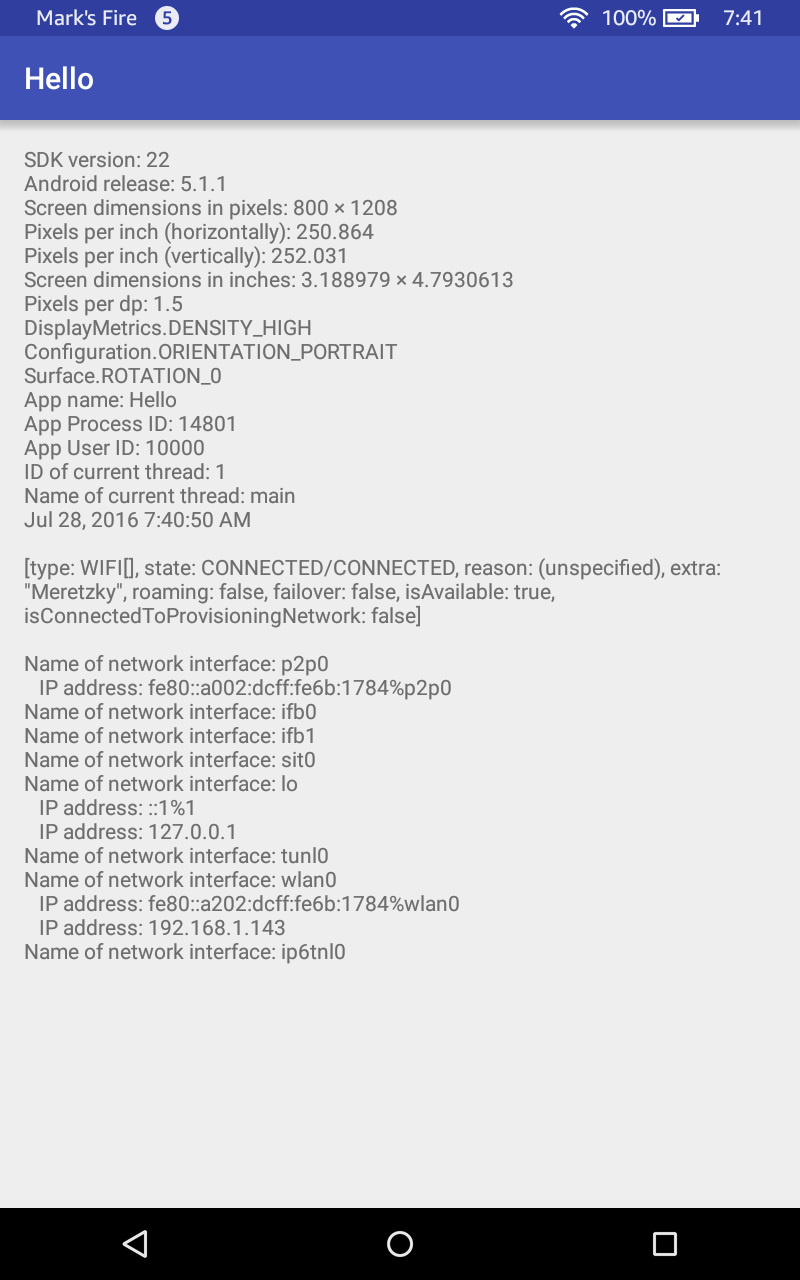
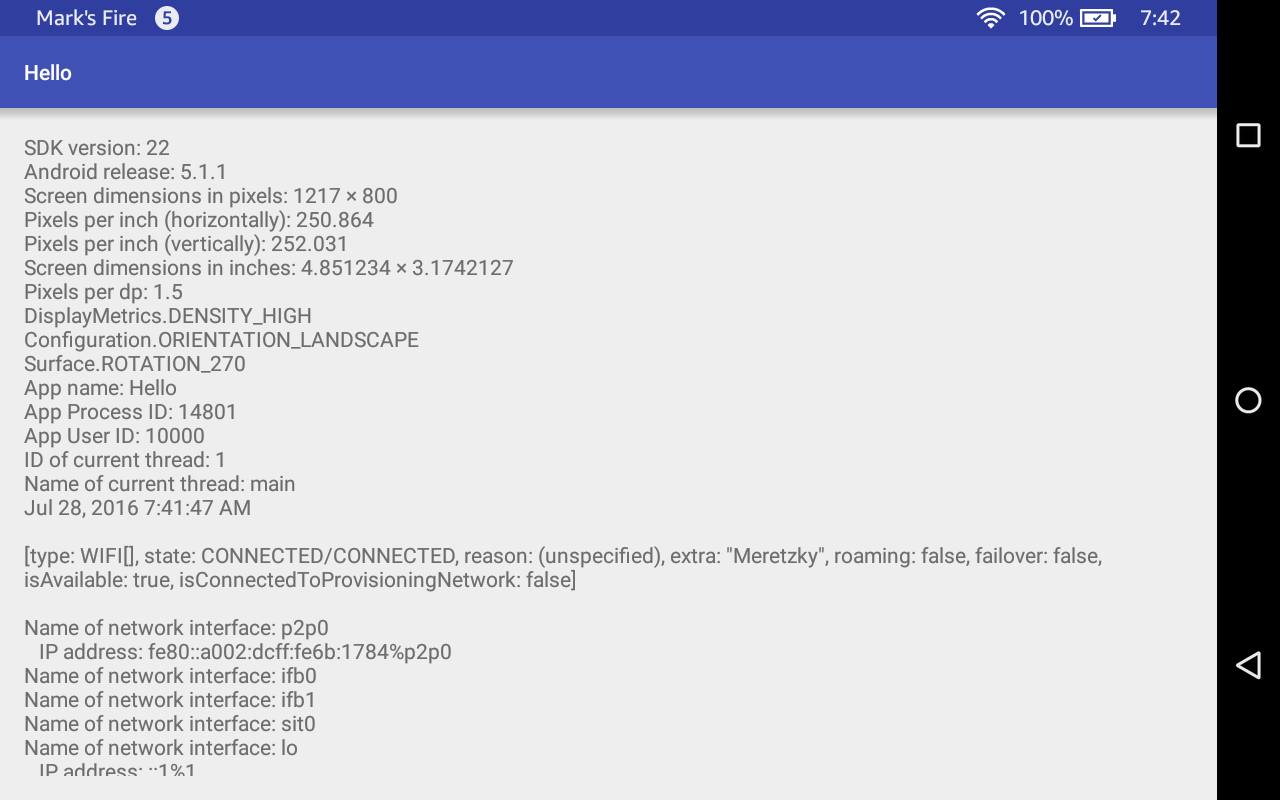
Run the above app.
The
onCreate
method of the
MainActivity
in
MainActivity.java
calls
setText
to write all the information into the
TextView
in
activity_main.xml.
Log
statement to the
onCreate
method of class
MainActivity.
    @Override
    protected void onCreateBundle savedInstanceState) {
        super.onCreate(savedInstanceState);
        setContentView(R.layout.activity_main);
        //etc.
        Log.d("myTag", "onCreate");
    }
Add the five other
lifecycle
methods
to
MainActivity.
To get Android Studio to type them for you,
click on the whitespace after the }
that ends the
onCreate
method
and pull down
onDestroy,
onStart
and
onStop,
onResume
and
onPause,
and press OK.
Insert a
Log
statement to each one.
The
Log.d
in
onDestroy
comes before the
super.onDestroy
because I was afraid that the
super.onDestroy
would leave us with a destroyed
Activity
object that was unable to call
Log.d.
    @Override
    protected void onStart() {
        super.onStart();
        Log.d("myTag", "onStart");
    }

    @Override
    protected void onResume() {
        super.onResume();
        Log.d("myTag", "onResume");
    }

    @Override
    protected void onPause() {
        Log.d("myTag", "onPause");
        super.onPause();
    }

    @Override
    protected void onStop() {
        Log.d("myTag", "onStop");
        super.onStop();
    }

    @Override
    protected void onDestroy() {
        Log.d("myTag", "onDestroy");
        super.onDestroy();
    }
Activity
object.
07-28 08:50:40.026 6414-6414/edu.nyu.sps.hello D/myTag: onCreate
07-28 08:50:40.030 6414-6414/edu.nyu.sps.hello D/myTag: onStart
07-28 08:50:40.030 6414-6414/edu.nyu.sps.hello D/myTag: onResume
07-28 08:52:25.126 8378-8378/edu.nyu.sps.hello D/myTag: onCreate
07-28 08:52:25.163 8378-8378/edu.nyu.sps.hello D/myTag: onStart
07-28 08:52:25.163 8378-8378/edu.nyu.sps.hello D/myTag: onResume
(The home button is pressed at this point.)
07-28 08:52:41.938 8378-8378/edu.nyu.sps.hello D/myTag: onPause
07-28 08:52:42.343 8378-8378/edu.nyu.sps.hello D/myTag: onStop
(The icon is tapped at this point.)
07-28 08:52:54.184 8378-8378/edu.nyu.sps.hello D/myTag: onStart
07-28 08:52:54.184 8378-8378/edu.nyu.sps.hello D/myTag: onResume
Activity
object from the screen
and destroy it.
For the time being,
assume that the back button always destroys the
Activity
from which you are going back.
See
Tasks
and Back Stack.
07-28 08:54:39.732 10114-10114/edu.nyu.sps.hello D/myTag: onCreate
07-28 08:54:39.771 10114-10114/edu.nyu.sps.hello D/myTag: onStart
07-28 08:54:39.771 10114-10114/edu.nyu.sps.hello D/myTag: onResume
(The back button is pressed at this point.)
07-28 08:54:42.460 10114-10114/edu.nyu.sps.hello D/myTag: onPause
07-28 08:54:42.840 10114-10114/edu.nyu.sps.hello D/myTag: onStop
07-28 08:54:42.840 10114-10114/edu.nyu.sps.hello D/myTag: onDestroy
Activity
object is destroyed and re-created.
See
Handling
Runtime Changes.
07-28 08:55:45.768 11009-11009/edu.nyu.sps.hello D/myTag: onCreate
07-28 08:55:45.804 11009-11009/edu.nyu.sps.hello D/myTag: onStart
07-28 08:55:45.804 11009-11009/edu.nyu.sps.hello D/myTag: onResume
(The orientation is changed at this point.)
07-28 08:56:11.117 11009-11009/edu.nyu.sps.hello D/myTag: onPause
07-28 08:56:11.119 11009-11009/edu.nyu.sps.hello D/myTag: onStop
07-28 08:56:11.119 11009-11009/edu.nyu.sps.hello D/myTag: onDestroy
07-28 08:56:11.154 11009-11009/edu.nyu.sps.hello D/myTag: onCreate
07-28 08:56:11.162 11009-11009/edu.nyu.sps.hello D/myTag: onStart
07-28 08:56:11.162 11009-11009/edu.nyu.sps.hello D/myTag: onResume
ps
on the emulator and the device.
adb devices
List of devices attached
emulator-5554	device
0088080744830RTG	device

adb -s emulator-5554 shell ps
USER      PID   PPID  VSIZE   RSS      WCHAN             PC   NAME
u0_a64    10059 1233  1292556 51988    ep_poll 7ff2555796ca S edu.nyu.sps.hello
Map?
getPackageName.
Two versions of thread id and priority.
Print name of current directory, name of user.
Print date first, followed by version numbers.
Print parent of pid.
Locale.getDefault().toString()
System.getProperty("java.version")