Pinch vs. Spread
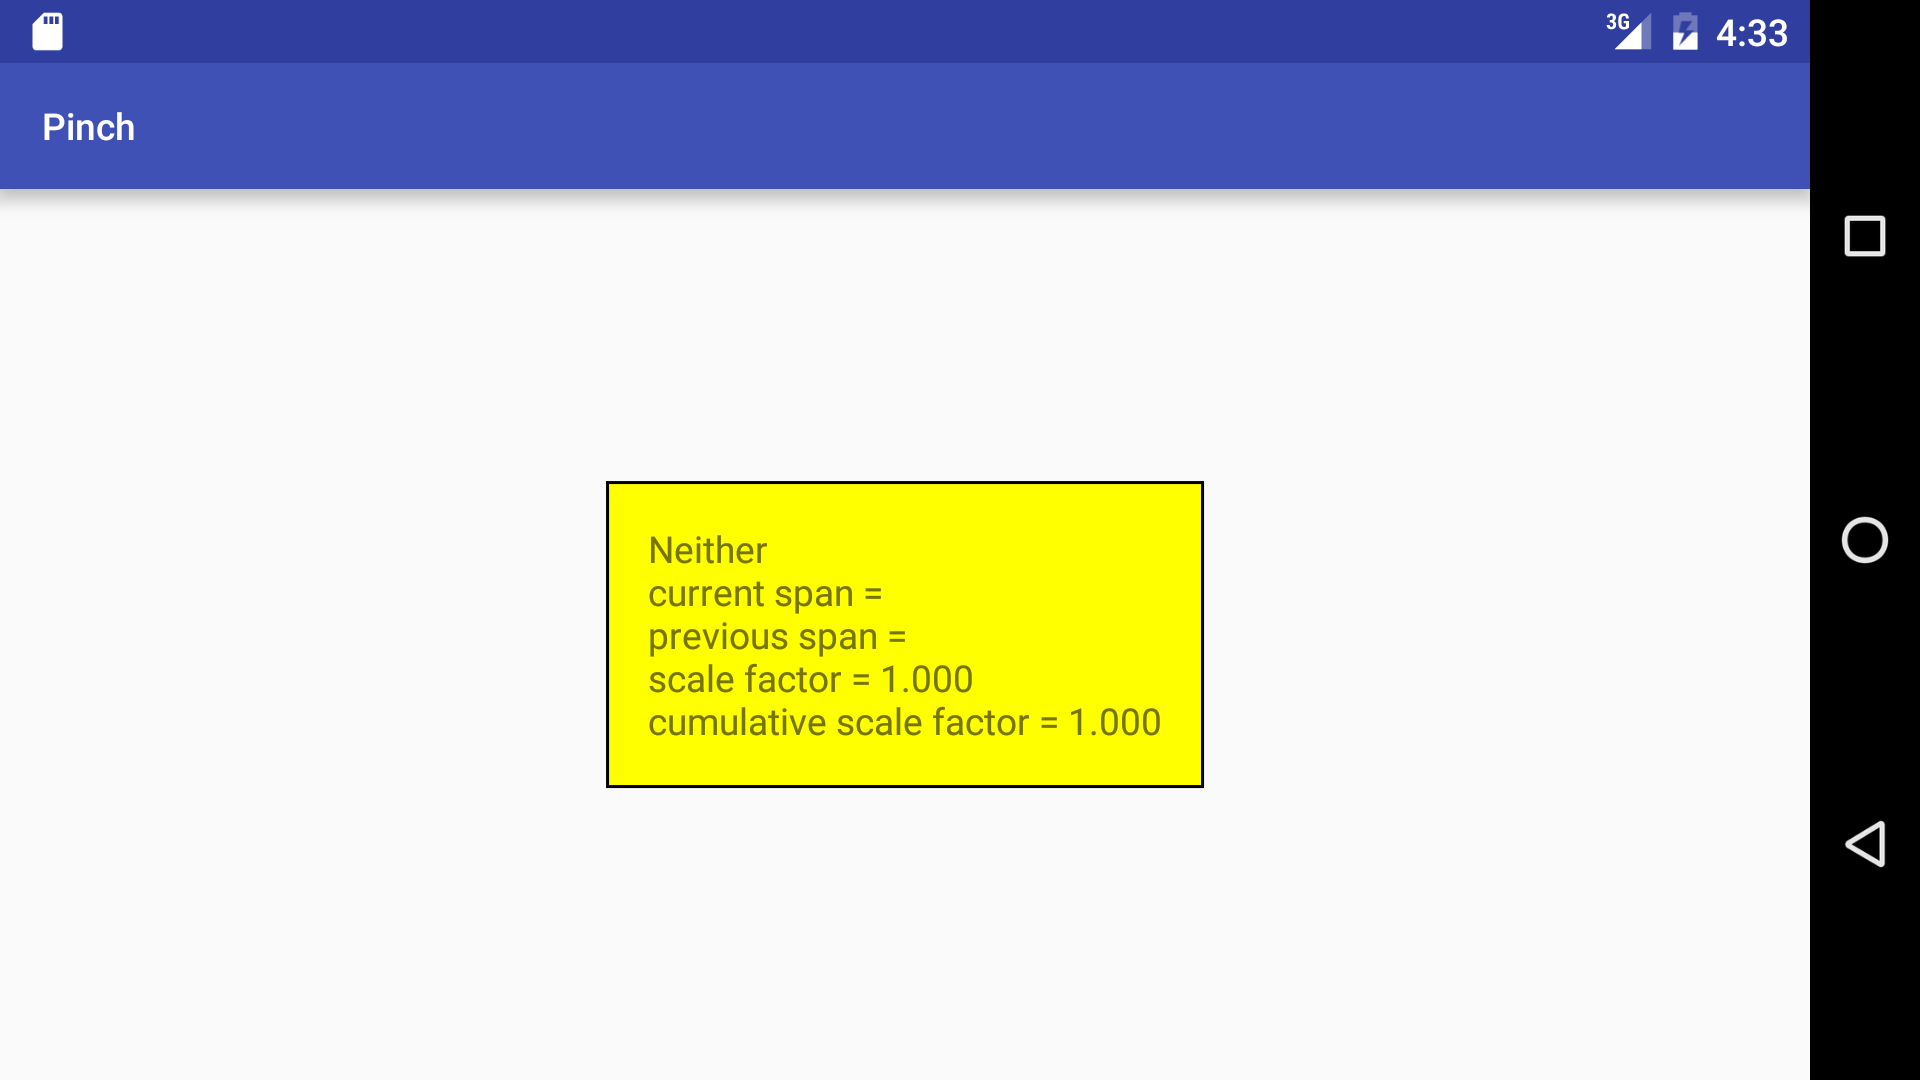

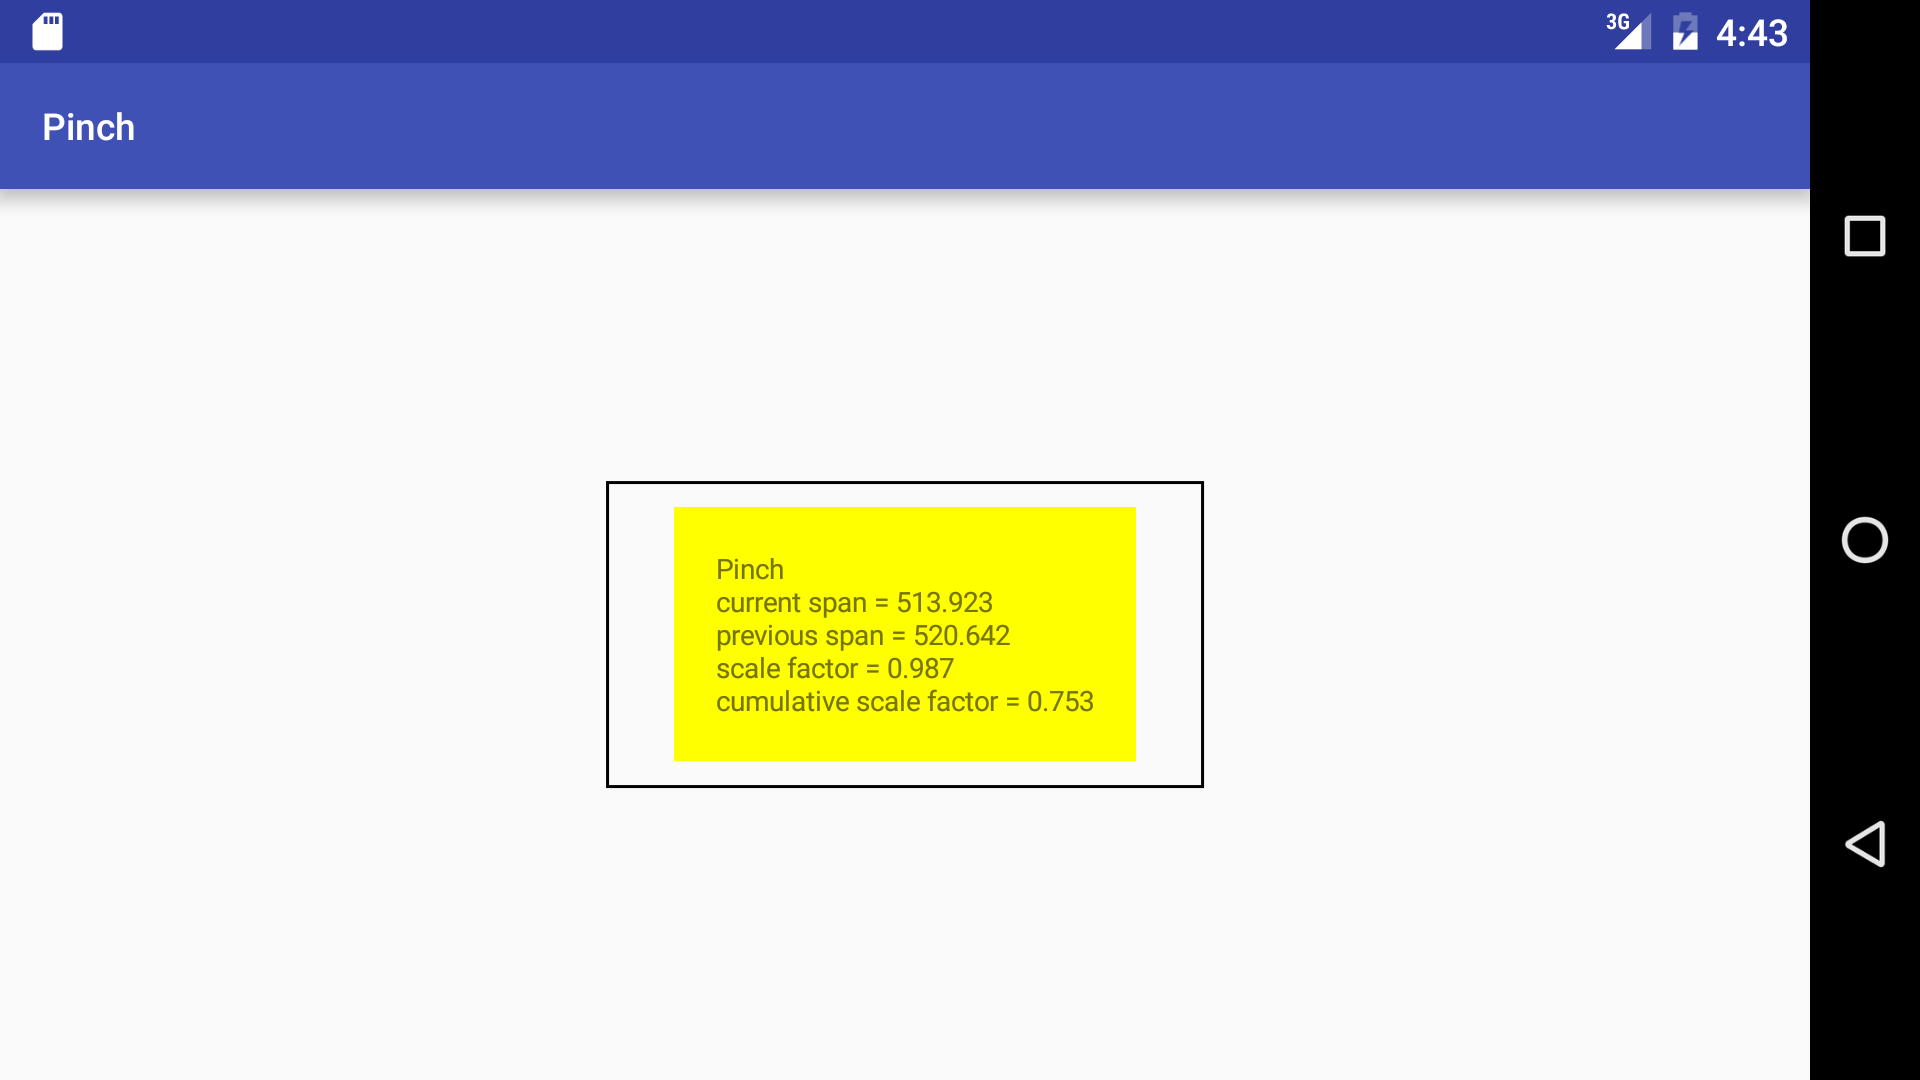
Use two fingers to pinch and spread the yellow
TextView.
The rectangular outline shows the
TextView’s
original size.
It lets you check that the cumulative scale factor goes back to 1 when you
return the
TextView
to its the original size.
Using two fingers is called
multi-touch.
For some reason, Android calls them “pointers”,
not
“fingers”.
You could access the fingers individually by calling the
getPointerCount
and the (one-argument)
getX
and
getY
methods of the
MotionEvent
parameter passed to the
onTouch
method of the
View.OnTouchListener.
But it’s simpler to pass the
MotionEvent
to the
ScaleGestureDetector
and let the
ScaleGestureDetector
call these methods for us.
The
onScale
method of the
ScaleGestureDetector.SimpleOnScaleGestureListener
is called many times per second while the pinch or spread is in progress.
Each time,
it displays the span in pixels bewteen the fingers during the
current
and
previous
calls.
The
scale
factor
is simply the ratio of these two numbers.
bc -l
scale = 4
1014.595 / 1006.656
1.0078
513.923 / 520.642
.9870
control-d
The cumulative scale factor
is the product of the scale factor of all the calls.
It’s much more useful than the other numbers.
For example, the
font
size
is the original font size times the cumulative scale factor.
TypedValue.COMPLEX_UNIT_PX
means that the font size is specified in pixels.
MainActivity.javaactivity_main.xml.
The
RelativeLayout
has an
id
number so we could make it touch-sensitive.
The two
TextViews
are initially the same size.
The first one will grow and shrink.
The text in the second one is written in invisible ink
(android:textColor="#000000"),
but you can see its border.
strings.xml-
border.xml
contains the border for the second
TextView.
See the border example in
Hello.
-
AndroidManifest.xml:
the
<activity>
element has the attribute
android:screenOrientation="landscape".
-
build.gradle
(Module: app).
Run the app
To simulate multi-touch on the Android Emulator,
hover to the yellow
TextView,
press the Mac command key,
and keep the command key held down as you drag away from the
TextView.
See
Navigating
on the Screen.
Things to try
-
Pinch
Bashar al-Assad.
Save
assad.jpg
(220 × 365)
on your Desktop and then copy and paste it into the
app/res/drawable
folder of your project.
Replace the two
TextViews
in
activity_main.xml
with the following.
    <ImageView
        android:id="@+id/imageView"
        android:layout_height="wrap_content"
        android:layout_width="wrap_content"
        android:layout_centerInParent="true"
        android:src="@drawable/assad"/>
In
onCreate,
change
final TextView textView = (TextView)findViewById(R.id.textView);
to
final ImageView imageView = (ImageView)findViewById(R.id.imageView);
Change
onScale
to
            @Override
            public boolean onScale(ScaleGestureDetector detector) {
                cumulativeScaleFactor *= detector.getScaleFactor();
                imageView.setScaleX(cumulativeScaleFactor);
                imageView.setScaleY(cumulativeScaleFactor);
                return true;
            }
Remove the
textSize
field from
class
MainActivity.
Remove the
android:screenOrientation="landscape".
