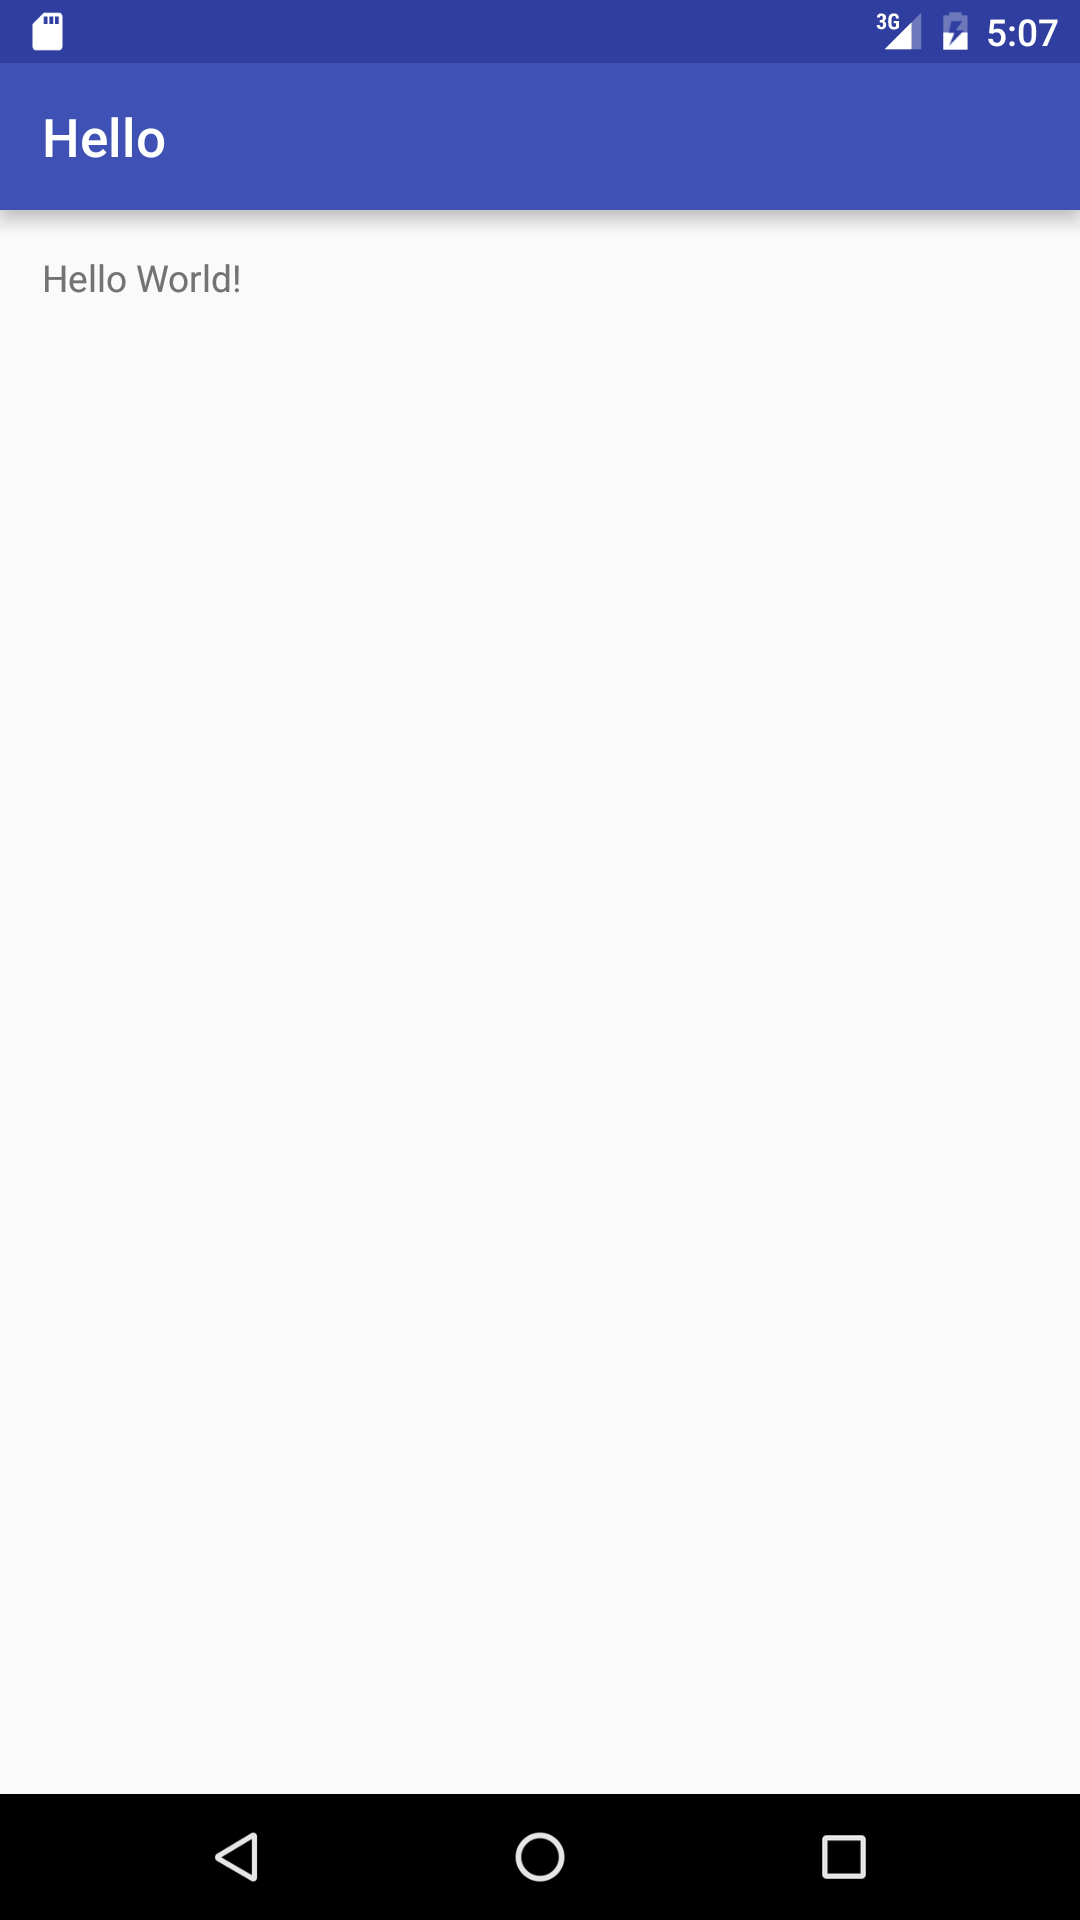
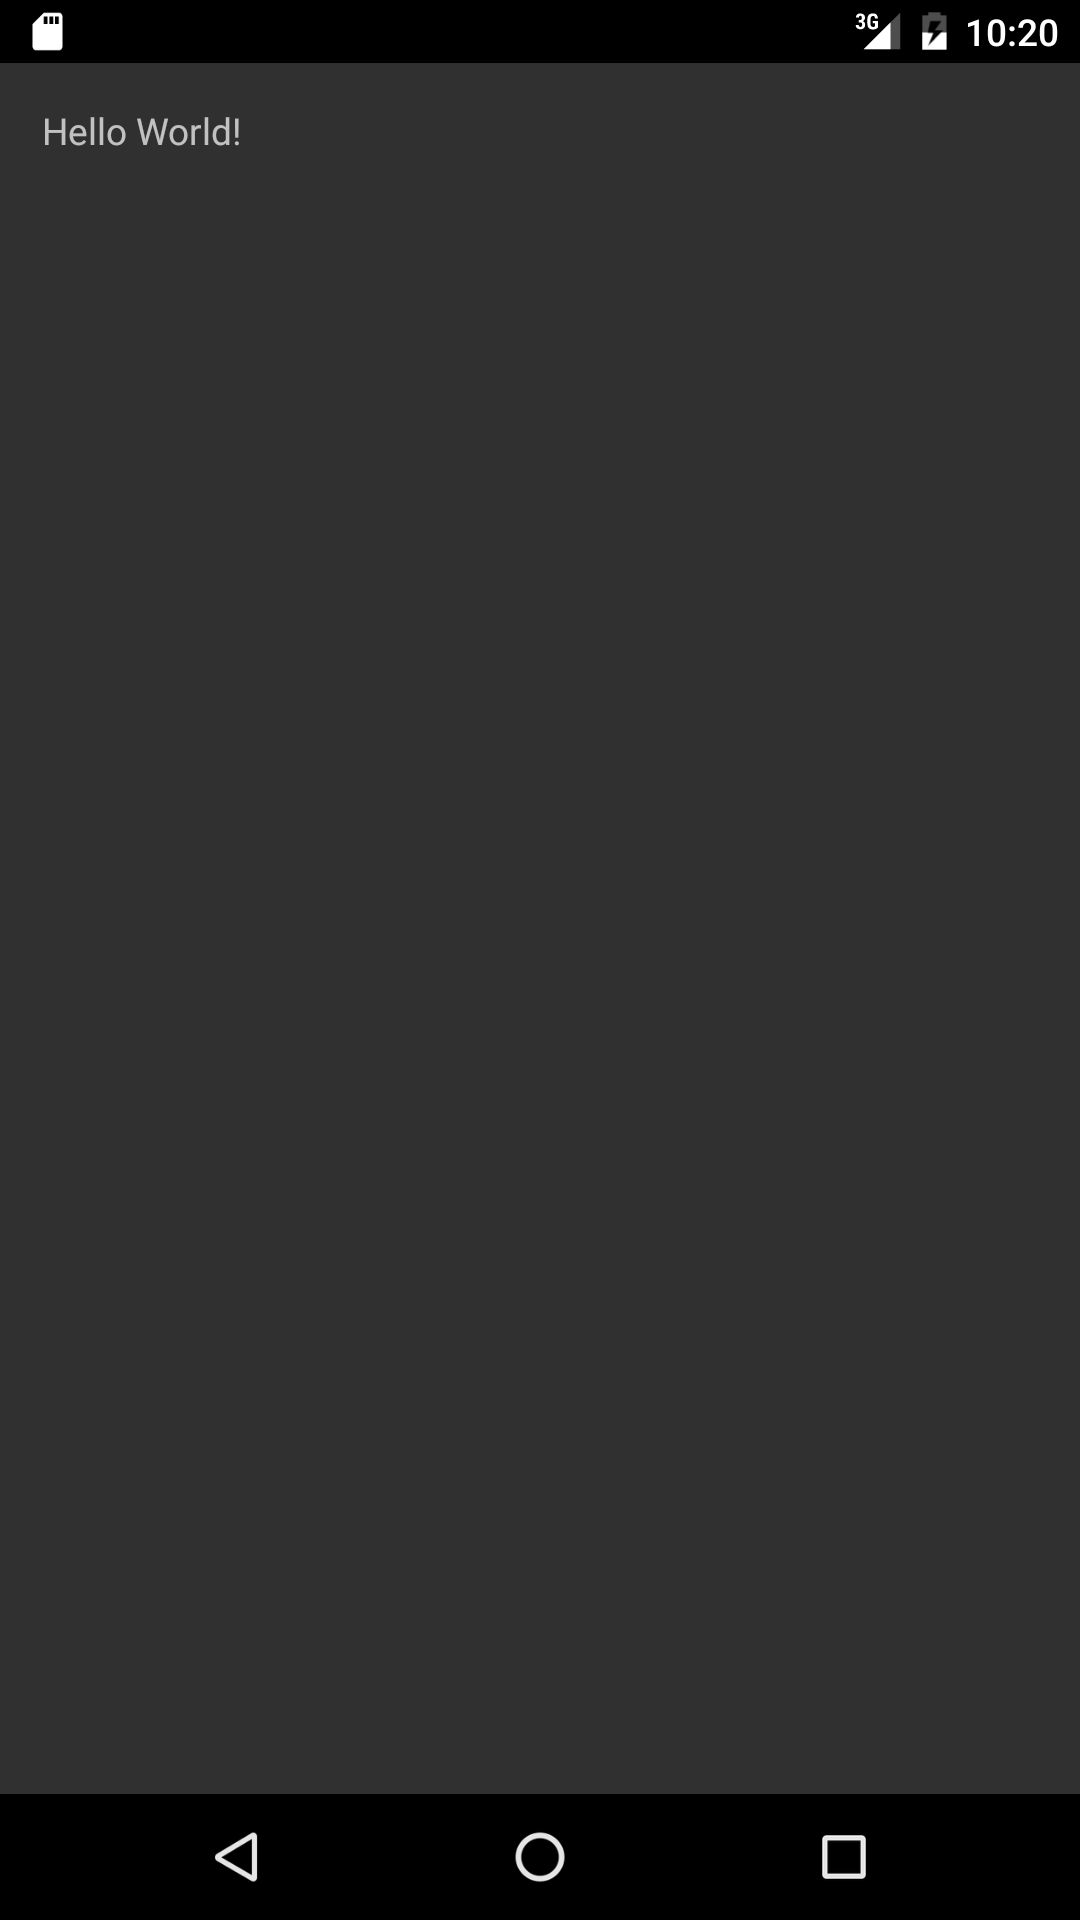
At the top of the screen is the
status bar,
containing the current time.
Underneath it is the
app bar
(which used to be called the action bar),
containing the name of the app.
At the bottom of the screen is the
navigation
bar,
containing the icons for
back (triangle),
home (circle),
and overview/recents (square).
The text “Hello world” is in a
TextView
object,
a rectangular region just big enough to enclose the two words.
The
TextView
is contained in a
RelativeLayout
object,
which is the big white region that fills most of the screen.
The
TextView
and
RelativeLayout
are created by the
onCreate
method of the app’s
Activity
object.
See the
Activity
Lifecycle.
In particular, they are created when
onCreate
passes the id number of the file
activity_main.xml
to the
setContentView
method.
See
Creating an Activity.
An
Android device
is a phone or tablet.
To create a screenshot of a device or emulator,
click on the “6: Android Monitor”
in the left side of the lower edge of Android Studio.
Select the phone or emulator in the dropdown menu above the logcat tab.
Then click on the gray camera with the circular blue lens
to the left of this tab.
Press the Save button
at the lower right corner of the resulting image
and select the folder in which to save the image file.
I print a one-pixel black border
around the screenshots that I display on the web.
The file
Hello.zip
contains the source code of the project,
plus files that are not source code.
You can create your own
Hello.zip
file with
these directions,
but you don’t have to.
- Java files
MainActivity.java.
The
onCreate
method of the
Activity
object is called automatically when the app is launched.
It displays the
View
object(s) in the layout file
activity_main.xml.
In the Java code,
the identification number for this
.xml
file is stored in the integer variable
R.layout.activity_main.
The R
stands for
resources.
R.java.
This file creates the integer variable
R.layout.activity_main
used in
MainActivity.java.
Do not edit this file.
This file is not normally displayed.
To see it,
change Android to Project Files in the drop-down menu above the list of files
in the left panel of Android Studio
(the
project
view)
and open
Hello →
app →
build →
generated/source →
r/debug →
edu/nyu/sps/hello →
R
- XML layout
files
res/layout/activity_main.xml
consists of a
RelativeLayout
containing one
TextView.
The
TextView
displays the string
"Hello World!".
- Other
resource
files written in XML
res/values/colors.xml
contains three
color
resources.
These resources are used by the
style
resourse
in
res/values/styles.xml.
-
res/values/strings.xml
contains the
string
resource
named
app_name,
containing the string
"Hello".
This string is displayed in the
app bar
of the app’s window,
and under the app’s icon in the launcher page on the emulator.
(There are many other types of
resources.)
res/values/styles.xml
contains a
style
resource
named
AppTheme.
This resource inherits all but three of its properties from its parent theme,
Theme.AppCompat.Light.DarkActionBar.
-
res/values/dimens/dimens.xml
gives the
dimensions
of the margins in
density-independent
pixels.
A
dp
is approximately 1/160th of an inch.
See
Supporting
Multiple Screens,
density,
and
densityDpi.
res/values-w820dp/dimens.xml
for an Android device whose screen is 820
density-independent
pixels
wide or more.
That’s approximately 5⅛ inches.
- Launcher
icons,
with dimensions in pixels.
-
res/mipmap-mdpi/ic_launcher.png
48 × 48
-
res/mipmap-hdpi/ic_launcher.png
72 × 72
-
res/mipmap-xhdpi/ic_launcher.png
96 × 96
-
res/mipmap-xxhdpi/ic_launcher.png
144 × 144
-
app/build/intermediates/res/merged/debug/mipmap-mdpi-v4/ic_launcher.png
48 × 48
-
app/build/intermediates/res/merged/debug/mipmap-hdpi-v4/ic_launcher.png
72 × 72
-
app/build/intermediates/res/merged/debug/mipmap-xhdpi-v4/ic_launcher.png
96 × 96
-
app/build/intermediates/res/merged/debug/mipmap-xxhdpi-v4/ic_launcher.png
144 × 144

-
AndroidManifest.xml
specifies the subclass of class
Activity
to be instantiated when the app is launched.
In this case the class is
MainActivity,
whose full name is
edu.nyu.sps.hello.MainActivity.
AndroidManifest.xml
could also give the app
permission to make
telephone
calls
or
Internet
connections,
etc.
-
Gradle scripts
-
build.gradle
(Project: Hello)
-
build.gradle
(Module: app).
See
Configuring
Build Variants.
-
minSdkVersion.
The app cannot be installed on a device whose SDK version is less than this.
-
targetSdkVersion.
The app will behave as if the device was running this version of the SDK.
compileSdkVersion.
The Java compiler will link your app to this version of the SDK
from your Mac or PC’s hard disk.
A
project
is the set of directories and files that constitute an app.
We will create an app named
Hello
and store it as a project named
Hello.
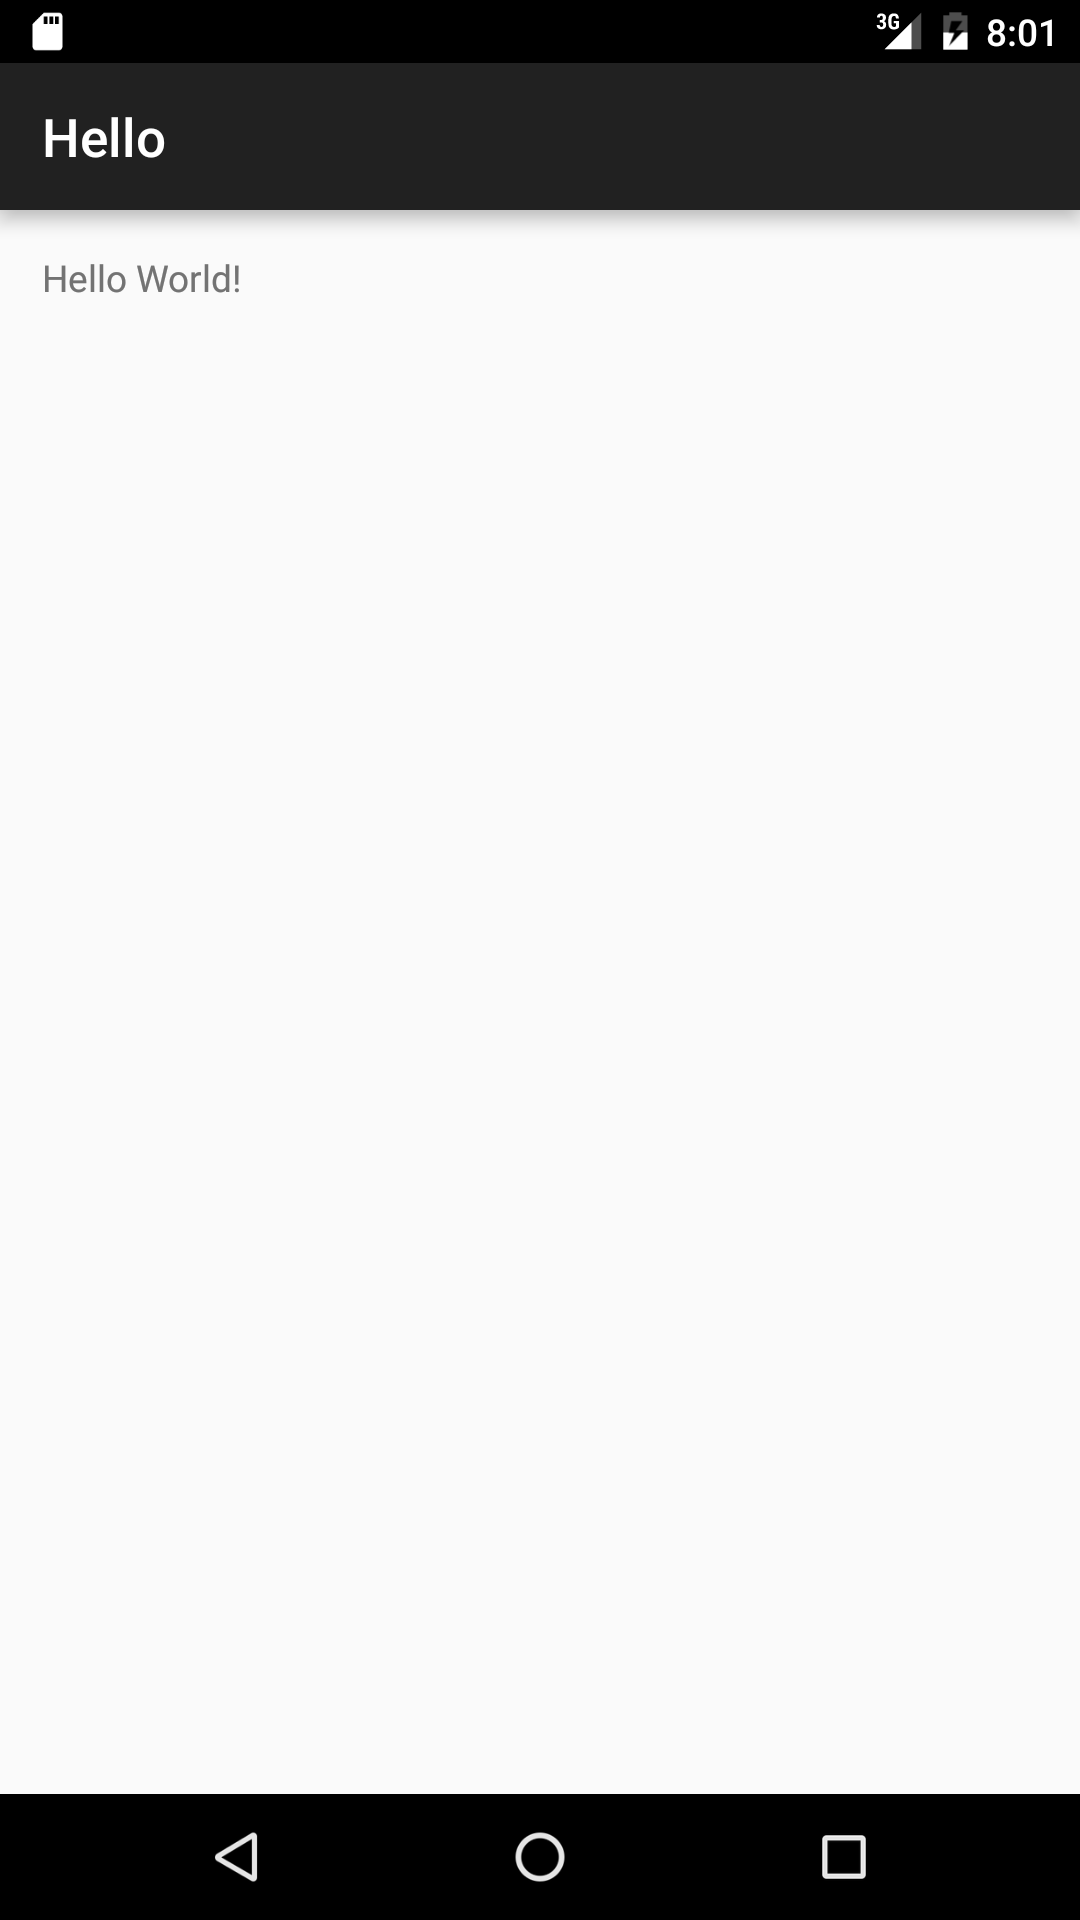
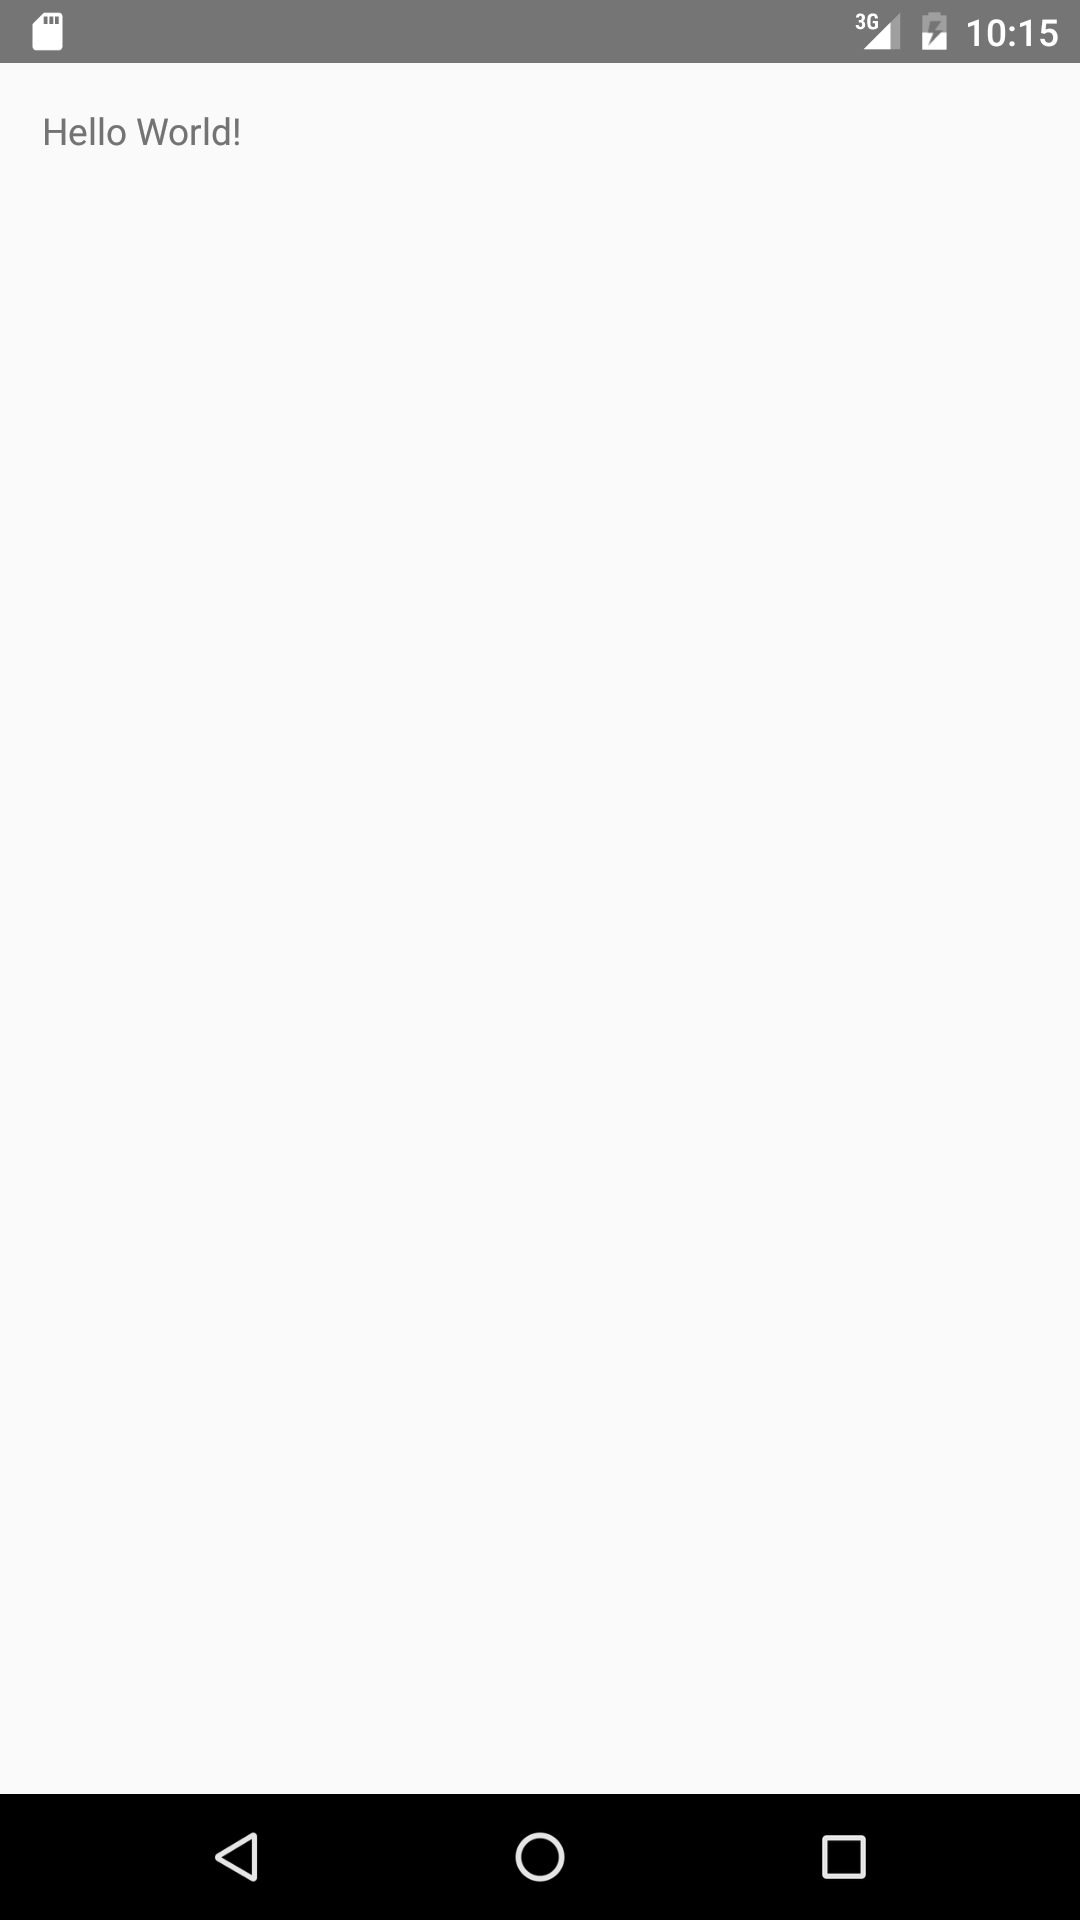
By default, an app prints the words “Hello world!”
in black letters on a white background.
We will not attempt to change this default here in our very first app.
Install
Android Studio
and the other things needed for this course,
if you have not already done so.
Launch Android Studio.
When you see the Welcome to Android Studio window,
click on
Start a new Android Studio project.
It would be simplest to give the project a one-word name
starting with an uppercase letter
(e.g., Hello).
The package name is a backwards domain name, followed by the name of the app.
New Project
Android Studio
Configure your new project.
Application name: Hello
Company Domain: mycompany.com
(I will use sps.nyu.edu)
Package name: com.mycompany.hello
(edu.nyu.sps.hello)
Project location: /Users/myname/AndroidStudioProjects/Hello
Press the Next button.
Since this is our very first app,
keep pressing Next, Next, Next to select the defaults:
Target Android Devices
Select the form factors your app will run on
Different platforms may require separate SDKs
☑ Phone and Tablet (as opposed to Android Wear or TV)
Minimum SDK: API 15: Android 4.0.3 (IceCreamSandwich)
Help
me choose
Next
Add an
Activity
to Mobile
Empty Activity
Next
Customize the Activity
Creates a new empty activity.
Activity Name: MainActivity
(This will be the name of our subclass of class
Activity, in a file named
MainActivity.java.)
☑ Generate Layout File
(The project will contain a
layout
resouce
file.)
Layout Name: activity_main
(The name of the layout resource file will be
activity_main.xml.)
Finish
Close the “Tip of the Day” window that appears after a few seconds.
You should eventually see a full-screen Android Studio window.
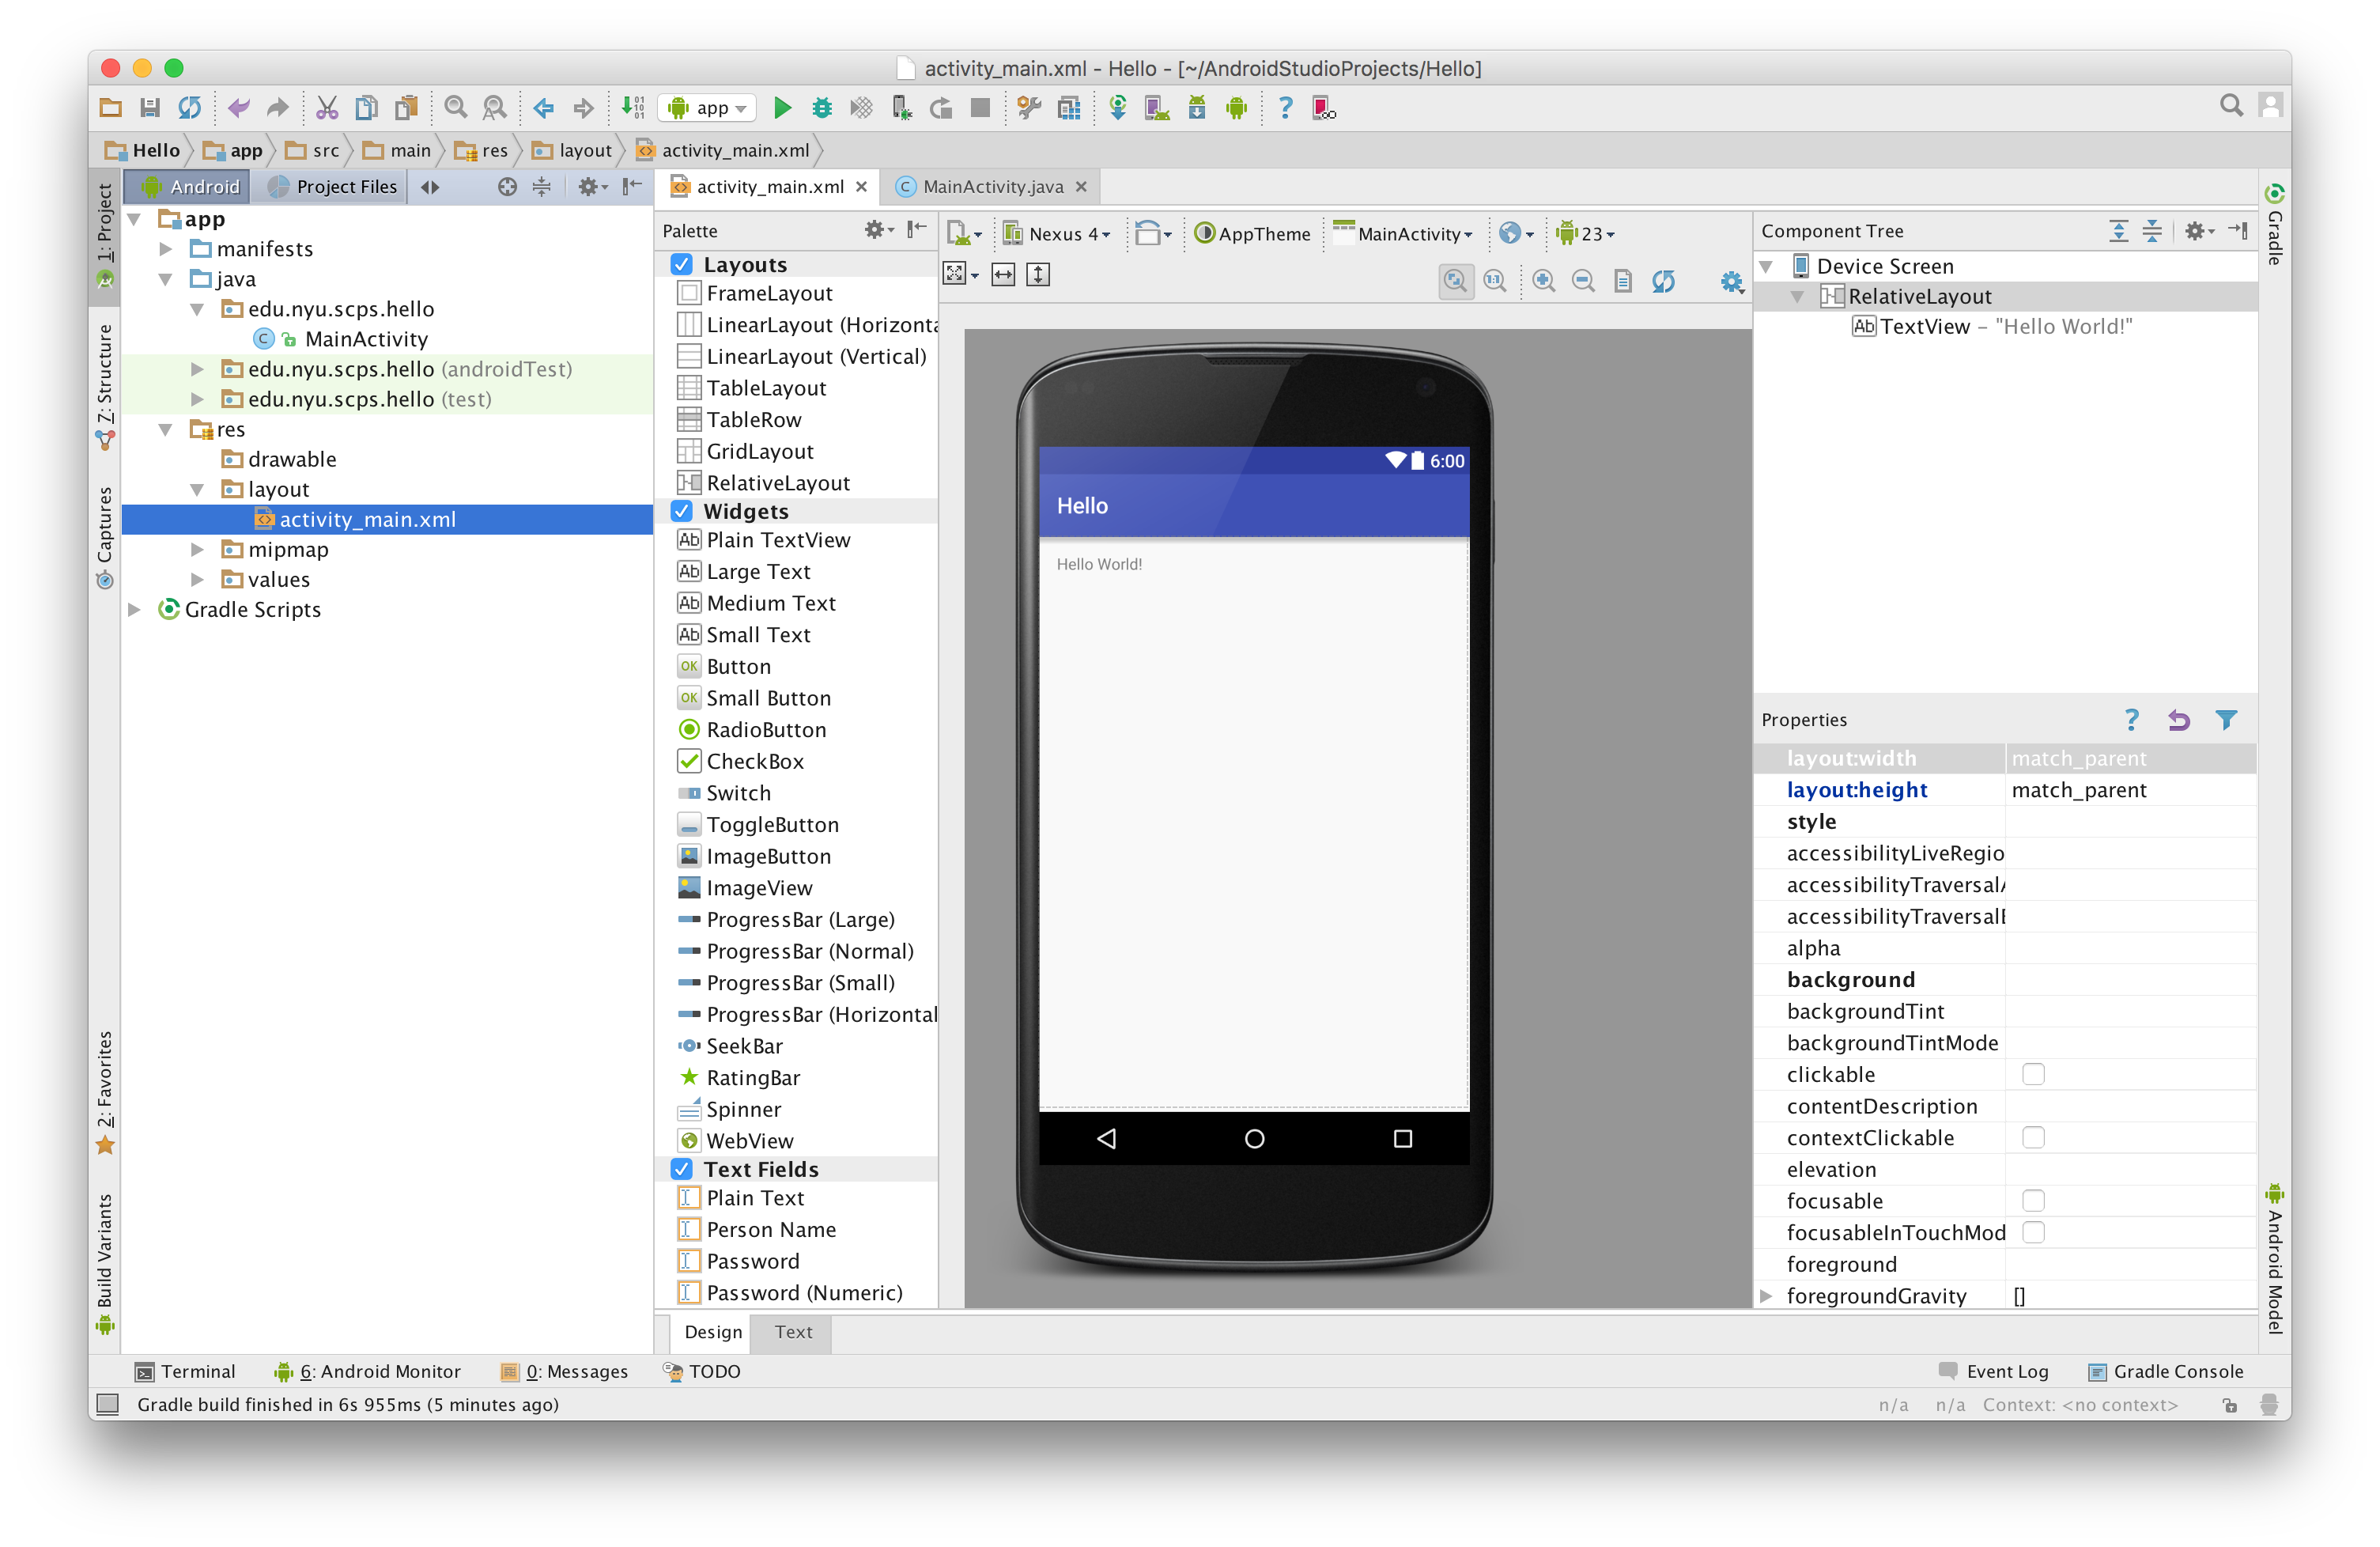
The left panel of Android Studio is called the
project view.
It lists the folders and files of the project.
If you don’t think you’re seeing the project view,
pull down
View → Tool Windows → Project
And at the top of the project view, select the Android tab,
not the Project Files tab.
Select the
activity_main.xml
file in the
res
folder in the project view.
At the bottom of the center panel are two tabs, Design and Text.
Try both of them.
At this point,
note that your directory
/Users/myname/AndroidStudioProjects
contains a new subdirectory named
Hello.
cd ~/AndroidStudioProjects
pwd
/Users/myname/AndroidStudioProjects

ls -l
drwxr-xr-x  15 myname  mygroup  510 Jul 25 08:05 Hello
Create an
AVD
(Android Virtual Device)
To run your app in the
Android Emulator,
you must first create an
AVD
that imitates a particular model of phone.
Tools → Android → AVD Manager
Press + Create Virtual Device
Select Hardware
Choose a device definition.
Category: Phone
Name: Nexus 5X (5.2", 1080 × 1920 pixels, 420 dots per inch)
Next
System Image
Select a system image:
It defaults to Api Level 23 (Marshmallow), Android 6.0, System Image x86.
Next (or press Return)
Android Virtual Device (AVD)
Verify Configuration.
Finish
When it is done installing the requested components, press Finish.
To find the AVD you just created,
find ~ -name '*.avd' 2> /dev/null
/Users/myname/.android/avd/Nexus_5X_API_23.avd

emulator -list-avds
Nexus_5X_API_23
Press the green triangular Run button near the top of Android Studio.
Select Deployment Target
Available Emulators: select the Nexus 5X API 23 you just created.
OK
A window entitled 5554:Nexus_5X_API_23 will appear.
Then click on the Home button (the circle)
in the
navigation
bar
at the bottom of the screen.
To see the steps the app went through in being loaded into the emulator,
and launched by the Android operating system there,
click on the “Run” to the right of the green triangle in the lower edge of Android Studio.
07/25 08:27:38: Launching app
$ adb push /Users/myname/AndroidStudioProjects/MyApplicationHello/app/build/outputs/apk/app-debug.apk /data/local/tmp/edu.nyu.sps.myapplicationhello
$ adb shell pm install -r "/data/local/tmp/edu.nyu.sps.myapplicationhello"
	pkg: /data/local/tmp/edu.nyu.sps.myapplicationhello
Success

$ adb shell am start -n "edu.nyu.sps.myapplicationhello/edu.nyu.sps.myapplicationhello.MainActivity" -a android.intent.action.MAIN -c android.intent.category.LAUNCHER
Client not ready yet..Waiting for process to come online
Connected to process 9721 on device Nexus_5X_API_23 [emulator-5554]
The
.apk file
The above
app-debug.apk
file is an “Android package”.
It is a zip file in the
app/build/outputs/apk
subdirectory of your project.
The
.dex
file contains the Java code.
The
.arsc
file (Android Package Resource File)
contains
strings.xml.
cd ~/AndroidStudioProjects/Hello/app/build/outputs/apk
pwd

ls -l
-rw-r--r--  1 myname  mygroup  1246463 Jul 25 10:18 app-debug-unaligned.apk
-rw-r--r--  1 myname  mygroup  1246536 Jul 25 10:18 app-debug.apk

file app-debug.apk
app-debug.apk: Zip archive data, at least v2.0 to extract

unzip -l app-debug.apk

Archive:  app-debug.apk
  Length     Date   Time    Name
 --------    ----   ----    ----
     2012  07-25-16 10:18   AndroidManifest.xml
etc.
      672  07-25-16 10:18   res/layout/activity_main.xml
etc.
     3122  12-31-80 19:00   res/mipmap-hdpi-v4/ic_launcher.png
     1956  12-31-80 19:00   res/mipmap-mdpi-v4/ic_launcher.png
     4366  12-31-80 19:00   res/mipmap-xhdpi-v4/ic_launcher.png
     7007  12-31-80 19:00   res/mipmap-xxhdpi-v4/ic_launcher.png
     9490  12-31-80 19:00   res/mipmap-xxxhdpi-v4/ic_launcher.png
   186396  12-31-80 19:00   resources.arsc
      736  07-25-16 10:18   classes.dex
    64684  07-25-16 10:18   classes2.dex
  2129369  07-25-16 10:18   instant-run.zip
    18528  07-25-16 10:18   META-INF/MANIFEST.MF
    18557  07-25-16 10:18   META-INF/CERT.SF
      765  07-25-16 10:18   META-INF/CERT.RSA
 --------                   -------
  2608191                   189 files
R.layout.activity_main
Each
layout
file
has an identifying number.
For example, the identifying number of
activity_main.xml
is
2,130,968,600
(= 7F040018 in hexadecimal, a.k.a. “base 16”).
The identifying number of each layout file is automatically stored in a Java
int
variable named after the file.
For example,
the id number of
activity_main.xml
is stored in the variable
activity_main.
The full name of this variable is
R.layout.activity_main.
To show you how
R.layout.activity_main
was created,
and how it got the last name
layout,
and how
layout
got
its
last name
R,
here is an excerpt from the file
R.java.
package edu.nyu.sps.hello;

public final class R {        //stands for "resource"
    public static final class layout {
        public static final int activity_main=0x7f040018;
    }
}
What happened when we ran the app
An app must define (create) one or more subclasses of class
Activity.
For example,
the
MainActivity.java
file of our app defines a class named
edu.nyu.sps.hello.MainActivity
(often abbreviated to
.MainActivity
or
MainActivity),
which is a subclass of class
AppCompatActivity,
which is a subclass of class
Activity.
Classes
Activity
and
AppCompatActivity
have already been written for us by the people who created Android.
When the app is launched,
something instantiates (creates) one object of one of these subclasses of class
Activity.
Which subclass will it be?
The answer is specified by the
android:name
attribute of the
<activity>
element of the
<application>
element of the
<manifest>
element of the
app’s
AndroidManifest.xml
file.
This answer is somewhat anticlimactic in our app,
since our app defines only one subclass of
Activity,
namely
MainActivity.
But it has to be specified because it is possible for an app to define
more than one subclass of class
Activity.
The
<activity>
element announces that an object of class
MainActivity
is capable of being the
MAIN
(first)
Activity
object in the app.
This means that an object of class
MainActivity
does not need any prior
Activity
object,
and does not need to receive data from any prior
Activity
object.
Only one class in an app can be the
MAIN
class.
The element also announces that this activity should
be listed in the phone’s
launcher
page of icons.
After the
Activity
object is created,
something calls the
onCreate
method of this object.
Since this is the first method of the app to be executed,
it should draw the initial content on the screen.
If the object had another method named
onDestroy,
that would be the last method to be executed
and should perform any necessary cleanup.
These methods are written in the file
MainActivity.java.
See the
flowchart
of the activity life cycle.
Our
onCreate
creates the
View
object(s) described in the layout file
activity_main.xml.
This file is identified by the integer id number
R.layout.activity_main.
Things to try
- Edit one of the files of the app
and then launch it again.
For example, go to
res/layout/activity_main.xml,
press the Text tab at the bottom of the panel,
and change the
TextView’s
attribute
android:text="Hello World!"
to
android:text="Goodbye World!"
Then
press the green triangular run button again
to stop the old app and and launch the new one.
-
The value of the
android:text
attribute of the
TextView
should really be a
string
resource.
Go to
res/values/strings.xml
and create a string resource named
greeting.
The file should look like this:
<resources>
    <string name="app_name">Hello</string>
    <string name="greeting">Hello world!</string>
</resources>
Then go to
res/layout/activity_main.xml,
and change the value of the
android:text
attribute to the following.
The
@string/
with the commercial
@
is not a filename or a directory name.
It is a
type
of resource,
namely a
string
resource,
that is located in one of the files in the
res/values
directory, namely
res/values/strings.xml.
android:text="@string/greeting"
Similarly, the
@dimen/
in the value of the
android:paddingLeft
attribute of the
RelativeLayout
indicates a
dimension
resource,
namely the
activity_horizontal_margin
in the file
res/values/dimens/dimens.xml
or the file
res/values-w820dp/dimens/dimens.xml.
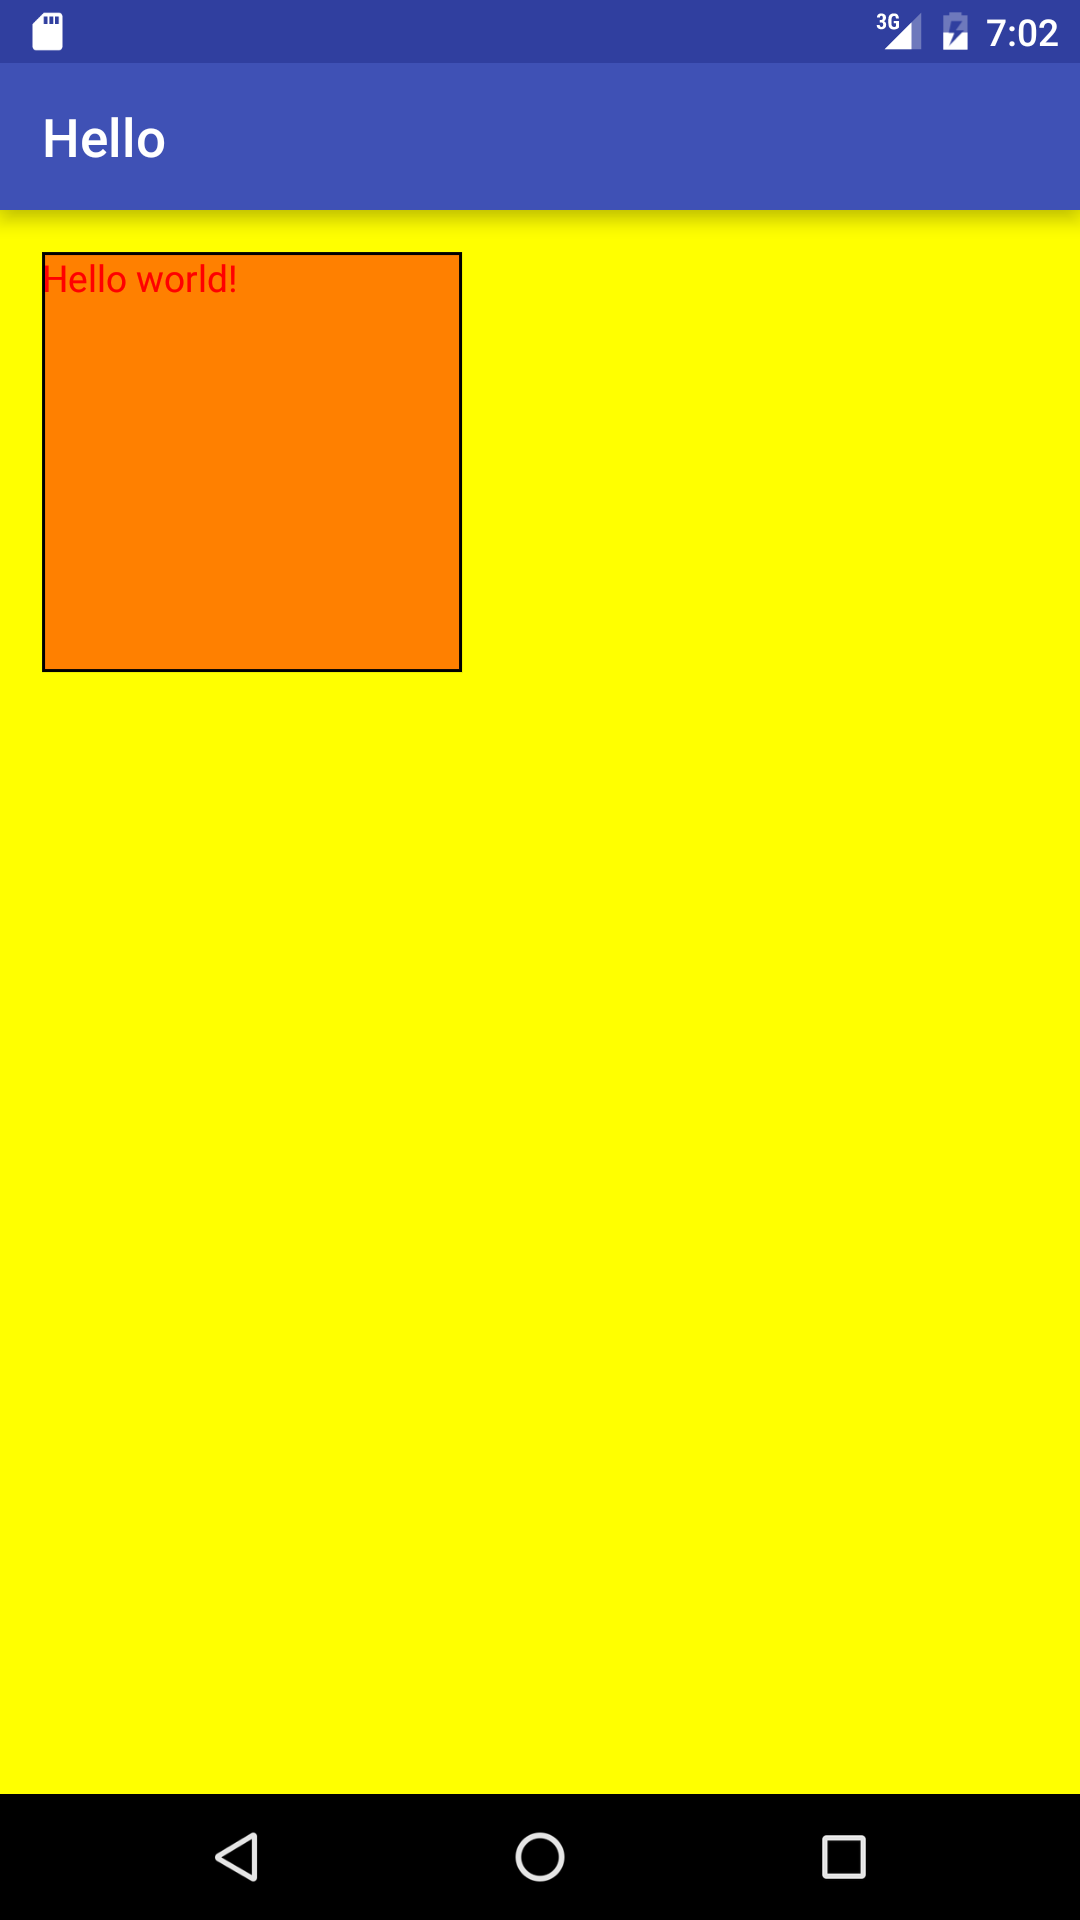
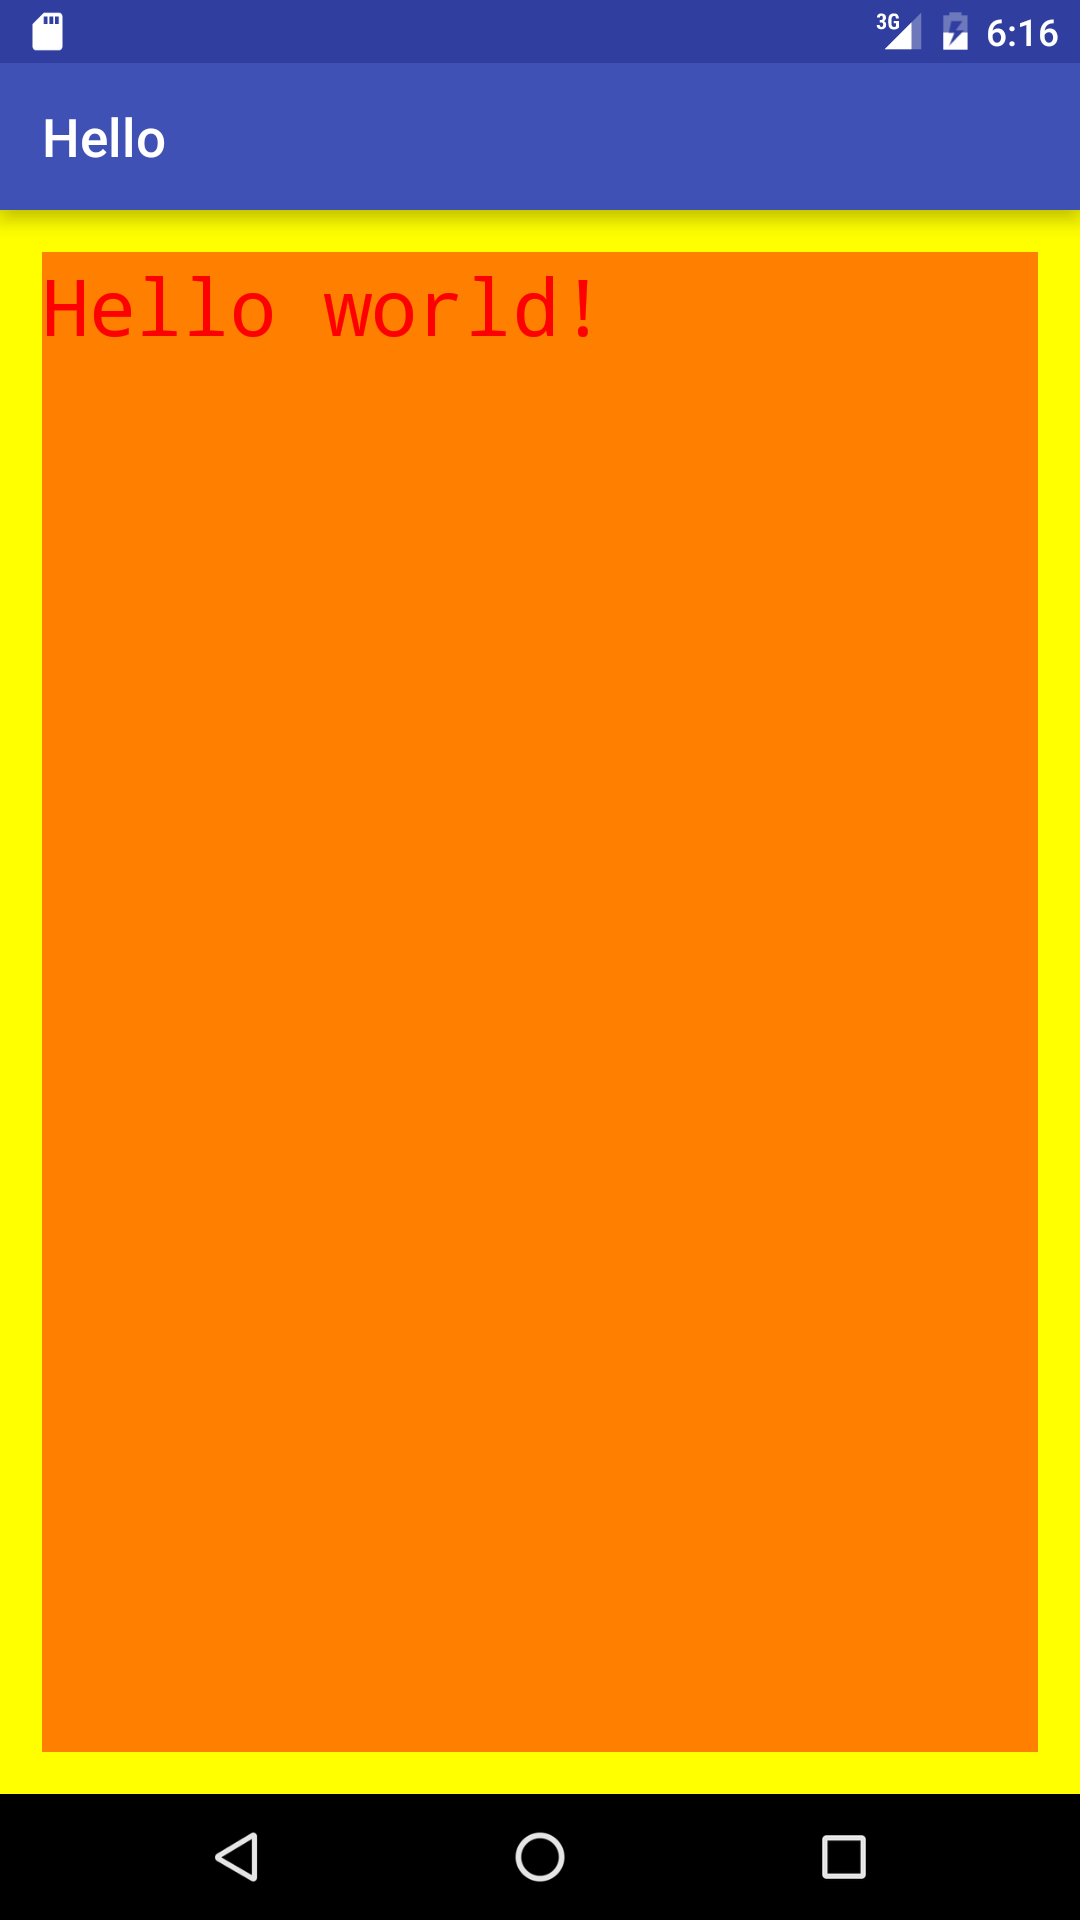
-
Change
activity_main.xml
to the following.
Specify the
background
colors so we can see how big the
TextView
and
RelativeLayout
are.
Each
color
is composed of four numbers: alpha (the opacity), red, green, blue.
Each number is written as a pair of hexadecimal digits,
where
00
is the minimum value,
FF
is the maximum value,
and
80
is the halfway value.
#FFFF0000
is opaque red,
#FFFF8000
is opaque orange,
and
#FFFFFF00
is opaque yellow.
Specify the
textSize
in
scale-independent
pixels:
they get bigger or smaller depending on the user’s
font size preferences in the Settings app.
(These preferences affect the
scaledDensity
field of class
DisplayMetrics,
and are detected by the
fontScale
value of the
android:configChanges
attribute of the
<activity>
element in
AndroidManifest.xml.)
Specify all other measurements in
dp’s.
See
Density
independence.
<?xml version="1.0" encoding="utf-8"?>
<RelativeLayout
    xmlns:android="http://schemas.android.com/apk/res/android"
    xmlns:tools="http://schemas.android.com/tools"
    android:layout_width="match_parent"
    android:layout_height="match_parent"
    android:paddingLeft="@dimen/activity_horizontal_margin"
    android:paddingRight="@dimen/activity_horizontal_margin"
    android:paddingTop="@dimen/activity_vertical_margin"
    android:paddingBottom="@dimen/activity_vertical_margin"
    android:background="#FFFFFF00"
    tools:context=".MainActivity">

    <TextView
        android:layout_width="wrap_content"
        android:layout_height="wrap_content"
        android:background="#FFFF8000"
        android:textColor="#FFFF0000"
        android:typeface="monospace"
        android:textSize="30sp"
        android:text="@string/greeting"/>

</RelativeLayout>

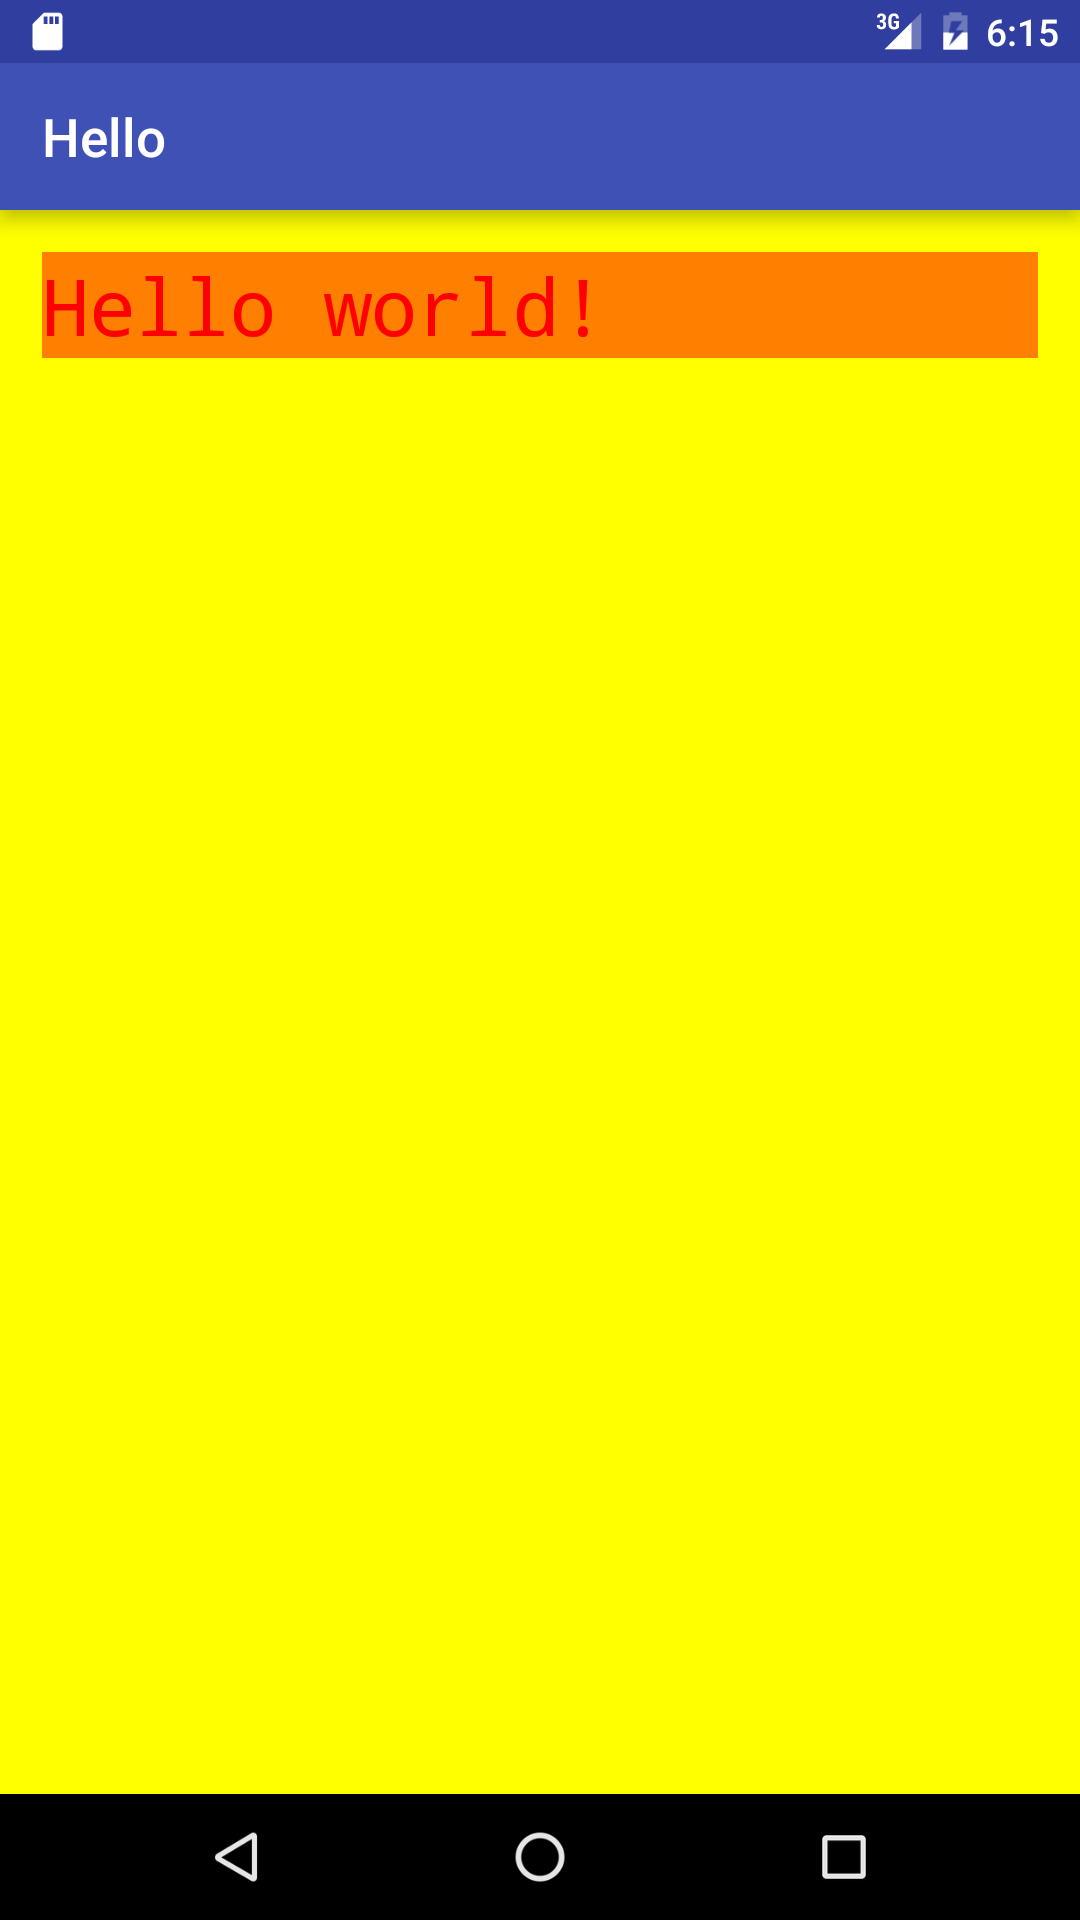
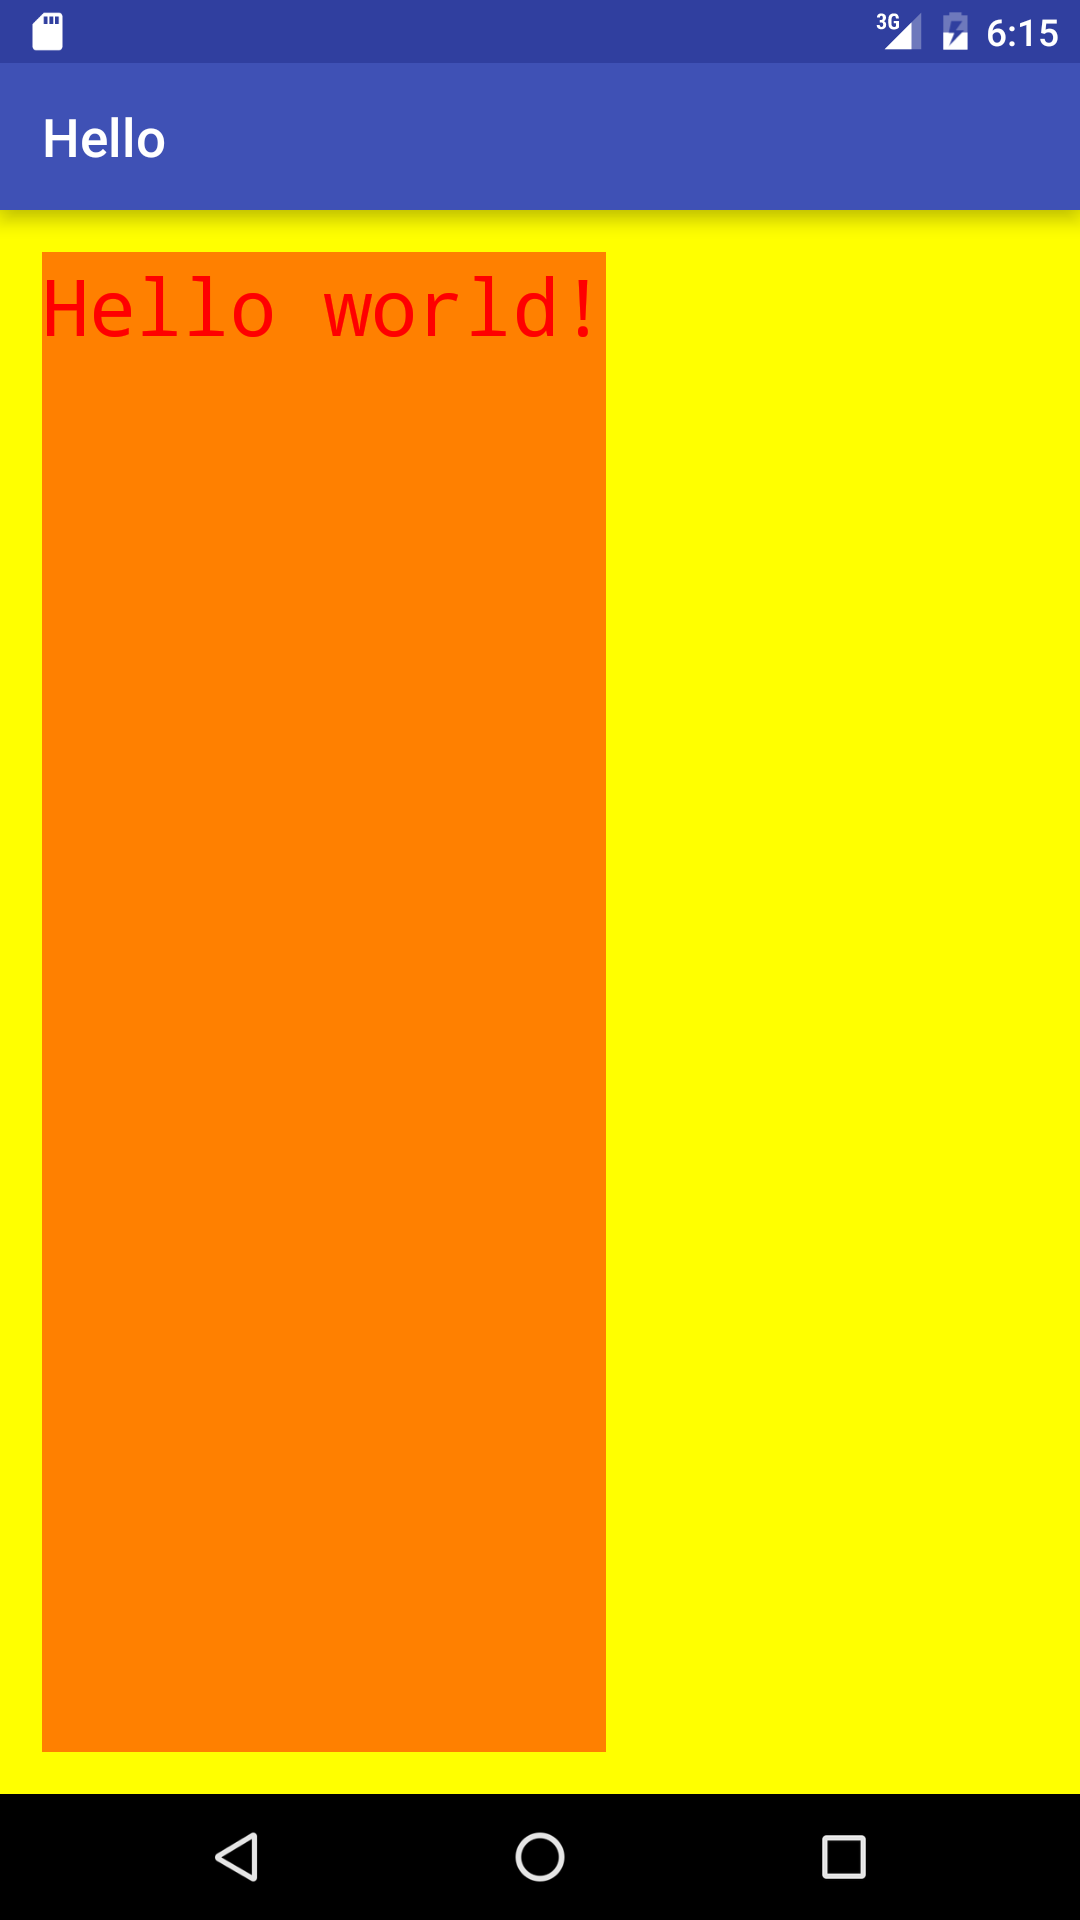
-
The parent of the
TextView
is the
RelativeLayout.
Change the
width
and/or
height
of the
TextView
to
match_parent.
The parent of the
RelativeLayout
is the entire screen.
The
RelativeLayout
occupies the whole screen because its
width
and
height
are
match_parent.
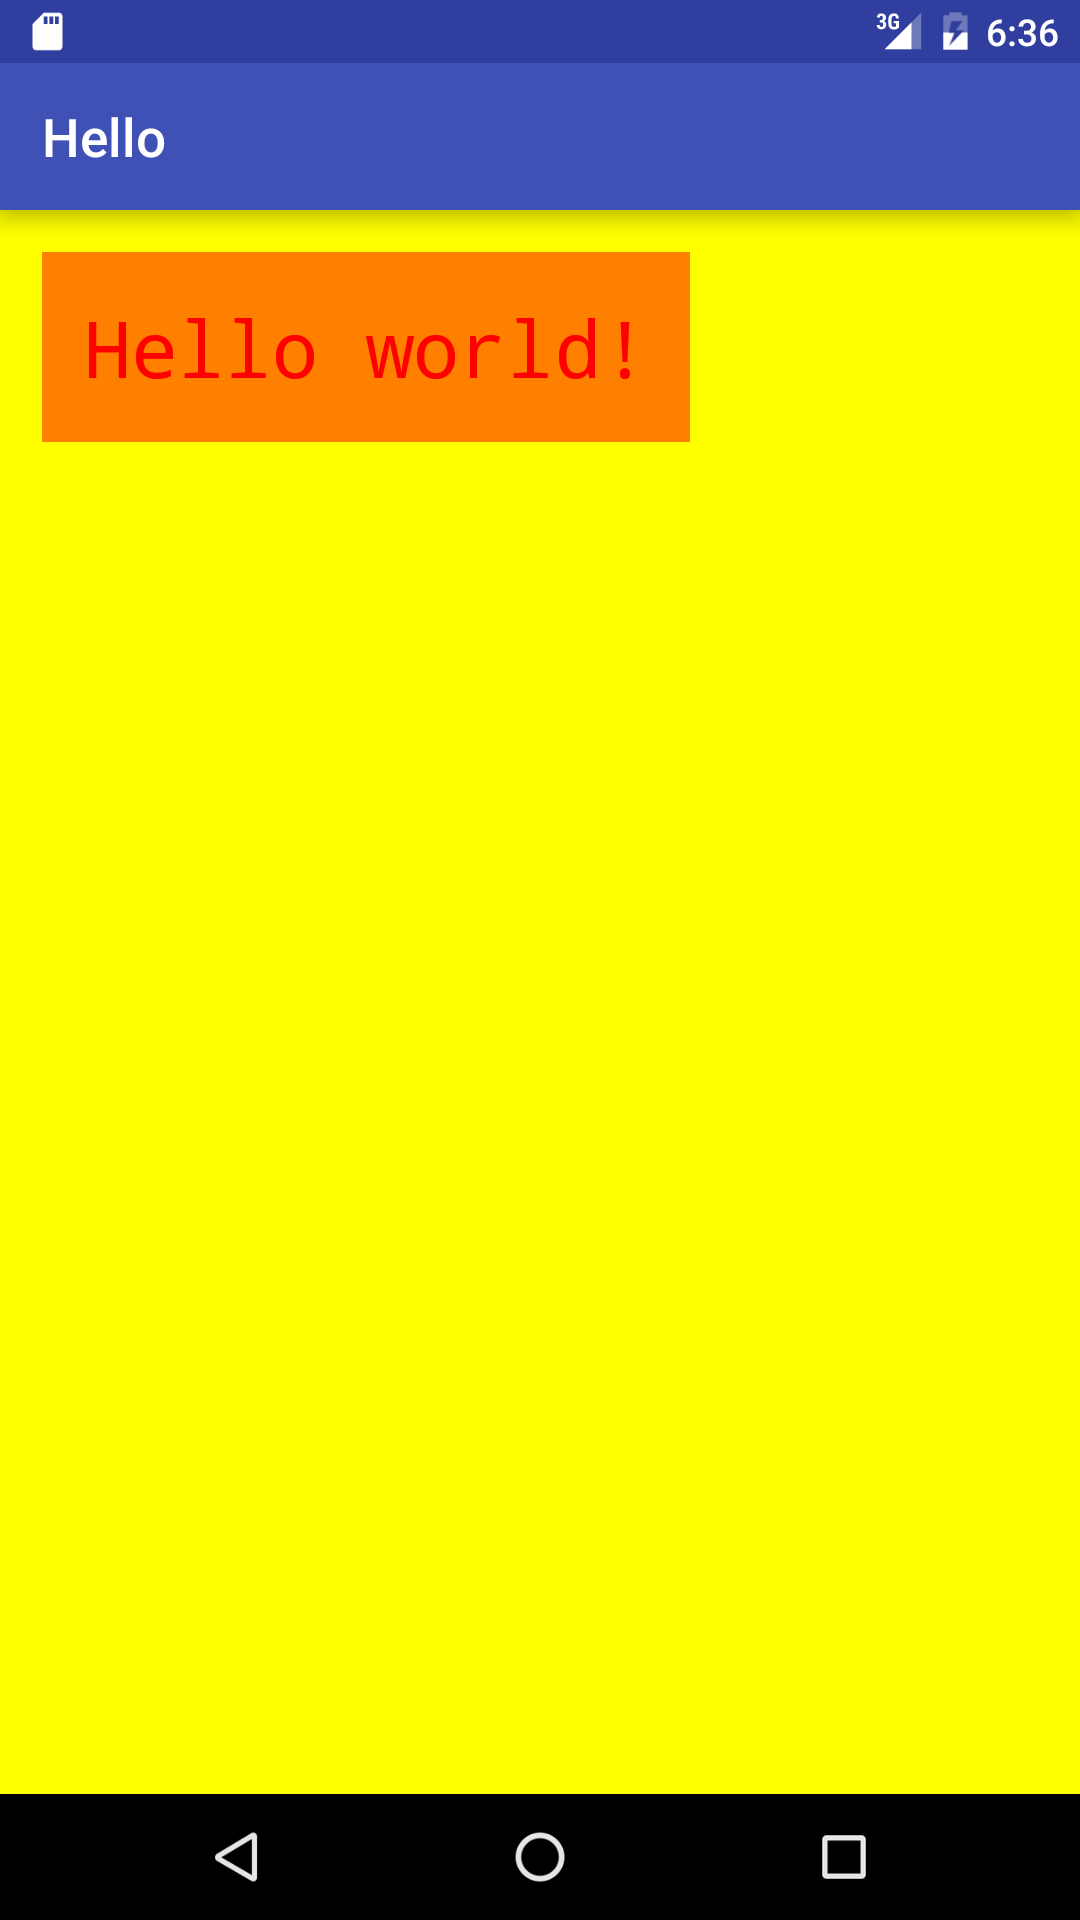
-
When the dimensions of any
View
are
wrap_content,
we can prevent it from shrink wrapping itself too tighly around its content
by giving it
padding.
This will prevent the words “Hello, World!” from touching the
edges of the
TextView
in the second example below.
If all four paddings are the same amount,
as in that example,
we can specify them with a single
android:padding
attribute.
Note that the yellow
RelativeLayout
has had padding all along.
That’s what prevented the
TextView
from touching the edges of the
RelativeLayout.
-
There’s another way we could prevent the
TextView
from touching the edges of the yellow
RelativeLayout.
Instead of having the edges of the
RelativeLayout
repel the
TextView,
we can make the edges of the
TextView
repel the
RelativeLayout
by giving the
TextView
margins.
When to use margin vs. padding?
If the
RelativeLayout
contains many children that should all be separated from the
RelativeLayout
by the same distance,
give the
RelativeLayout
padding.
If the
RelativeLayout
contains only one child,
or if the
RelativeLayout
contains several children that should each be separated from the
RelativeLayout
by a different distance,
give each child a different amount of margin.
<?xml version="1.0" encoding="utf-8"?>
<RelativeLayout
    xmlns:android="http://schemas.android.com/apk/res/android"
    xmlns:tools="http://schemas.android.com/tools"
    android:layout_width="match_parent"
    android:layout_height="match_parent"
    android:background="#FFFFFF00"
    tools:context=".MainActivity">

    <TextView
        android:layout_width="wrap_content"
        android:layout_height="wrap_content"
        android:layout_marginLeft="16dp"
        android:layout_marginRight="16dp"
        android:layout_marginTop="16dp"
        android:layout_marginBottom="16dp"
        android:background="#FFFF8000"
        android:textColor="#FFFF0000"
        android:typeface="monospace"
        android:textSize="30sp"
        android:text="@string/greeting"/>

</RelativeLayout>
-
If the dimensions of a
TextView
are not
match_content,
i.e.,
if the
TextView
is not shrink wrapped,
we can give it
gravity.
160 dp’s ≅ 1 inch.
start
and
end
mean the same thing as
left
and
right
if your phone is set to English.
They mean the same thing as
right
and
left
if your phone is set to Arabic or Hebrew.
Other values for
gravity
include
android:gravity="top|left"                 (the default)
android:gravity="left|center_vertical"     (middle of left edge)
android:gravity="top|center_horizontal"    (middle of top edge)
android:gravity="center"
-
Give the
TextView
a thin, black border.
First, create an XML file containing a
shape drawable resource.
In the Android Studio
project view,
select the folder
app/res/drawable.
File → New → Drawable resource file
New Resource File
File name: border
OK
Edit your new file
app/res/drawable/border.xml
to consist of the following.
<?xml version="1.0" encoding="utf-8"?>
<shape
    xmlns:android="http://schemas.android.com/apk/res/android"
    android:shape="rectangle">

    <solid android:color="#FFFF8000"/>

    <stroke
        android:width="1dp"
        android:color="#FF000000"/>
</shape>
Then change the
background
attribute of the
TextView
to
android:background="@drawable/border"
|
-
The
TextView’s
default font, font size, background color, font color, etc.,
come from a set of defaults called a
theme.
(A
style
is similar to a theme,
but I’m not going to talk about the difference between a theme and a
style right now.)
Because of the attribute
android:theme="@style/AppTheme"
in
AndroidManifest.xml,
our app uses the
style
resource
named
AppTheme
created in
res/values/styles.xml.
This theme inherits all but three of its properties from its parent theme,
Theme.AppCompat.Light.DarkActionBar,
which has already been created for us.
(I linked to its
source code
because its
documentation
is scanty.)
Let’s have our
AppTheme
inherit all of its properties from its parent.
Change
styles.xml
to the following,
and go back to the original content of the
activity_main.xml
file.
(Instead of commenting out the three colors,
you can invent your own values.
See the pretty
color
palette.)
<resources>

    <!-- Base application theme. -->
    <style name="AppTheme" parent="Theme.AppCompat.Light.DarkActionBar">
        <!-- Customize your theme here. -->
        <!--
        <item name="colorPrimary">@color/colorPrimary</item>
        <item name="colorPrimaryDark">@color/colorPrimaryDark</item>
        <item name="colorAccent">@color/colorAccent</item>
        -->
    </style>

</resources>
Theme.AppCompat.Light.DarkActionBar
is a child of
Base.Theme.AppCompat.Light.DarkActionBar,
which is a child of
Base.Theme.AppCompat.Light,
which is a child of
Base.V7.Theme.AppCompat.Light,
which is a child of
Platform.AppCompat.Light,
which is a child of
android:Theme.Light,
which inherits from
Theme.
I hunted down the three colors that are overridden in our project’s
original
res/values/styles.xml
file:
-
Theme.AppCompat.Light.DarkActionBar
inherits
colorPrimary
from
Base.Theme.AppCompat.Light.DarkActionBar,
where it is
defined
to be the
color
resource
primary_material_dark,
which is
defined
to be the color resource
material_grey_900,
which is
defined
to be the value
#ff212121,
an opaque dark gray.
This is the color used for the app bar.
-
Theme.AppCompat.Light.DarkActionBar
inherits
colorPrimaryDark
from
Base.Theme.AppCompat.Light.DarkActionBar,
where it is
defined
to be the
color
resource
primary_dark_material_dark,
which is
defined
to be the color resource
android:color/black,
which is defined in the file
~/Library/Android/sdk/platforms/android-24/data/res/values/colors.xml
on your computer’s hard disk
to be the value
#ff000000,
opaque black.
This is the color used for the status bar.
-
Theme.AppCompat.Light.DarkActionBar
inherits
colorAccent
from
Base.V7.Theme.AppCompat.Light,
where its is
defined
to be the color resource
accent_material_light,
which is
defined
to be the color resource
material_deep_teal_500,
which is
defined
to be the value
ff009688,
an opaque dark greenish-blue.
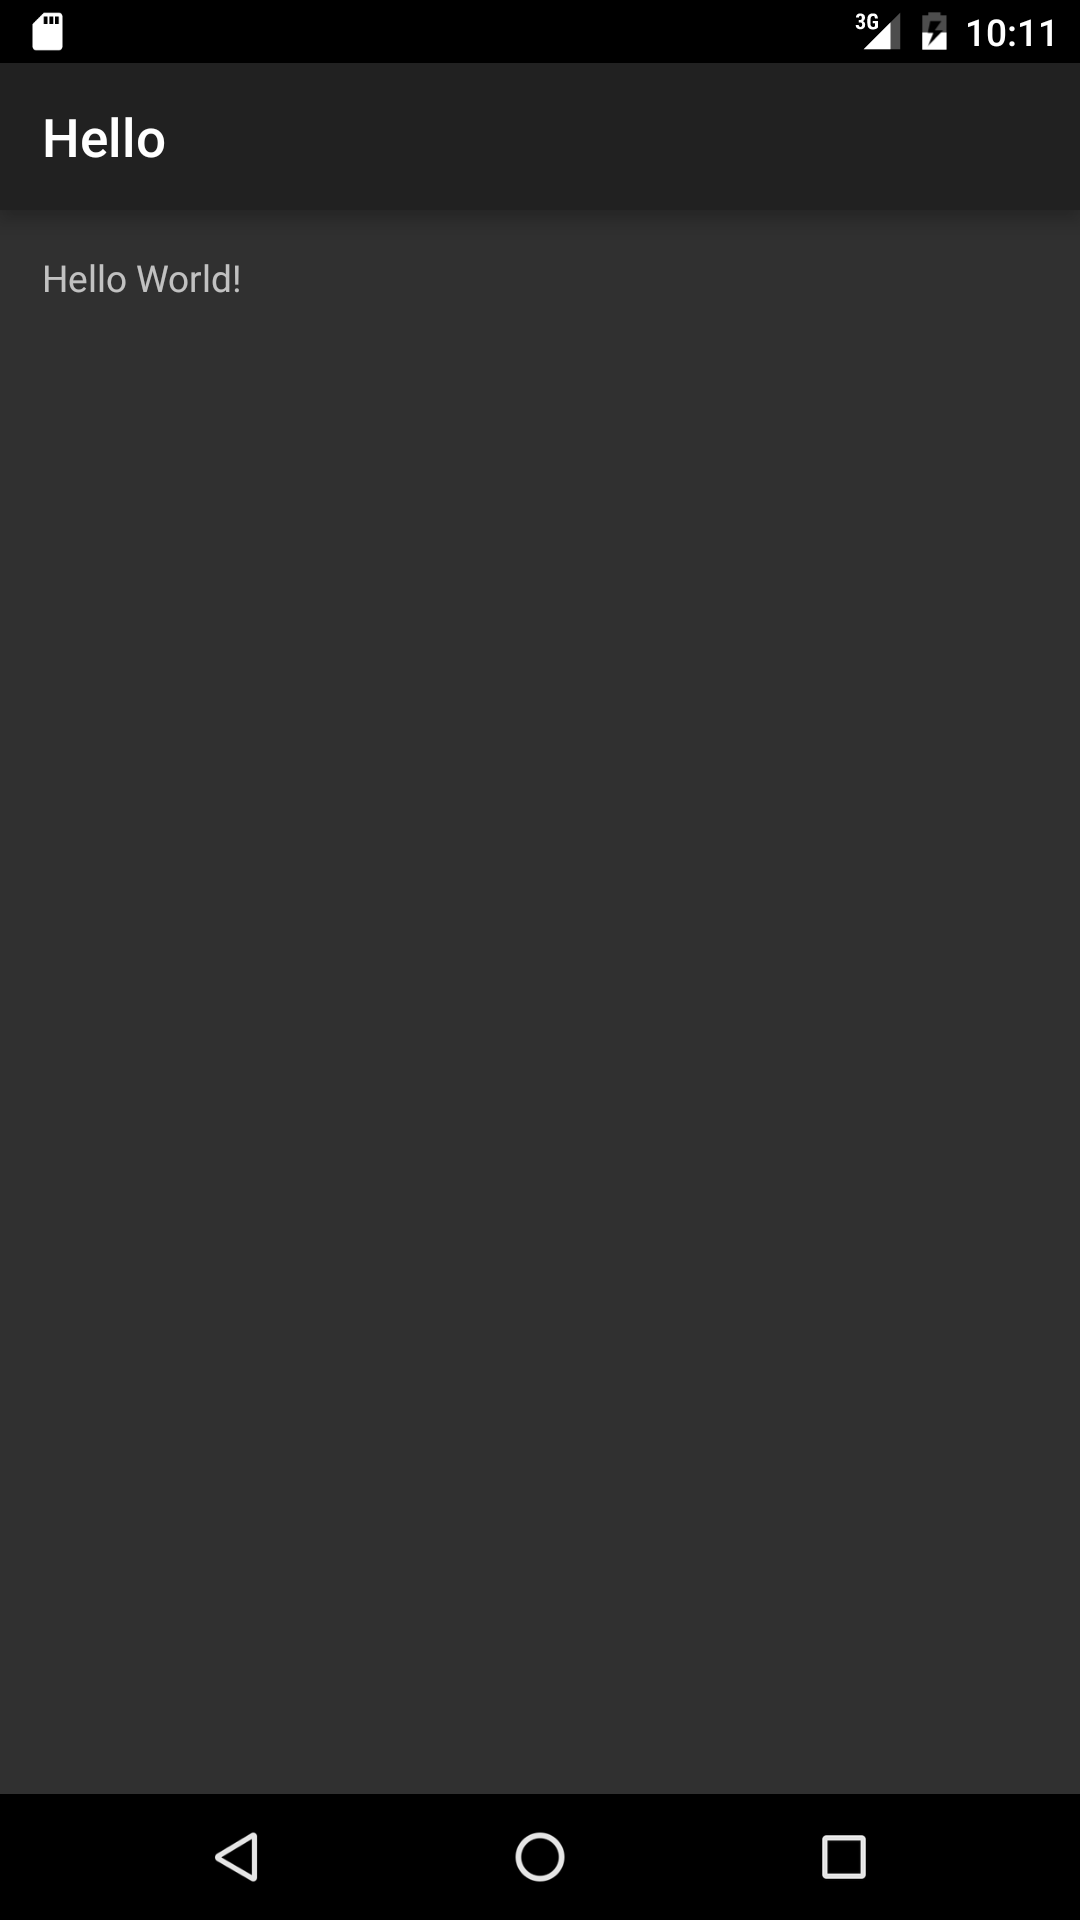
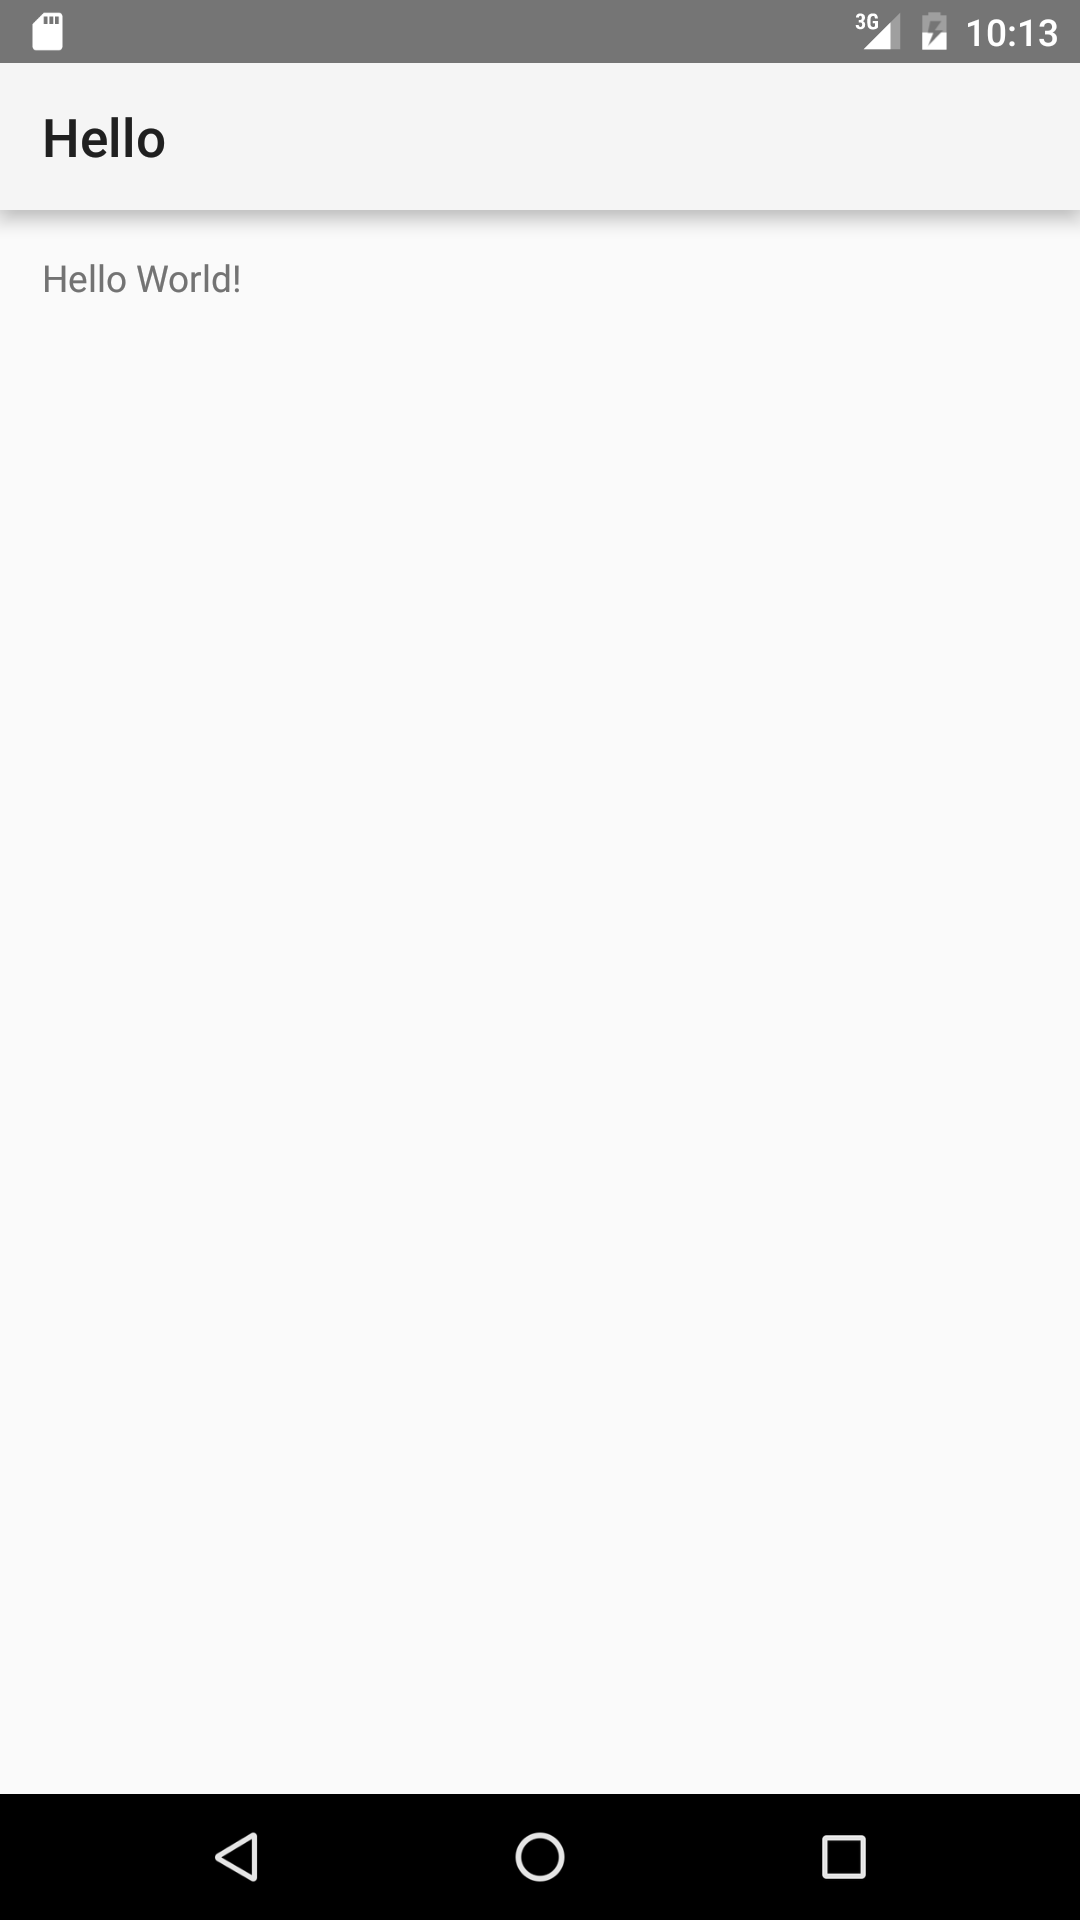
-
Let’s have the
AppTheme
in our
res/values/styles.xml
inherit from a parent other than
Theme.AppCompat.Light.DarkActionBar.
In
styles.xml,
change the tag
<style name="AppTheme" parent="Theme.AppCompat.Light.DarkActionBar">
to one of the following.
These themes belong to the
v7
appcompat library
mentioned in
build.gradle.
Keep the three items in
res/values/styles.xml
commented out.
<style name="AppTheme" parent="Theme.AppCompat">
<style name="AppTheme" parent="Theme.AppCompat.Light">
<style name="AppTheme" parent="Theme.AppCompat.NoActionBar">
<style name="AppTheme" parent="Theme.AppCompat.Light.NoActionBar">
-
Display
activity_main.html
in Android Studio and
click on the
Design tab at the bottom of the center panel.
From the Palette above the Design tab,
drag a Small
Button
into
activity_main.xml.
Drag in an
AnalogClock
(now deprecated)
or a
TextClock
too.
Then click on the Text tab and see what you’ve dragged into the file.
-
When we created the app,
we specified API 15 as the minimum SDK version required on any device that
is intended to run our app.
To allow the app to run on devices with an older version of Android,
edit the
minSdkVersion
in the
build.gradle
(Module: app) file in the
gradle
folder.
Then pull down
Tools → Android → Sync Project with Gradle Files
-
Add
JavaDoc
comments to your
.java
files.
These are comments that can be automatically copied
into files of documentation called JavaDoc files.
For example, insert the three characters
/**
and press return immediately before the
@Override
before the
onCreate
method of the
MainActivity.
When you press the return,
Android Studio will write the rest of the JavaDoc comment for you:
    /**
     *
     * @param savedInstanceState
     */
    @Override
    protected void onCreate(Bundle savedInstanceState) {
        super.onCreate(savedInstanceState);
        setContentView(R.layout.activity_main);
    }
Now type some documentation about the method and its parameters.
    /**
     * Called automatically immediately after the AppCompatActivity object
     * has been constructed.
     *
     * @param savedInstanceState Information from the previous incarnation of
     *                           the AppCompatActivity object, or null if there was
     *                           no previous incarnation.
     */
    @Override
    protected void onCreate(Bundle savedInstanceState) {
        super.onCreate(savedInstanceState);
        setContentView(R.layout.activity_main);
    }
In Android Studio,
pull down
Tools → Generate JavaDoc…
Output directory: /Users/myname/Desktop/javadoc
Other command line arguments: -bootclasspath /Users/myname/Library/Android/sdk/platforms/android-24/android.jar
OK
Ignore the error messages
in the Android Studio LogCat window
caused by the
R.java
file.
Then point your browser at the
index.html
file in your
javadoc
folder on your Desktop and click on
MainActivity.
-
When you create the project,
what do you get if you ask for a
Basic Activity
instead of an Empty Activity?
-
Go to your
~/AndroidStudioProjects
directory and explore the
Hello
subdirectory.
How does it compare with what you see in the Android Studio
project
view?
What about when you select Project Files
from the tab at the top of the
project
view?
cd ~/AndroidStudioProjects
pwd
/Users/myname/AndroidStudioProjects
ls -l
drwxr-xr-x  15 myname  mygroup  510 Jul 26 07:54 Hello
To see the names of the directories on Mac and other Unixes,
find Hello -type d -print | cat -n
To see the names of all the directories and files,
find Hello -ls | cat -n     (Unix)
dir /s                      (Windows: all subdirectories too)
-
Is the copy of the
.apk
file in the device or emulator the same size as the original?
find ~/AndroidStudioProjects/Hello -type f -name '*.apk'
/Users/myname/AndroidStudioProjects/Hello/app/build/outputs/apk/app-debug-unaligned.apk
/Users/myname/AndroidStudioProjects/Hello/app/build/outputs/apk/app-debug.apk

ls -l ~/AndroidStudioProjects/Hello/app/build/outputs/apk/app-debug.apk
-rw-r--r--  1 myname  mygroup  1246537 Jul 26 23:29 /Users/myname/AndroidStudioProjects/Hello/app/build/outputs/apk/app-debug.apk

adb devices
List of devices attached
ca1784a34445a8d0308	device     (Azpen A727)
0088080744830RTG	device     (Amazon Fire HD 6)
192.168.57.101:5555	device     (Genymotion Samsung Galaxy S5 emulator)
emulator-5554	device             (Android Nexus 5 emulator)

adb devices -l
ca1784a34445a8d0308    device usb:340787200X product:polaris_inet model:A727 device:polaris-inet
0088080744830RTG       device usb:337641472X product:full_ariel model:KFARWI device:ariel
192.168.57.101:5555    device product:vbox86p model:Samsung_Galaxy_S5___4_4_4___API_19___1080x1920 device:vbox86p
emulator-5554          device product:sdk_google_phone_x86_64 model:Android_SDK_built_for_x86_64 device:generic_x86_64

adb -s emulator-5554 shell find / -name '*hello*' '2> /dev/null' | grep hello
/data/app/edu.nyu.sps.hello-1/base.apk

adb -s emulator-5554 shell ls -l /data/app/edu.nyu.sps.hello-1/base.apk
-rw-r--r-- system   system    1246537 2016-07-26 23:29 base.apk
-
You can remove the app from the emulator by dragging its icon to the top of
the screen.
As you drag it, an Uninstall garbage can will appear.
Do you want to uninstall this app?
OK
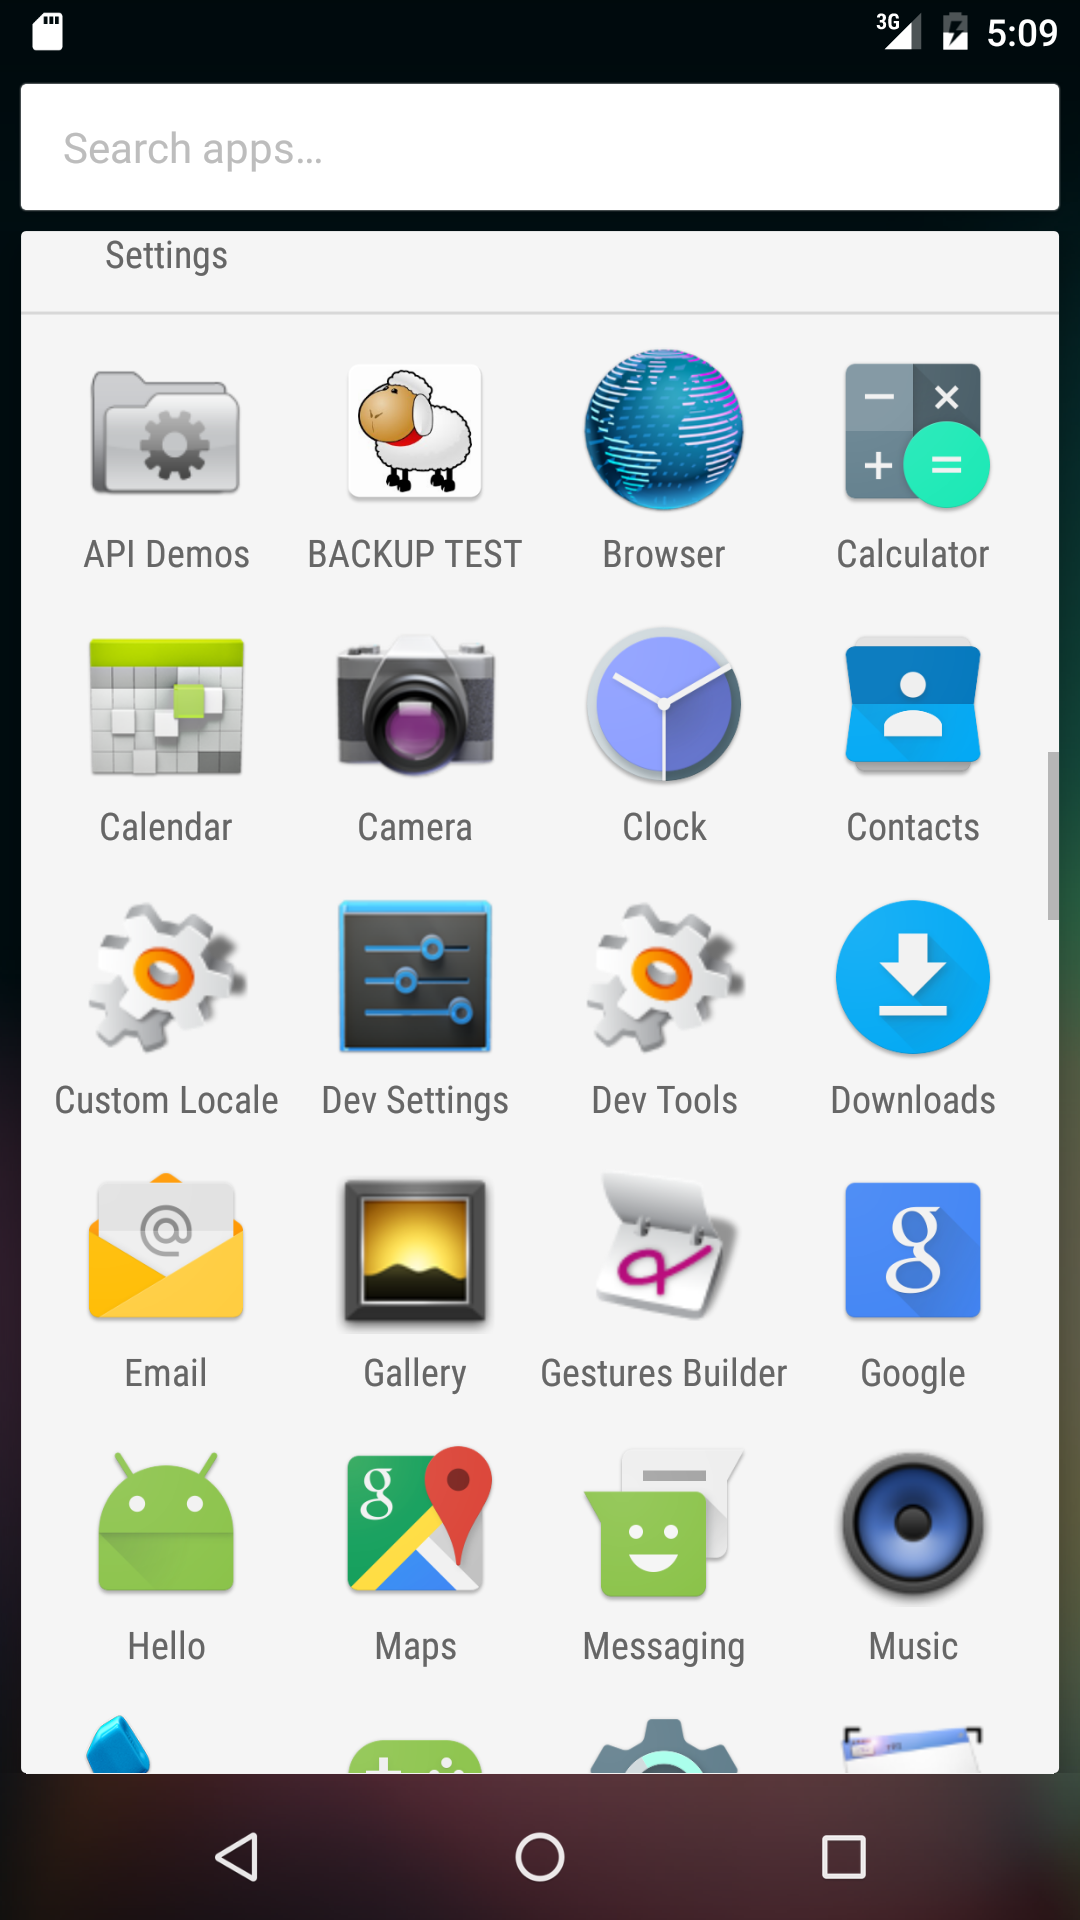
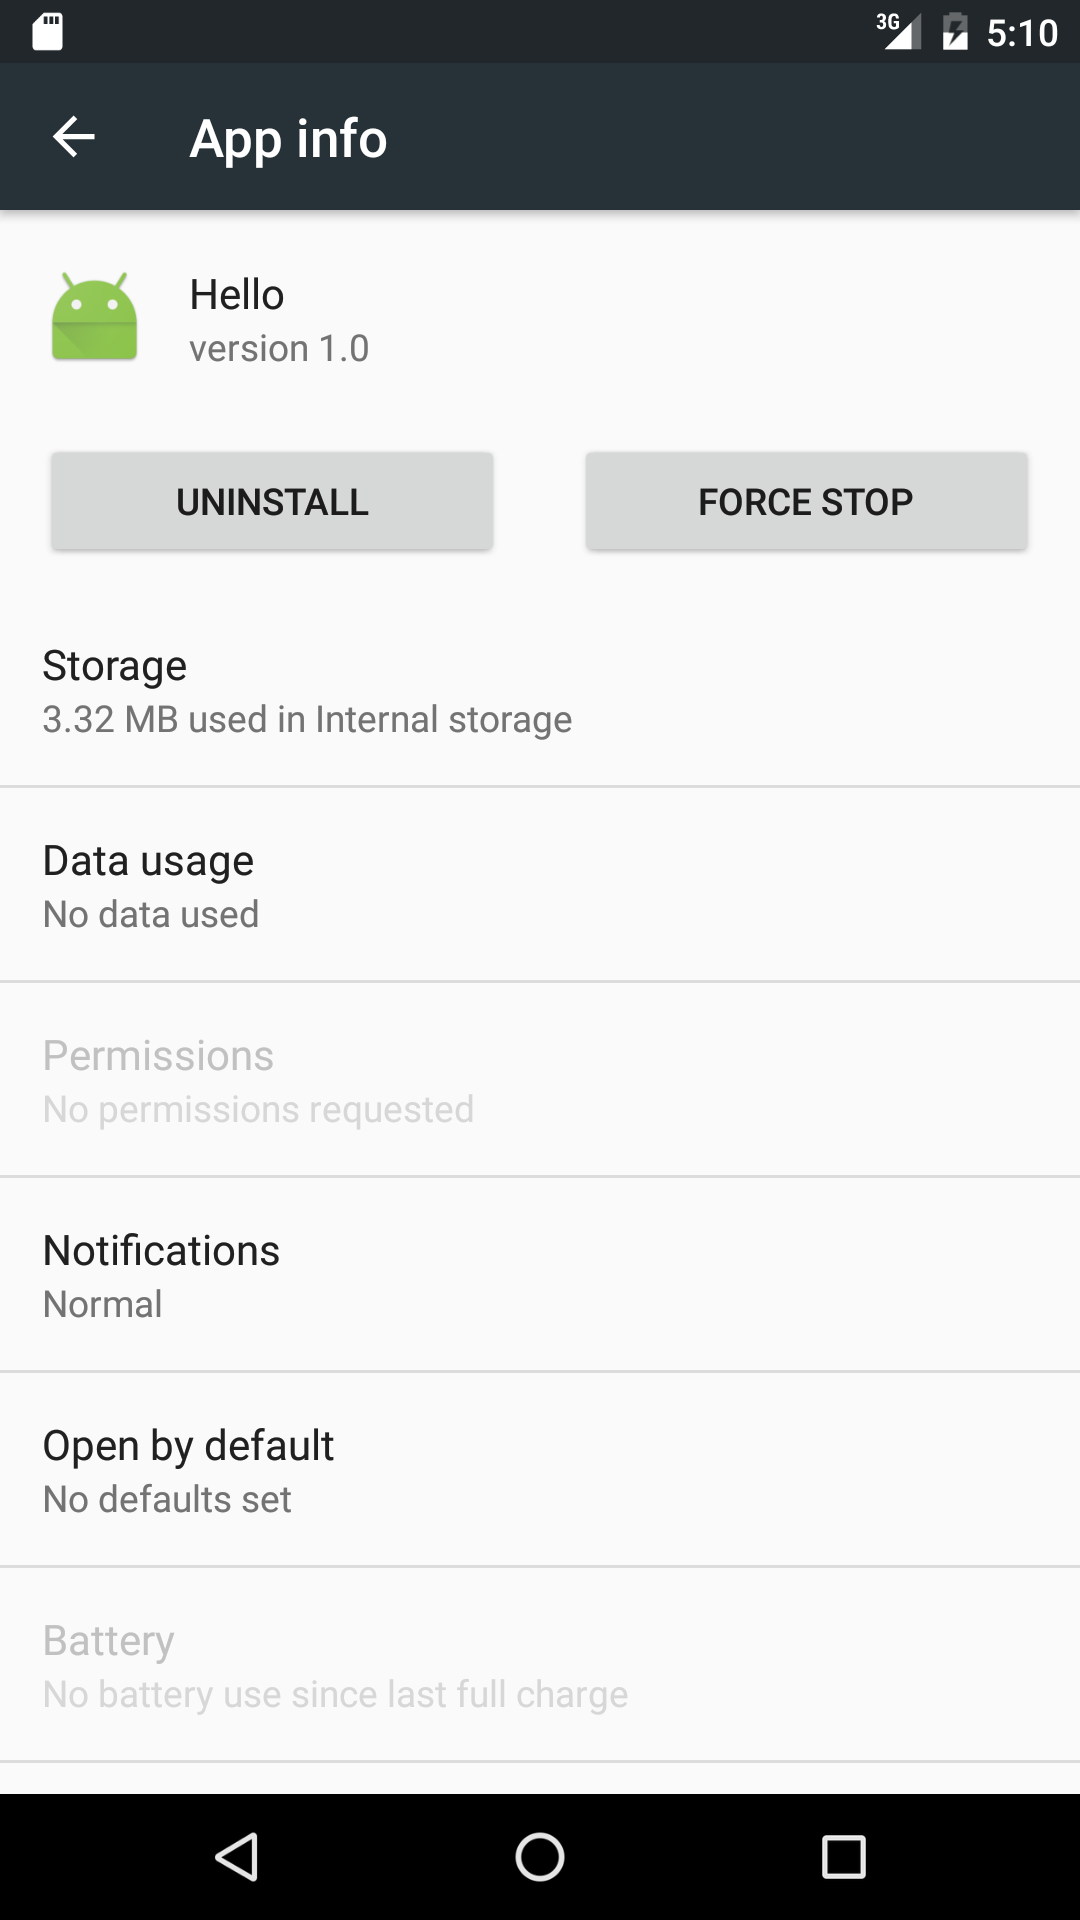
Or launch the Settings app and go to
Device →
Apps →
Hello
Press Uninstall.
Do you want to uninstall this app?
OK
Uninstalling…
Uninstall finished.
Then press the Home button again.

